4.8 Exercise B
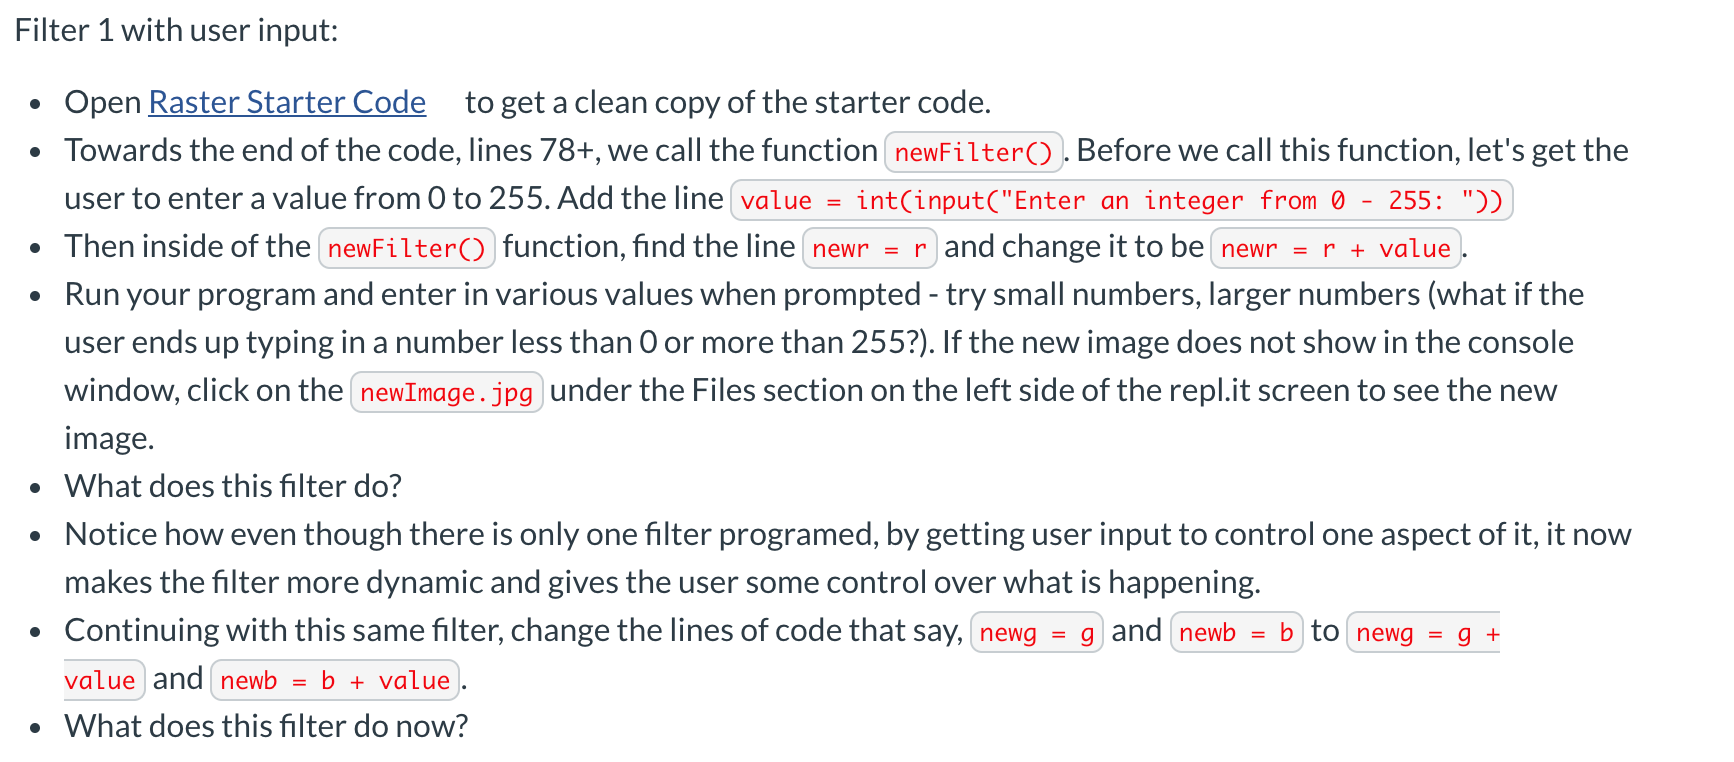
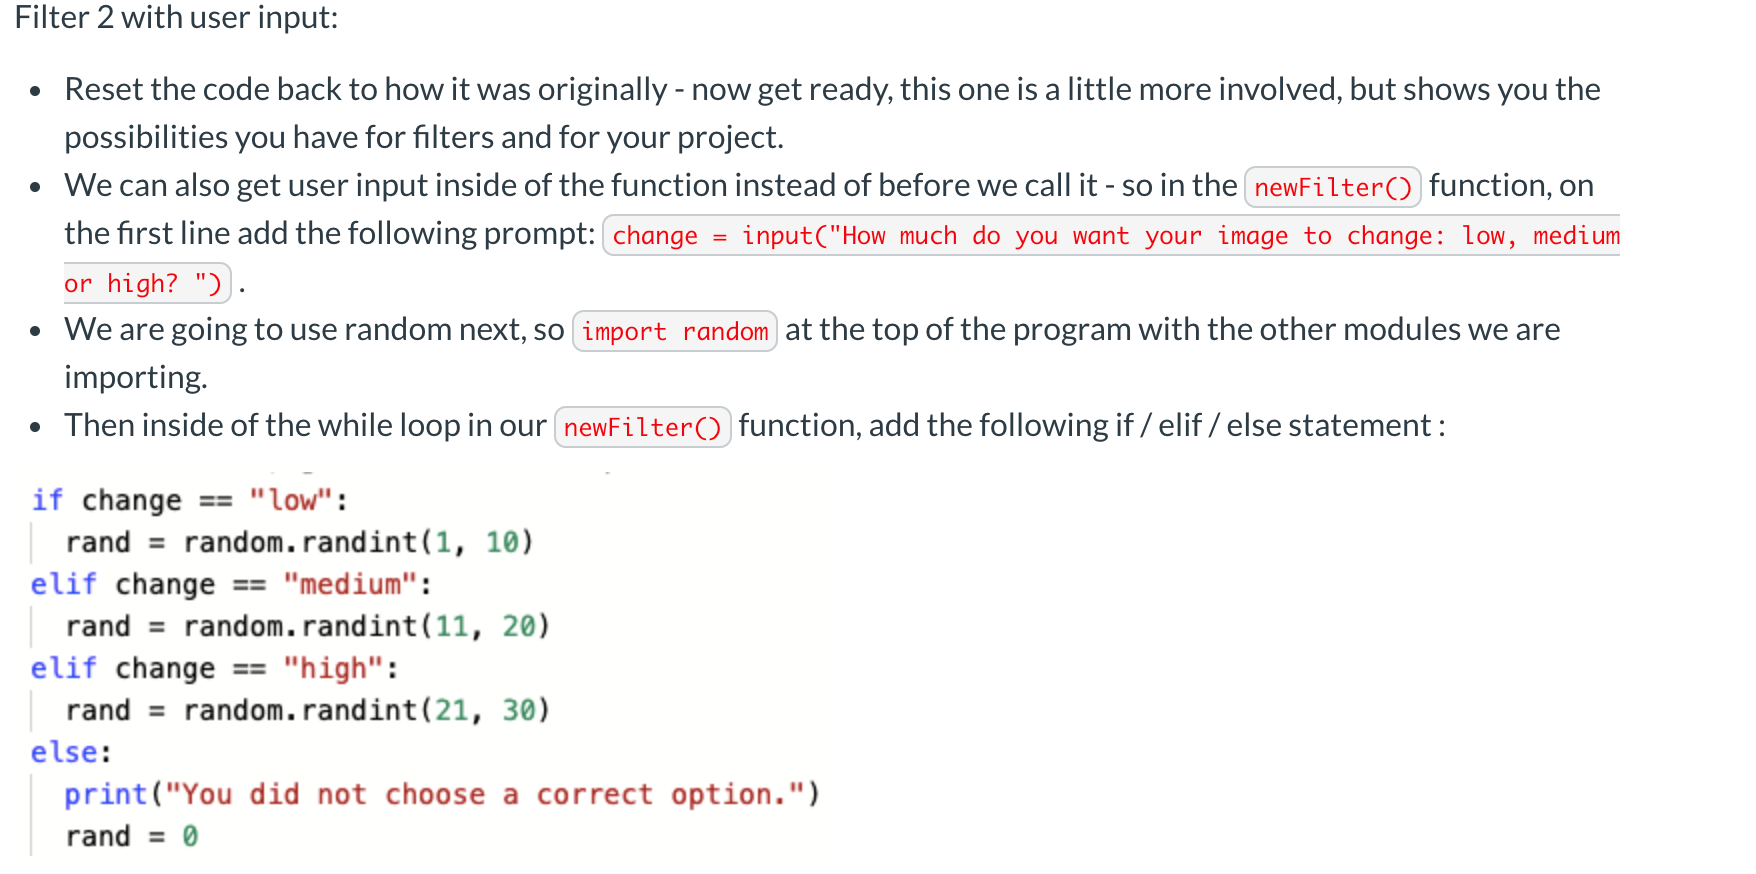
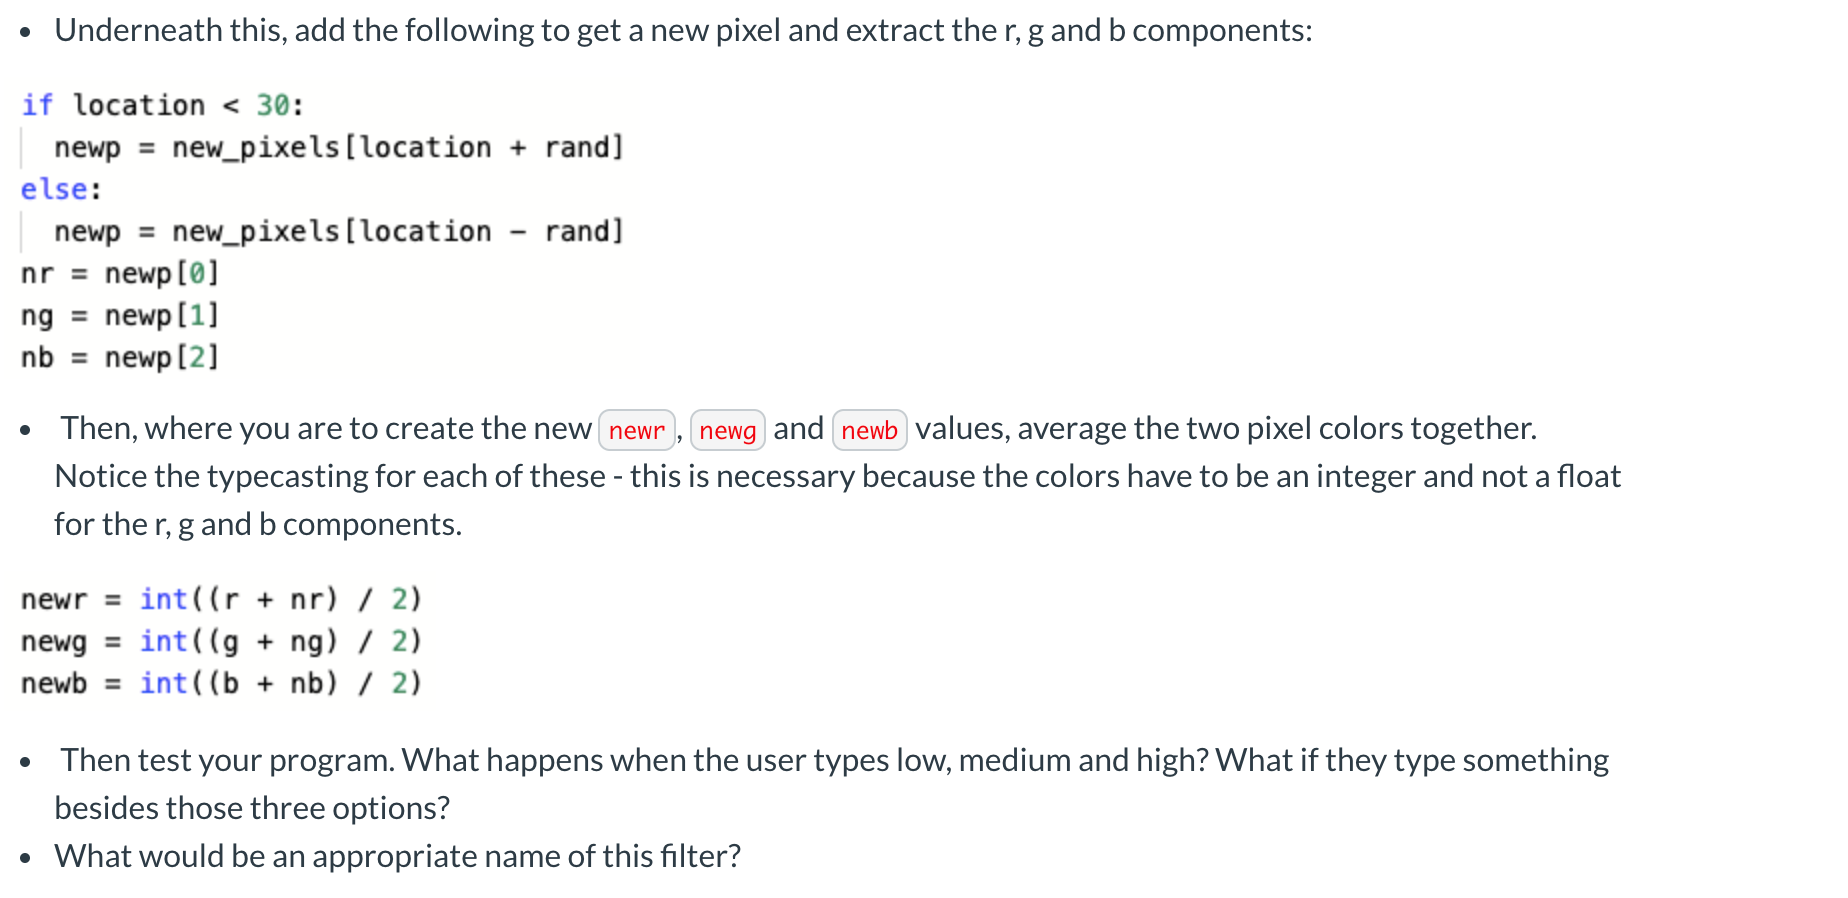
Raster Image Manipulation User Input As you have seen in the past few lessons, it is quite easy to change an image at the pixel level. However, one thing holds true about all the changes you made to the original image... you had to actually program it. This is ne for someone like yourself that has the program code and knows how to use it, but what about a user? Think about social media sites like Snapchat or Instagram the user simply has to take a photo and then with no knowledge of programming, can edit it using different lters and features. We are going to do the same thing now. Instead of programming a static lter that always does the same thing regardless of what the user wants, we are going to program a lter that takes in user input and then applies what they want to the image! For example, want to add more red to an image? How much? Based on an input from the user we can add any amount to the overall image. Let's see how this works. Filter 1 with user input: . Open Raster Starter Code to get a clean copy of the starter code. . Towards the end of the code, lines 78+, we call the function (newFilter() . Before we call this function, let's get the user to enter a value from O to 255. Add the line value = int(input("Enter an integer from 0 - 255: ")) . Then inside of the newFilter() function, find the line newr = r)and change it to be newr = r + value . Run your program and enter in various values when prompted - try small numbers, larger numbers (what if the user ends up typing in a number less than 0 or more than 255?). If the new image does not show in the console window, click on the newImage . jpg ) under the Files section on the left side of the repl.it screen to see the new image. . What does this filter do? . Notice how even though there is only one filter programed, by getting user input to control one aspect of it, it now makes the filter more dynamic and gives the user some control over what is happening. . Continuing with this same filter, change the lines of code that say, newg = g)and newb = b to newg = g + value and newb = b + value. . What does this filter do now?Filter 2 with user input: . Reset the code back to how it was originally - now get ready, this one is a little more involved, but shows you the possibilities you have for lters and for your project. . We can also get user input inside of the function instead of before we call it - so in the newFi'Lter'O function, on the rst line add the following prompt: change = inputC' How much do you want your image to change: low, medium or' high? ") . . We are going to use random next, so import random at the top of the program with the other modules we are importing. . Then inside of the while loop in our newFilter'O function, add the following if / elif / else statement: if change = "low": rand = random.randintl1, 16) elif change == "medium": rand = random.randintl11, 29) elif change == "high": rand = random.randint(21, 3e) else: print("You did not choose a correct option.") rand = 0 . Underneath this, add the following to get a new pixel and extract the r, g and b components: if location