Answered step by step
Verified Expert Solution
Question
1 Approved Answer
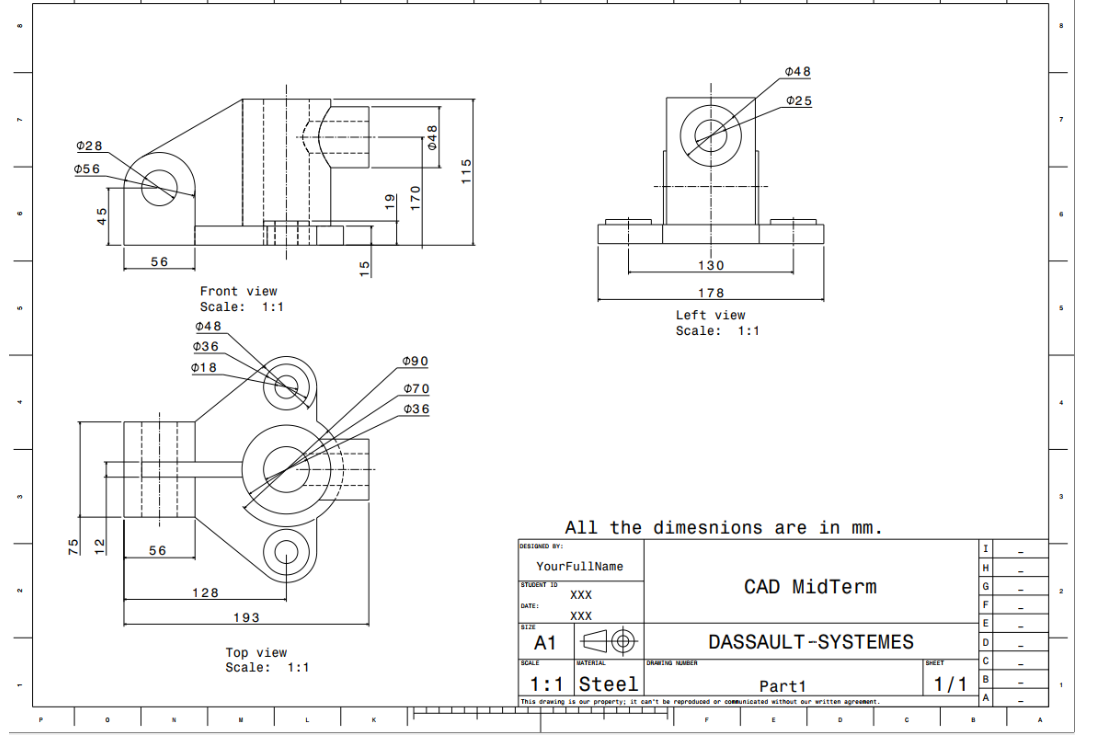
a. Attached is a 3-view (3rd angle projection) drawing of a part (see drwg 1). All dimensions are in mm. Create a 3D model


a. Attached is a 3-view (3rd angle projection) drawing of a part (see drwg 1). All dimensions are in mm. Create a 3D model of the part in Fusion360, modeled as a single component made of steel. b. Create a pin (steel) with minimum tolerance to be locked inside the hole shown on (drwg-2). You can lock the pin by coinciding the axis of the pin and the axis of the hole also making a surface contact between the bottom top of the pin and the hole. 56 028 056 5 56 Front view Scale: 048 036 018 128 193 Top view Scale: 1:1 15 19 170 090 070 036 048 115 130 178 Left view Scale: 1:1 All the dimesnions are in mm. 048 025 1:1 DESIGNED BY: YourFullName STUDENT ID XXX DATE: XXX SIZE A1 SCALE MATERIAL 1:1 Steel DRAWING NUMBER I H CAD Mid Term G F E DASSAULT-SYSTEMES D SHEET C Part1 1/1 B A This drawing is our property; it can't be reproduced or communicated without our written agreement.
Step by Step Solution
There are 3 Steps involved in it
Step: 1

Get Instant Access to Expert-Tailored Solutions
See step-by-step solutions with expert insights and AI powered tools for academic success
Step: 2

Step: 3

Ace Your Homework with AI
Get the answers you need in no time with our AI-driven, step-by-step assistance
Get Started


