Question
@@@_______________________client.py_______________________@@ import socket import struct import cv2 import pickle class client: def __init__(self, server_ip, server_port) -> None: # Initilization code def connect_to_server(self) -> None: #

@@@_______________________client.py_______________________@@
import socket import struct import cv2 import pickle
class client: def __init__(self, server_ip, server_port) -> None: # Initilization code
def connect_to_server(self) -> None: # Code to connect to server
def receive_video_data(self) -> None: data = b"" try: payload_size = struct.calcsize("Q") while True: # Code to receive messages chunk by chunk # and constitute them into full messsage msg_size = struct.unpack("Q",packed_msg_size)[0] while len(data)
from client import client
client = client('127.0.1.1', 1024) client.connect_to_server() client.receive_video_data() ==========================================================================
@@@_______________________server.py_______________________@@
import socket import pickle import cv2 import struct import threading
class tcp_streaming_server: def __init__(self, ip, port) -> None: # Write Initialization Code Here self.video_dim = (800, 600)
def bind_socket(self) -> None: # Complete this
def listen(self) -> None: # Complete this def client_handler(self, client_socket) -> None: if client_socket is None: return path_to_video_file = "video.mkv" vid = cv2.VideoCapture(path_to_video_file) try: while vid.isOpened(): _, frame = vid.read() frame = cv2.resize(frame, self.video_dim, fx=0, fy=0, interpolation=cv2.INTER_CUBIC) a = pickle.dumps(frame) message = struct.pack("Q", len(a)) + a # Write Code to send Message except: None
def serve(self) -> None: try: # Code for multithreaded service except KeyboardInterrupt: self.socket.close()
@@@_______________________server_script.py_______________________@@
from server import tcp_streaming_server
server = tcp_streaming_server('127.0.1.1', 1024) server.bind_socket() server.listen() server.serve()
==============______________________offline_env.yml___________
name: offline_cn channels: - defaults dependencies: - _libgcc_mutex=0.1=main - _openmp_mutex=5.1=1_gnu - ca-certificates=2022.10.11=h06a4308_0 - certifi=2022.9.24=py37h06a4308_0 - ld_impl_linux-64=2.38=h1181459_1 - libffi=3.4.2=h6a678d5_6 - libgcc-ng=11.2.0=h1234567_1 - libgomp=11.2.0=h1234567_1 - libstdcxx-ng=11.2.0=h1234567_1 - ncurses=6.3=h5eee18b_3 - openssl=1.1.1s=h7f8727e_0 - pip=22.3.1=py37h06a4308_0 - python=3.7.15=h7a1cb2a_1 - readline=8.2=h5eee18b_0 - setuptools=65.5.0=py37h06a4308_0 - sqlite=3.40.0=h5082296_0 - tk=8.6.12=h1ccaba5_0 - wheel=0.37.1=pyhd3eb1b0_0 - xz=5.2.8=h5eee18b_0 - zlib=1.2.13=h5eee18b_0 - pip: - numpy==1.21.6 - opencv-python==4.6.0.66 prefix: /home/gourab/anaconda3/envs/offline_cn |
|
|
| Please help me!
and do not copy please..
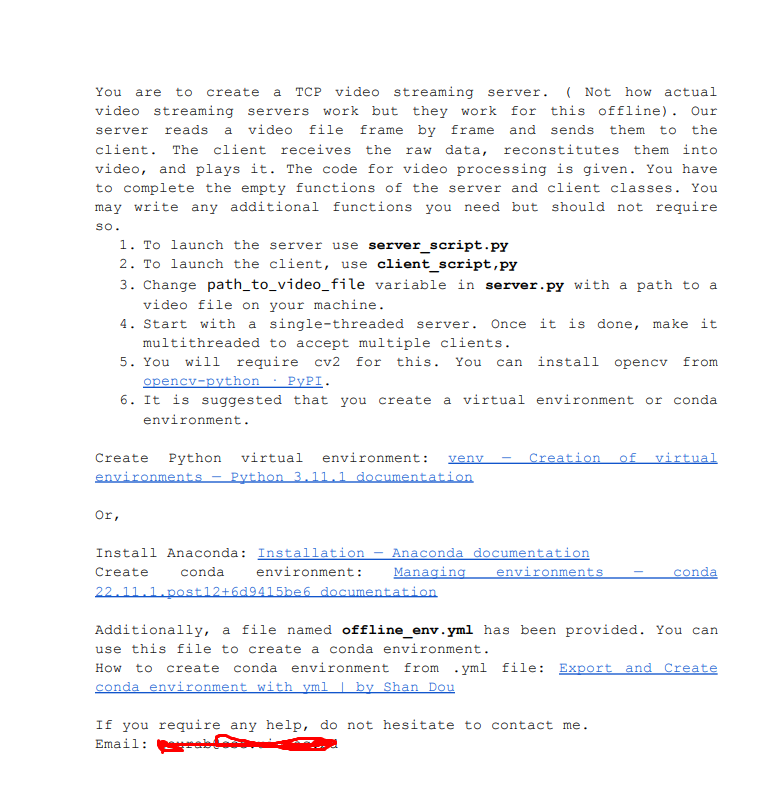
You are to create a TCP video streaming server. ( Not how actual video streaming servers work but they work for this offline). Our server reads a video file frame by frame and sends them to the client. The client receives the raw data, reconstitutes them into video, and plays it. The code for video processing is given. You have to complete the empty functions of the server and client classes. You may write any additional functions you need but should not require so. 1. To launch the server use server_script.py 2. To launch the client, use client_script,py 3. Change path_to_video_file variable in server.py with a path to a video file on your machine. 4. Start with a single-threaded server. Once it is done, make it multithreaded to accept multiple clients. 5. You will require cv2 for this. You can install opencv from opencv-python : PyPI. 6. It is suggested that you create a virtual environment or conda environment. Create Python virtual environment: venv - creation of virtual environments - Python 3.11.1 documentation Or, Install Anaconda: Installation - Anaconda documentation Create conda environment: Managing environments - conda 22.11.1.post 12+6 d94.15be6 documentation Additionally, a file named offline_env.yml has been provided. You can use this file to create a conda environment. How to create conda environment from .yml file: Export and create conda environment with yml b by Shan Dou If you require any help, do not hesitate to contact me. EmailStep by Step Solution
There are 3 Steps involved in it
Step: 1

Get Instant Access to Expert-Tailored Solutions
See step-by-step solutions with expert insights and AI powered tools for academic success
Step: 2

Step: 3

Ace Your Homework with AI
Get the answers you need in no time with our AI-driven, step-by-step assistance
Get Started


