Answered step by step
Verified Expert Solution
Question
1 Approved Answer
Configering DNS server. Configuring DNS Server This tutorial requires you to install containernet from https://github.com/ramonfontes/containernet. So, considering that you already have installed containernet, run the
Configering DNS server.
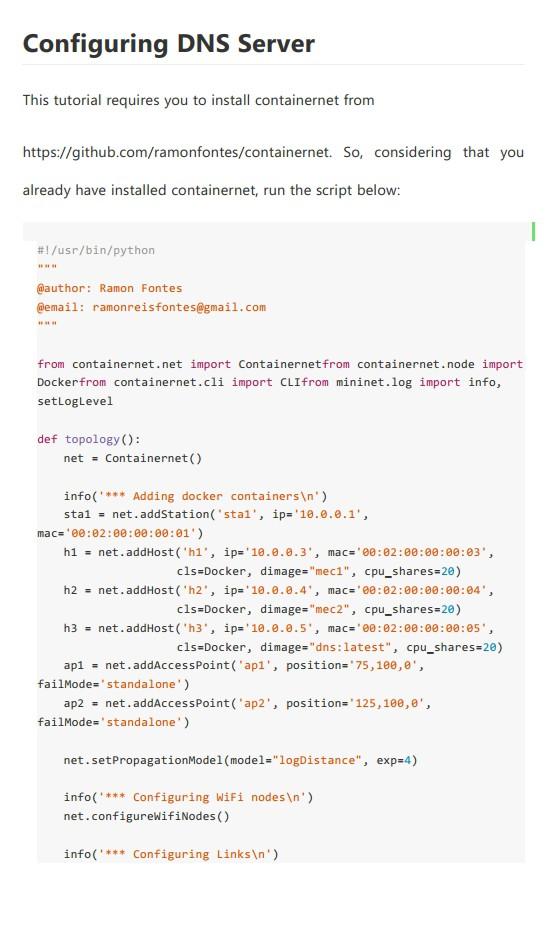
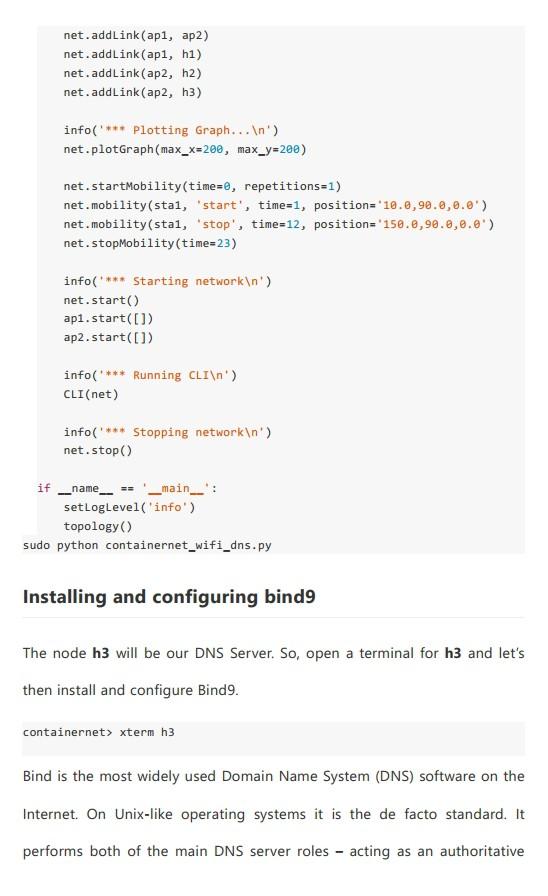
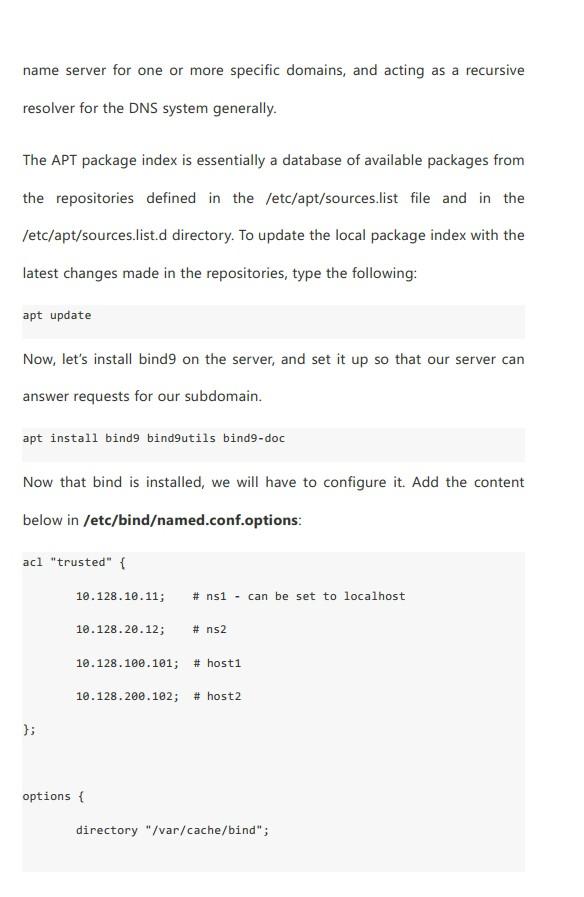
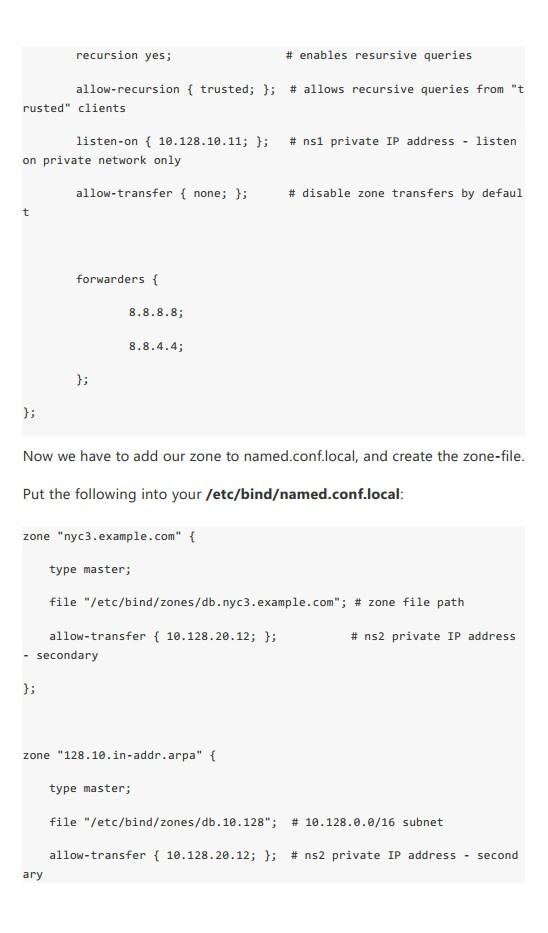
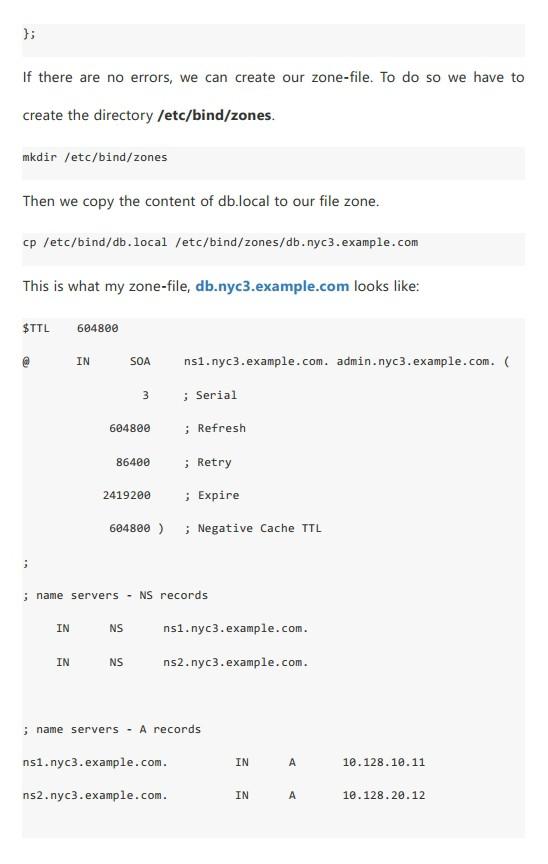
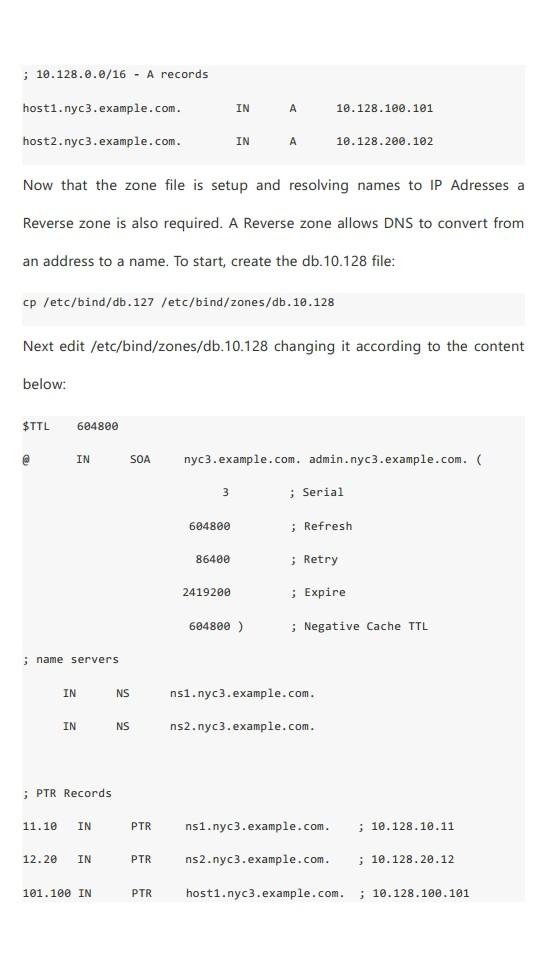
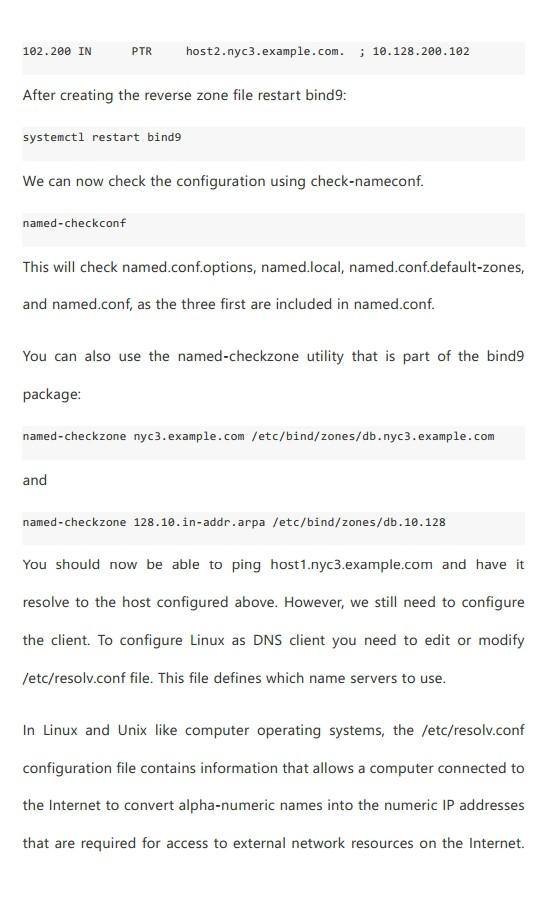
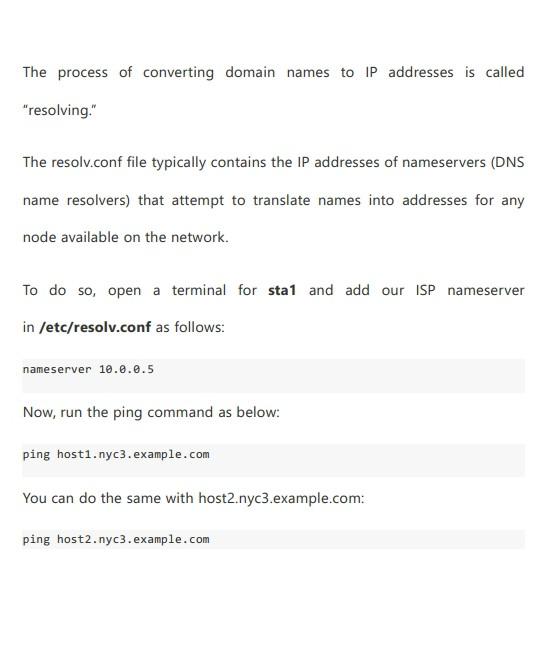
Configuring DNS Server This tutorial requires you to install containernet from https://github.com/ramonfontes/containernet. So, considering that you already have installed containernet, run the script below: The node h3 will be our DNS Server. So, open a terminal for h3 and let's then install and configure Bind9. containernet> xterm h3 Bind is the most widely used Domain Name System (DNS) software on the Internet. On Unix-like operating systems it is the de facto standard. It performs both of the main DNS server roles - acting as an authoritative name server for one or more specific domains, and acting as a recursive resolver for the DNS system generally. The APT package index is essentially a database of available packages from the repositories defined in the /etc/apt/sources.list file and in the /etc/apt/sources.list.d directory. To update the local package index with the latest changes made in the repositories, type the following: apt update Now, let's install bind9 on the server, and set it up so that our server can answer requests for our subdomain. apt install bind9 bind9utils bind9-doc Now that bind is installed, we will have to configure it. Add the content below in /etc/bindamed.conf.options: ac1 "trusted" \{ 10.128.10.11; \# ns1 - can be set to localhost 10.128.20.12; \# ns2 10.128.100.101; \# host1 10.128.200.102; \# host2 \}; options \{ directory "/var/cache/bind"; Now we have to add our zone to named.conf.local, and create the zone-file. Put the following into your/etc/bindamed.conf.local: zone "nyc3. example.com" \{ type master; file "/etc/bind/zones/db.nyc3. example.com"; \# zone file path allow-transfer {10.128.20.12;}; - secondary \}; ns2 private IP address zone "128.10.in-addr. arpa" \{ type master; file "/etc/bind/zones/db.10.128"; \#10.128.0.0/16 subnet allow-transfer {10.128.20.12;}; \# ns 2 private IP address - second ary \}; If there are no errors, we can create our zone-file. To do so we have to create the directory/etc/bind/zones. mkdir/etc/bind/zones Then we copy the content of db.local to our file zone. cp /etc/bind/db. local /etc/bind/zones/db. nyc3. example.com This is what my zone-file, db.nyc3.example.com looks like: \$TTL 604800 IN SOA ns1.nyc3.example.com. admin.nyc3.example.com. ( 3604800864002419200;Expire604800;;NegativeCacheTTL;Serial;Refresh;Retry Now that the zone file is setup and resolving names to IP Adresses a Reverse zone is also required. A Reverse zone allows DNS to convert from an address to a name. To start, create the db.10.128 file: cp /etc/bind/db.127/etc/bind/zones/db.10.128 Next edit/etc/bind/zones/db.10.128 changing it according to the content below: 102.200 IN PTR host2.nyc3.example.com. ; 10.128.200.102 After creating the reverse zone file restart bind 9 : systemctl 1 restart bind 9 We can now check the configuration using check-nameconf. named-checkconf This will check named.conf.options, named.local, named.conf.default-zones, and named.conf, as the three first are included in named.conf. You can also use the named-checkzone utility that is part of the bind 9 package: named-checkzone nyc3. example.com /etc/bind/zones/db. nyc3. example.com and named-checkzone 128.10.in-addr.arpa /etc/bind/zones/db.10.128 You should now be able to ping host1.nyc3.example.com and have it resolve to the host configured above. However, we still need to configure the client. To configure Linux as DNS client you need to edit or modify /etc/resolv.conf file. This file defines which name servers to use. In Linux and Unix like computer operating systems, the /etc/resolv.conf configuration file contains information that allows a computer connected to the Internet to convert alpha-numeric names into the numeric IP addresses that are required for access to external network resources on the Internet. The process of converting domain names to IP addresses is called "resolving." The resolv.conf file typically contains the IP addresses of nameservers (DNS name resolvers) that attempt to translate names into addresses for any node available on the network. To do so, open a terminal for sta1 and add our ISP nameserver in /etc/resolv.conf as follows: nameserver 10005 Now, run the ping command as below: pi You can do the same with host2.nyc3.example.com: ping host2. nyc3. example. com
Step by Step Solution
There are 3 Steps involved in it
Step: 1

Get Instant Access to Expert-Tailored Solutions
See step-by-step solutions with expert insights and AI powered tools for academic success
Step: 2

Step: 3

Ace Your Homework with AI
Get the answers you need in no time with our AI-driven, step-by-step assistance
Get Started


