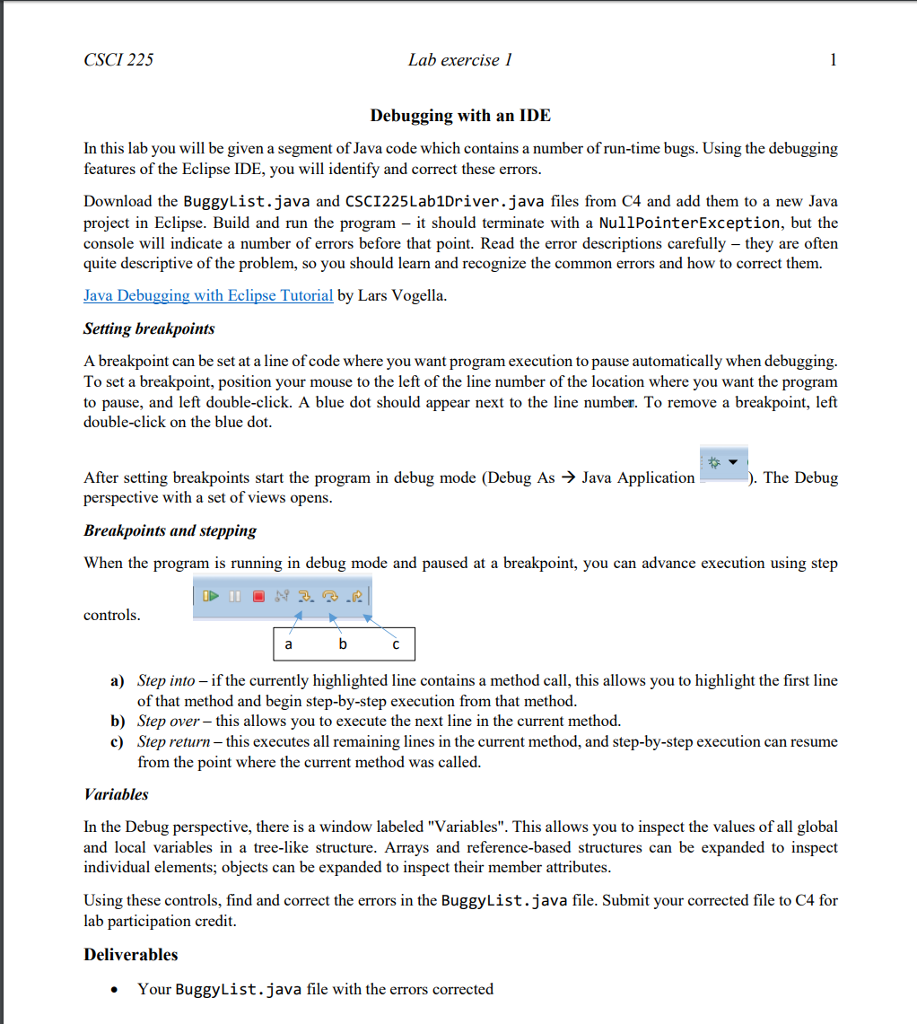
Question
// File: BuggyList.java // Author: Geoffrey Tien/ Rita Ester // Description: Buggy linked list implementation for CSCI 225 Lab 1 // Based on SimpleStack at
// File: BuggyList.java // Author: Geoffrey Tien/ Rita Ester // Description: Buggy linked list implementation for CSCI 225 Lab 1 // Based on SimpleStack at course website
public class BuggyList { // private inner Node class private class Node { // all members public, for convenience public int data; public Node next;
// parameterized constructor public Node(int x, Node nd) { data = x; next = nd; } } // private member variables private int n; // number of items in list private Node front; // front of list private Node back; // back of list // public member functions // default constructor public BuggyList() { n = 0; front = null; back = null; } // copy constructor public BuggyList(BuggyList ls) { Node nd = ls.front; while (nd != null) { addBack(nd.data); } } // Inserts an int to the front of list // PARAM: x is the value to be inserted public void addFront(int x) { Node nd = new Node(x, front); front = nd; } //Inserts an int to the back of list // PARAM: x is the value to be inserted public void addBack(int x) { Node nd = new Node(x, null); back = nd; n++; } // Removes and returns the item at the front of list // Returns -1 if the list is empty (in lieu of proper exception handling) public int removeFront() { Node nd = front; front = front.next; n--; return nd.data; } // Returns the item at the specified index //Returns -1 if the list is empty (in lieu of proper exception handling) public int elementAt(int index) { if (n
// File: CSCI225Lab1Driver.java // Author: Geoffrey Tien/ Rita Ester // Description: Driver file with main method for CSCI 225 Lab 1
public class CSCI225Lab1Driver { public static void main(String[] args) { int errorcount = 0; boolean result = false; // create a new list and test if empty System.out.print("Creating new list and testing if empty... "); BuggyList listA = new BuggyList(); result = listA.isEmpty(); if (result) System.out.println("done - OK!"); else { System.out.println("ERROR: list not empty"); errorcount++; } // add 3 items to front of list System.out.print("Using AddFront to add 3 items to front of list... "); listA.addFront(12); listA.addFront(9); listA.addFront(4); System.out.print("done. Checking if list is empty... "); result = listA.isEmpty(); if (result) { System.out.println("ERROR: IsEmpty returned true"); errorcount++; } else System.out.println("done - OK!"); System.out.print("Checking size of list... "); result = listA.count() == 3; if (result) System.out.println("done - OK!"); else { System.out.println("ERROR: list size should be 3"); errorcount++; } // add two items to back of list System.out.print("Using AddBack to add 2 items to back of list... "); listA.addBack(17); listA.addBack(26); System.out.print("done. Checking value of item at index 1... "); result = listA.elementAt(1) == 9; if (result) System.out.println("done - OK!"); else { System.out.println("ERROR: ElementAt(1) should be 9"); errorcount++; } System.out.print("Checking value of item at index 2... "); result = listA.elementAt(2) == 12; if (result) System.out.println("done - OK!"); else { System.out.println("ERROR: ElementAt(2) should be 12"); errorcount++; } System.out.print("Checking value of item at index 3... "); result = listA.elementAt(3) == 17; if (result) System.out.println("done - OK!"); else { System.out.println("ERROR: elementAt(3) should be 17"); errorcount++; } System.out.print("Checking value of item at index 4... "); result = listA.elementAt(4) == 26; if (result) System.out.println("done - OK!"); else { System.out.println("ERROR: ElementAt(4) should be 26"); errorcount++; } // Create a new list and attempt to remove from it System.out.print("Creating a new list... "); BuggyList listB = new BuggyList(); System.out.print(" done. Attempting to remove an item from front... "); int value = listB.removeFront(); // Add 3 elements using AddBack System.out.print("Using AddBack to add 2 items to back of list... "); listB.addBack(23); listB.addBack(37); listB.addBack(49); System.out.print("Checking value of item at index 2... "); result = listB.elementAt(2) == 49; if (result) System.out.println("done - OK!"); else { System.out.println("ERROR: ElementAt(2) should be 49"); errorcount++; } System.out.println("Test program complete. Detected " + errorcount + " errors."); } }

Step by Step Solution
There are 3 Steps involved in it
Step: 1

Get Instant Access to Expert-Tailored Solutions
See step-by-step solutions with expert insights and AI powered tools for academic success
Step: 2

Step: 3

Ace Your Homework with AI
Get the answers you need in no time with our AI-driven, step-by-step assistance
Get Started


