First, install Erlang and the RabbitMQ server which can both be found under Message Queues with RabbitMQ Resources located on the Message Queues With RabbitMQ
First, install Erlang and the RabbitMQ server which can both be
found under Message Queues with RabbitMQ Resources located on the Message Queues
With RabbitMQ Assignment page for your operating system. Finally, for protocol support you
will need to install the Pika module. From PyCharm inside your project go to File > Settings >
Project Settings > Project Interpreter. From there click on the green "+" to add a package to the
project. Enter Pika in the search field at the top and select Add Package.
Now, you will need two Python source files. One sender (send.py) and one receiver (receive.py).
The sender will need establish a connection, channel and declare a queue. It will then need to
send a message to the message queue once per second. You may use a while loop and the
time.sleep function for this. The message should be something unique, like "My name is John
Doe and I love Python! #" where is # is a running counter so you can see the message number.
Each of the receivers, will need to establish a connection to the same queue, register a call back,
and start consuming any messages received. When a message is received it should be output to
standard out.
This assignment is not very realistic when implemented on a single computer but recognize that
"localhost" need not be the address. The message queue could be located on one server with
dozens of senders and receivers each located anywhere.
As you are running your code, noticed that you can start the server. It will begin sending
messages. Wait a few seconds and start the receiver. Notice that all messages are received even
though some were sent before the receiver was started. This is one of the benefits of message
queues, i.e. it maintains the message history and can deliver messages to clients even if they
momentarily lose connectivity.
Hint
Be sure to review the RabbitMQ Tutorials which can be found under the Message Queues
with RabbitMQ Resources. Not only will they help with the assignment, they also contain very
good information about message queues in general.
Test your code completely. At each step of the test take a screen shot and embed it into a Word
document. Submit the Word document to the appropriate assignment.
Submit the source files and any other relevant material.
Below is my current code for the Sender.py:
import sysv_ipc
import numpy as np
import struct
BUFF_SIZE = 20
msg_string = "My name is Anthony Taylor II and I absolutely love Python! #"
msg_double1 = 1234.56789
msg_double2 = 9876.12345
msg_npy = np.arange(BUFF_SIZE, dtype=np.uint8).reshape((2, BUFF_SIZE // 2))
msg_npy_half = np.arange(BUFF_SIZE // 2, dtype=np.uint8).reshape((2, BUFF_SIZE // 4))
try:
mq = sysv_ipc.MessageQueue(1234, sysv_ipc.IPC_CREAT)
# string transmission
mq.send(msg_string, True, type=1)
# Two double transmission
bytearray1 = str(struct.pack("d", msg_double1))
bytearray2 = str(struct.pack("d", msg_double2))
mq.send(bytearray1 + bytearray2, True, type=1)
# numpy array transmission
mq.send(msg_npy.tobytes(order='C'), True, type=1)
# one double one numpy transmission
bytearray1 = str(struct.pack("d", msg_double1))
mq.send(bytearray1 + msg_npy_half.tobytes(order='C'), True, type=1)
except sysv_ipc.ExistentialError:
print
"ERROR: message queue creation failed"
Below is my code for receiver.py:
import sysv_ipc
import numpy as np
import struct
BUFF_SIZE = 16
try:
mq = sysv_ipc.MessageQueue(1234, sysv_ipc.IPC_CREAT)
while True:
message = mq.receive()
print message
except sysv_ipc.ExistentialError:
print "ERROR: message queue creation failed"
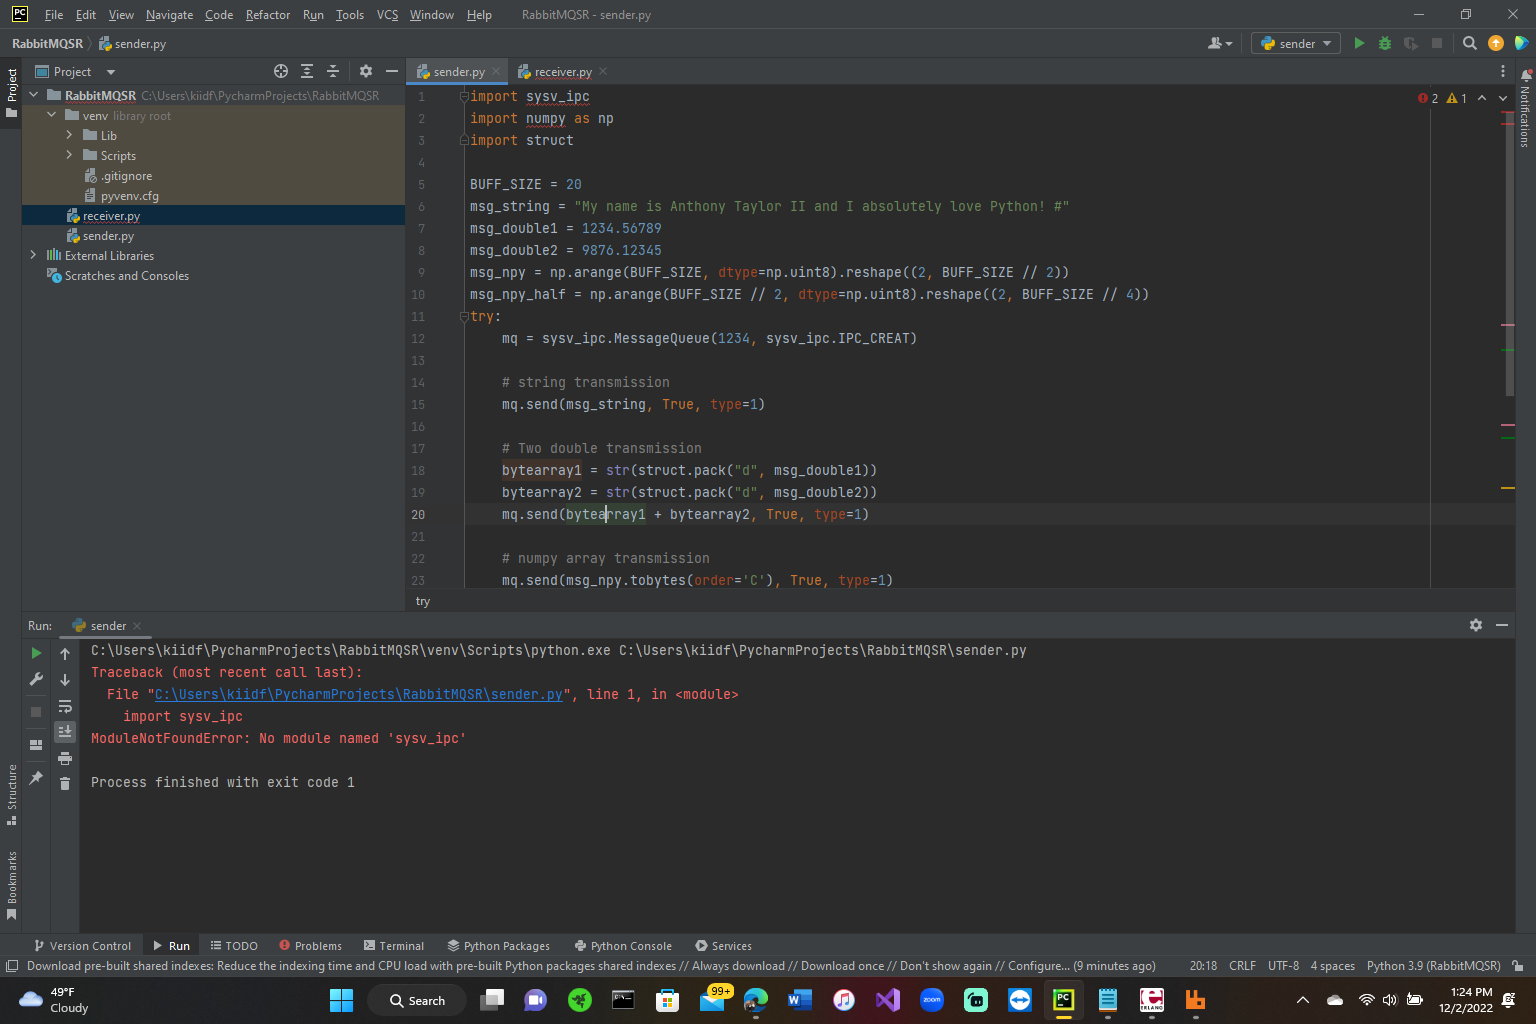
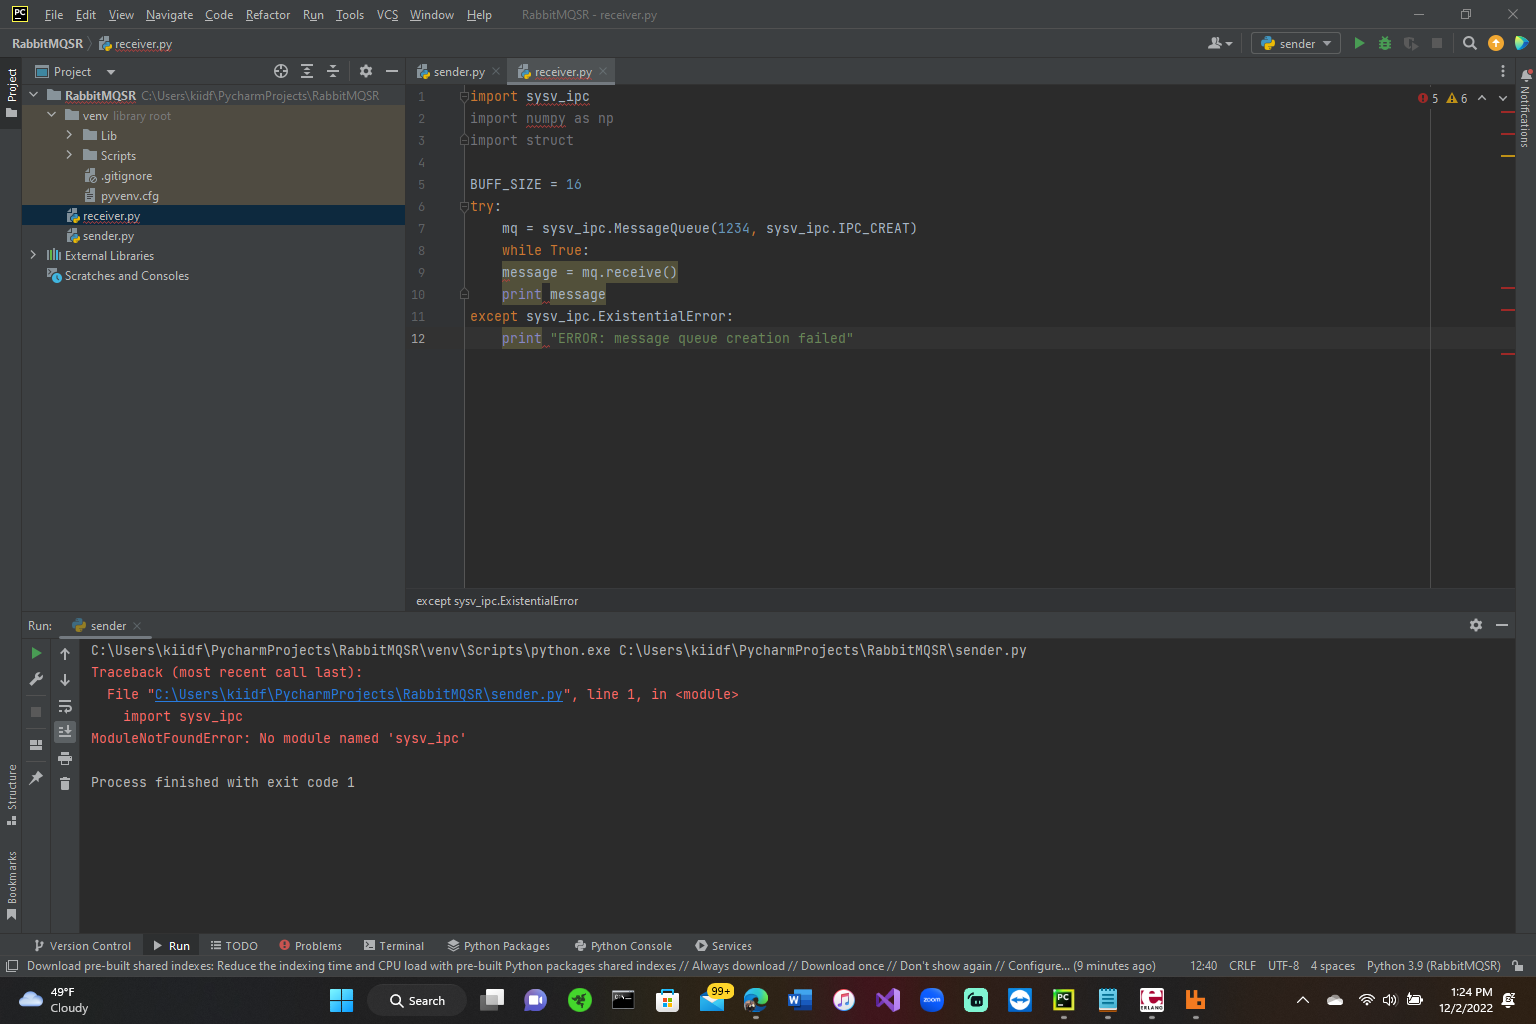
The system is saying that the import for sysv_ipc does not exist and I cannot get the code to run. Is the code incorrect for this assignment?


PC File Edit View Navigate Code Refactor Run Tools VCS Window Help RabbitMQSR sender.py Bookmarks Project RabbitMQSR > Run: > C:\Users\kiidf\PycharmProjects\RabbitMQSR venv library root Lib Scripts .gitignore pyvenv.cfg receiver.py sender.py > III External Libraries Scratches and Consoles sender Process finished with exit code 1 1 2 3 4 5 6 7 8 9 10 11 12 13 14 15 16 17 18 19 20 21 22 23 try sender.py RabbitMQSR - sender.py receiver.py X import sysv_ipc import numpy as np Aimport struct BUFF_SIZE = 20 msg_string = "My name is Anthony Taylor II and I absolutely love Python! #" msg_double1 = 1234.56789 msg_double2 = 9876.12345 msg_npy= np.arange (BUFF_SIZE, dtype=np.uint8).reshape((2, BUFF SIZE // 2)) msg_npy_half = np.arange (BUFF_SIZE // 2, dtype=np. uint8).reshape ((2, BUFF_SIZE // 4)) try: mq = sysv_ipc.MessageQueue (1234, sysv_ipc.IPC_CREAT) # string transmission mq.send(msg_string, True, type=1) # Two double transmission bytearray1 = str(struct.pack("d", msg_double1)) bytearray2 = str(struct.pack("d", msg_double2)) mq.send (bytearray1 + bytearray2, True, type=1) C:\Users\kiidf\PycharmProjects\RabbitMQSR\venv\Scripts\python.exe C:\Users\kiidf\PycharmProjects\RabbitMQSR\sender.py Traceback (most recent call last): File "C:\Users\kiidf\Pycharm Projects\RabbitMQSR\sender.py", line 1, in import sysv_ipc ModuleNotFoundError: No module named 'sysv_ipc' #numpy array transmission mq.send(msg_npy.tobytes (order='C'), True, type=1) sender 99+ G Q Version Control Run E TODO Problems > Terminal Python Packages Python Console Services Download pre-built shared indexes: Reduce the indexing time and CPU load with pre-built Python packages shared indexes// Always download// Download once // Don't show again // Configure... (9 minutes ago) 20:18 CRLF UTF-8 4 spaces Python 3.9 (RabbitMQSR) Q Search 49F 1:24 PM 12/2/2022 Cloudy 02 A1 A V Notifications
Step by Step Solution
There are 3 Steps involved in it
Step: 1
Your issue stems from the system not recognizing the sysvipc module which indicates that either the module is not installed or the system youre using doesnt have support for it Steps to Resolve the Is...
See step-by-step solutions with expert insights and AI powered tools for academic success
Step: 2

Step: 3

Ace Your Homework with AI
Get the answers you need in no time with our AI-driven, step-by-step assistance
Get Started


