Answered step by step
Verified Expert Solution
Question
1 Approved Answer
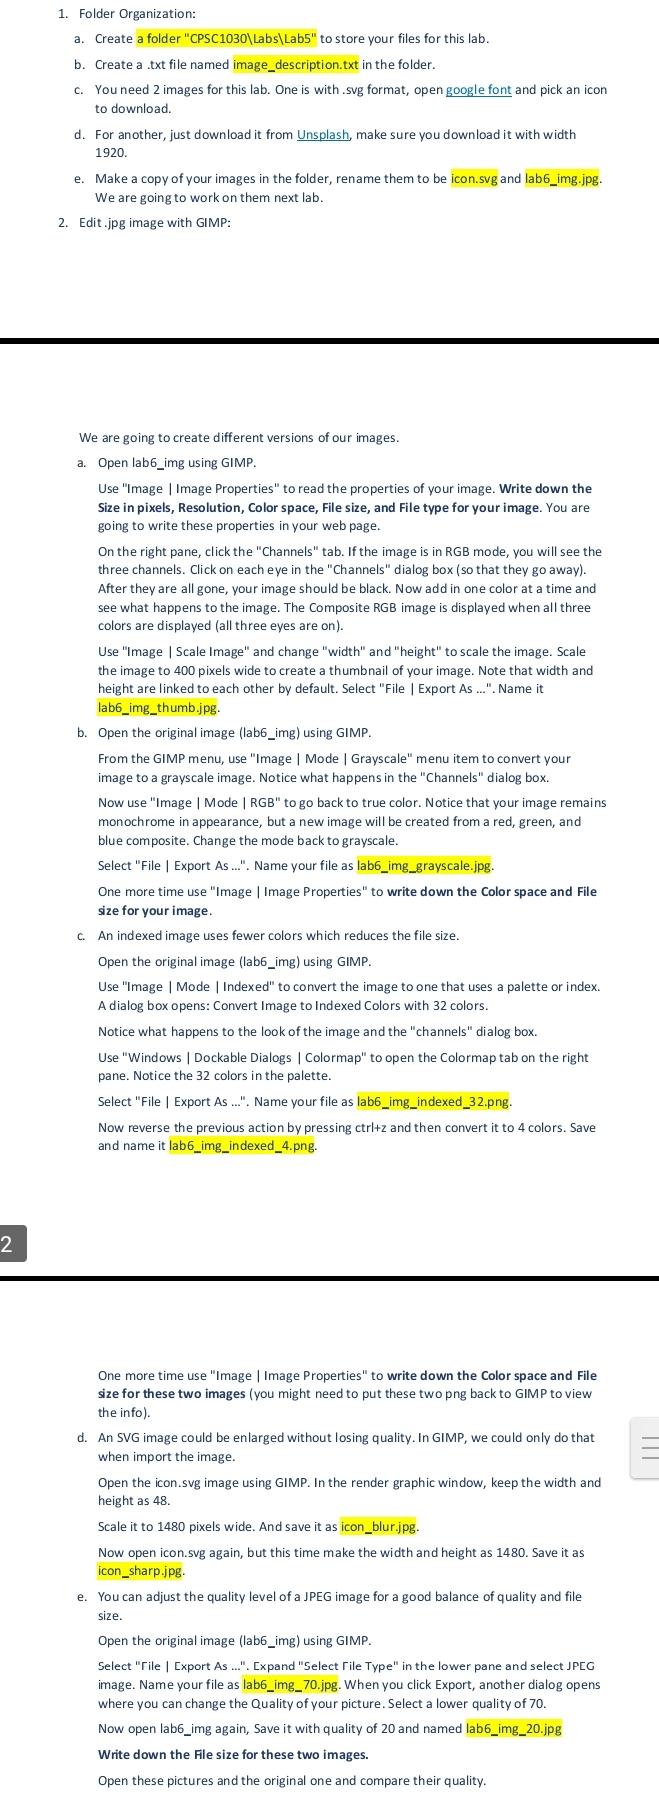
Folder Organization: a . Create a folder CPSC 1 0 3 0 Labs Lab 5 to store your files for this
Folder Organization:
a Create a folder CPSCLabsLab to store your files for this lab.
b Create a txt file named imagedescription.txt in the folder.
c You need images for this lab. One is with svg format, open google font and pick an icon to download.
d For another, just download it from Unsplash, make sure you download it with width
e Make a copy of your images in the folder, rename them to be icon.svg and labimg.jpg We are going to work on them next lab.
Edit.jpg image with GIMP:
We are going to create different versions of our images.
a Open labimg using GIMP.
Use "Image Image Properties" to read the properties of your image. Write down the Size in pixels, Resolution, Color space, File size, and File type for your image. You are going to write these properties in your web page.
On the right pane, click the "Channels" tab. If the image is in RGB mode, you will see the three channels. Click on each eye in the "Channels" dialog box so that they go away After they are all gone, your image should be black. Now add in one color at a time and see what happens to the image. The Composite RGB image is displayed when all three colors are displayed all three eyes are on
Use "Image Scale Image" and change "width" and "height" to scale the image. Scale the image to pixels wide to create a thumbnail of your image. Note that width and height are linked to each other by default. Select "File Export As Name it labimgthumb.jpg
b Open the original image labimg using GIMP.
From the GIMP menu, use "Image Mode Grayscale" menu item to convert your image to a grayscale image. Notice what happens in the "Channels" dialog box.
Now use "Image Mode RGB to go back to true color. Notice that your image remains monochrome in appearance, but a new image will be created from a red, green, and blue composite. Change the mode back to grayscale.
Select "File Export As Name your file as labimggrayscale.jpg
One more time use "Image Image Properties" to write down the Color space and File size for your image.
c An indexed image uses fewer colors which reduces the file size.
Open the original image labimg using GIMP.
Use "Image Mode Indexed" to convert the image to one that uses a palette or index. A dialog box opens: Convert Image to Indexed Colors with colors.
Notice what happens to the look of the image and the "channels" dialog box.
Use "Windows Dockable Dialogs Colormap" to open the Colormap tab on the right pane. Notice the colors in the palette.
Select "File Export As Name your file as labimgindexedpng
Now reverse the previous action by pressing ctrlz and then convert it to colors. Save and name it labimgindexedpng
One more time use "Image Image Properties" to write down the Color space and File size for these two images you might need to put these two png back to GIMP to view the info
d An SVG image could be enlarged without losing quality. In GIMP, we could only do that when import the image.
Open the icon.svg image using GIMP. In the render graphic window, keep the width and height as
Scale it to pixels wide. And save it as iconblur.jpg
Now open icon.svg again, but this time make the width and height as Save it as iconsharp.jpg
e You can adjust the quality level of a JPEG image for a good balance of quality and file size.
Open the original image labimg using GIMP.
Select "rile xport As Expand "Select rile Type" in the lower pane and select JPEG image. Name your file as labimgjpg When you click Export, another dialog opens where you can change the Quality of your picture. Select a lower quality of
Now open labimg again, Save it with quality of and named labimgjpg
Write down the File size for these two images.
Open these pictures and the original one and compare their quality.

Step by Step Solution
There are 3 Steps involved in it
Step: 1

Get Instant Access to Expert-Tailored Solutions
See step-by-step solutions with expert insights and AI powered tools for academic success
Step: 2

Step: 3

Ace Your Homework with AI
Get the answers you need in no time with our AI-driven, step-by-step assistance
Get Started


