Answered step by step
Verified Expert Solution
Link Copied!

Question

1 Approved Answer

How to do this PHET Simulation? link: https://phet.colorado.edu/en/simulations/geometric-optics Geometric Optics Name: Introduction: Enter the simulation (https://phet.colorado.edu/en/simulations/geometric- optics) and select the following options: Mirror, Pencil, Concave,

How to do this PHET Simulation?

link: https://phet.colorado.edu/en/simulations/geometric-optics
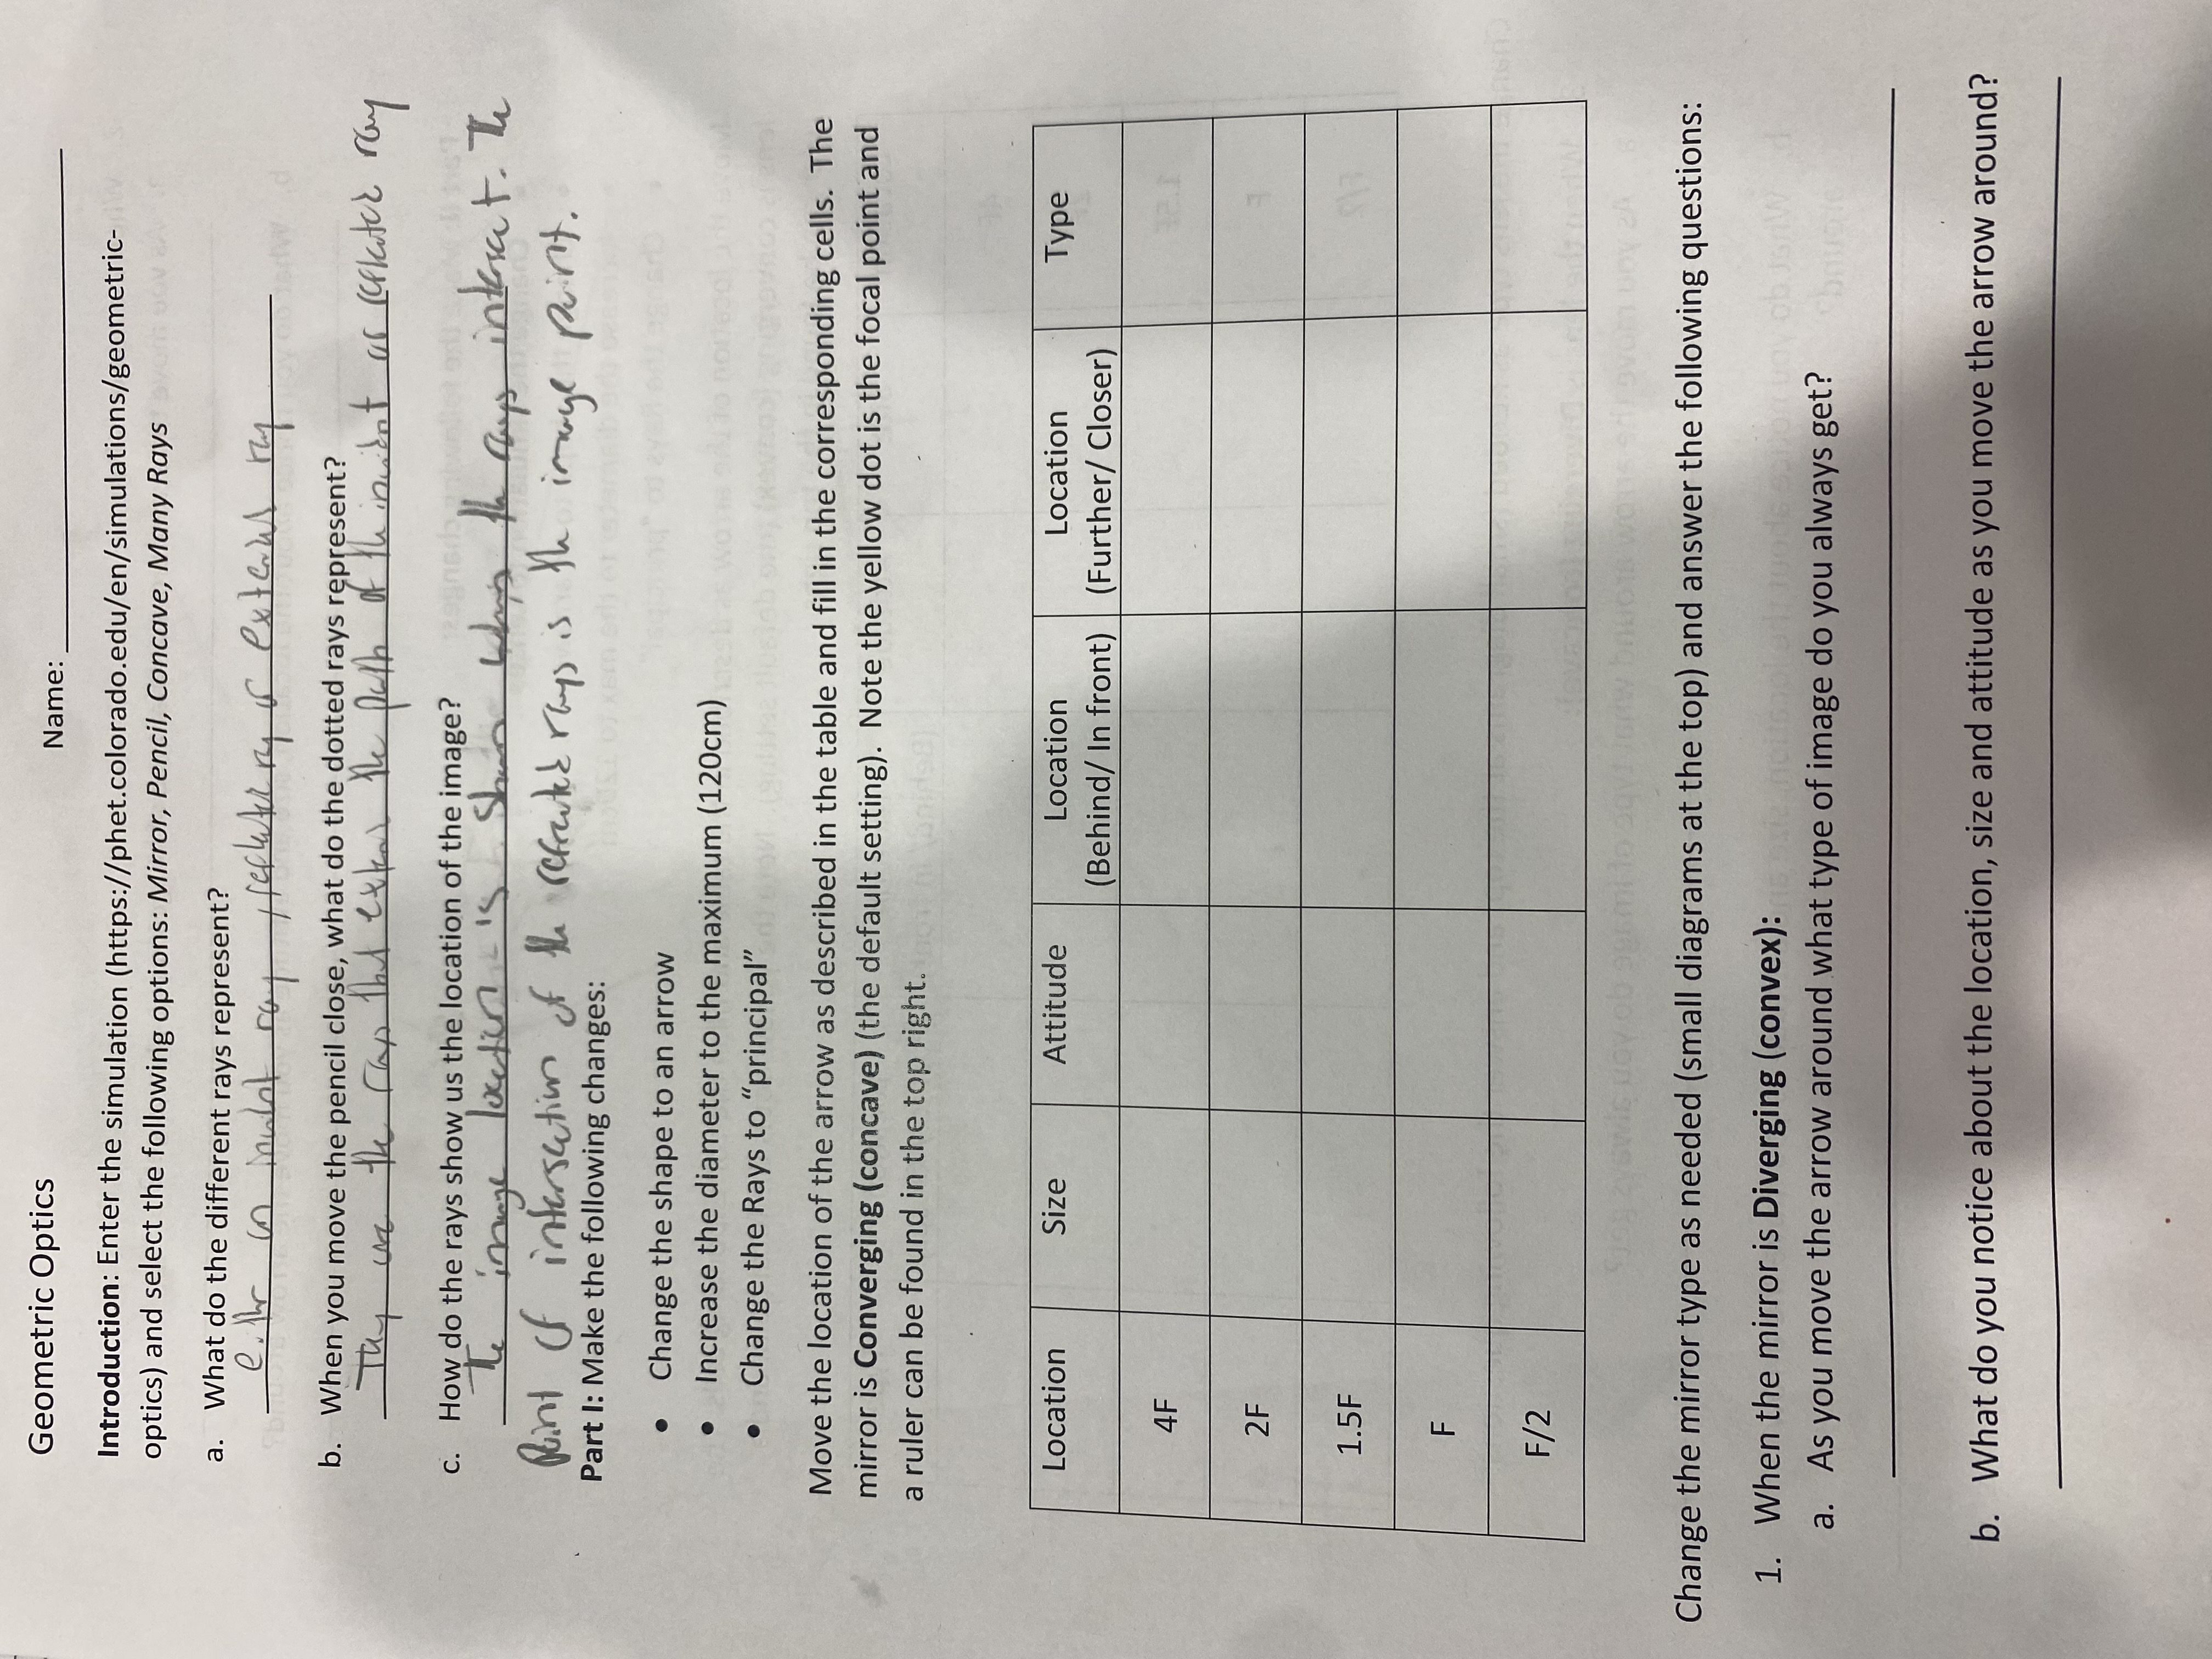
image text in transcribedimage text in transcribed
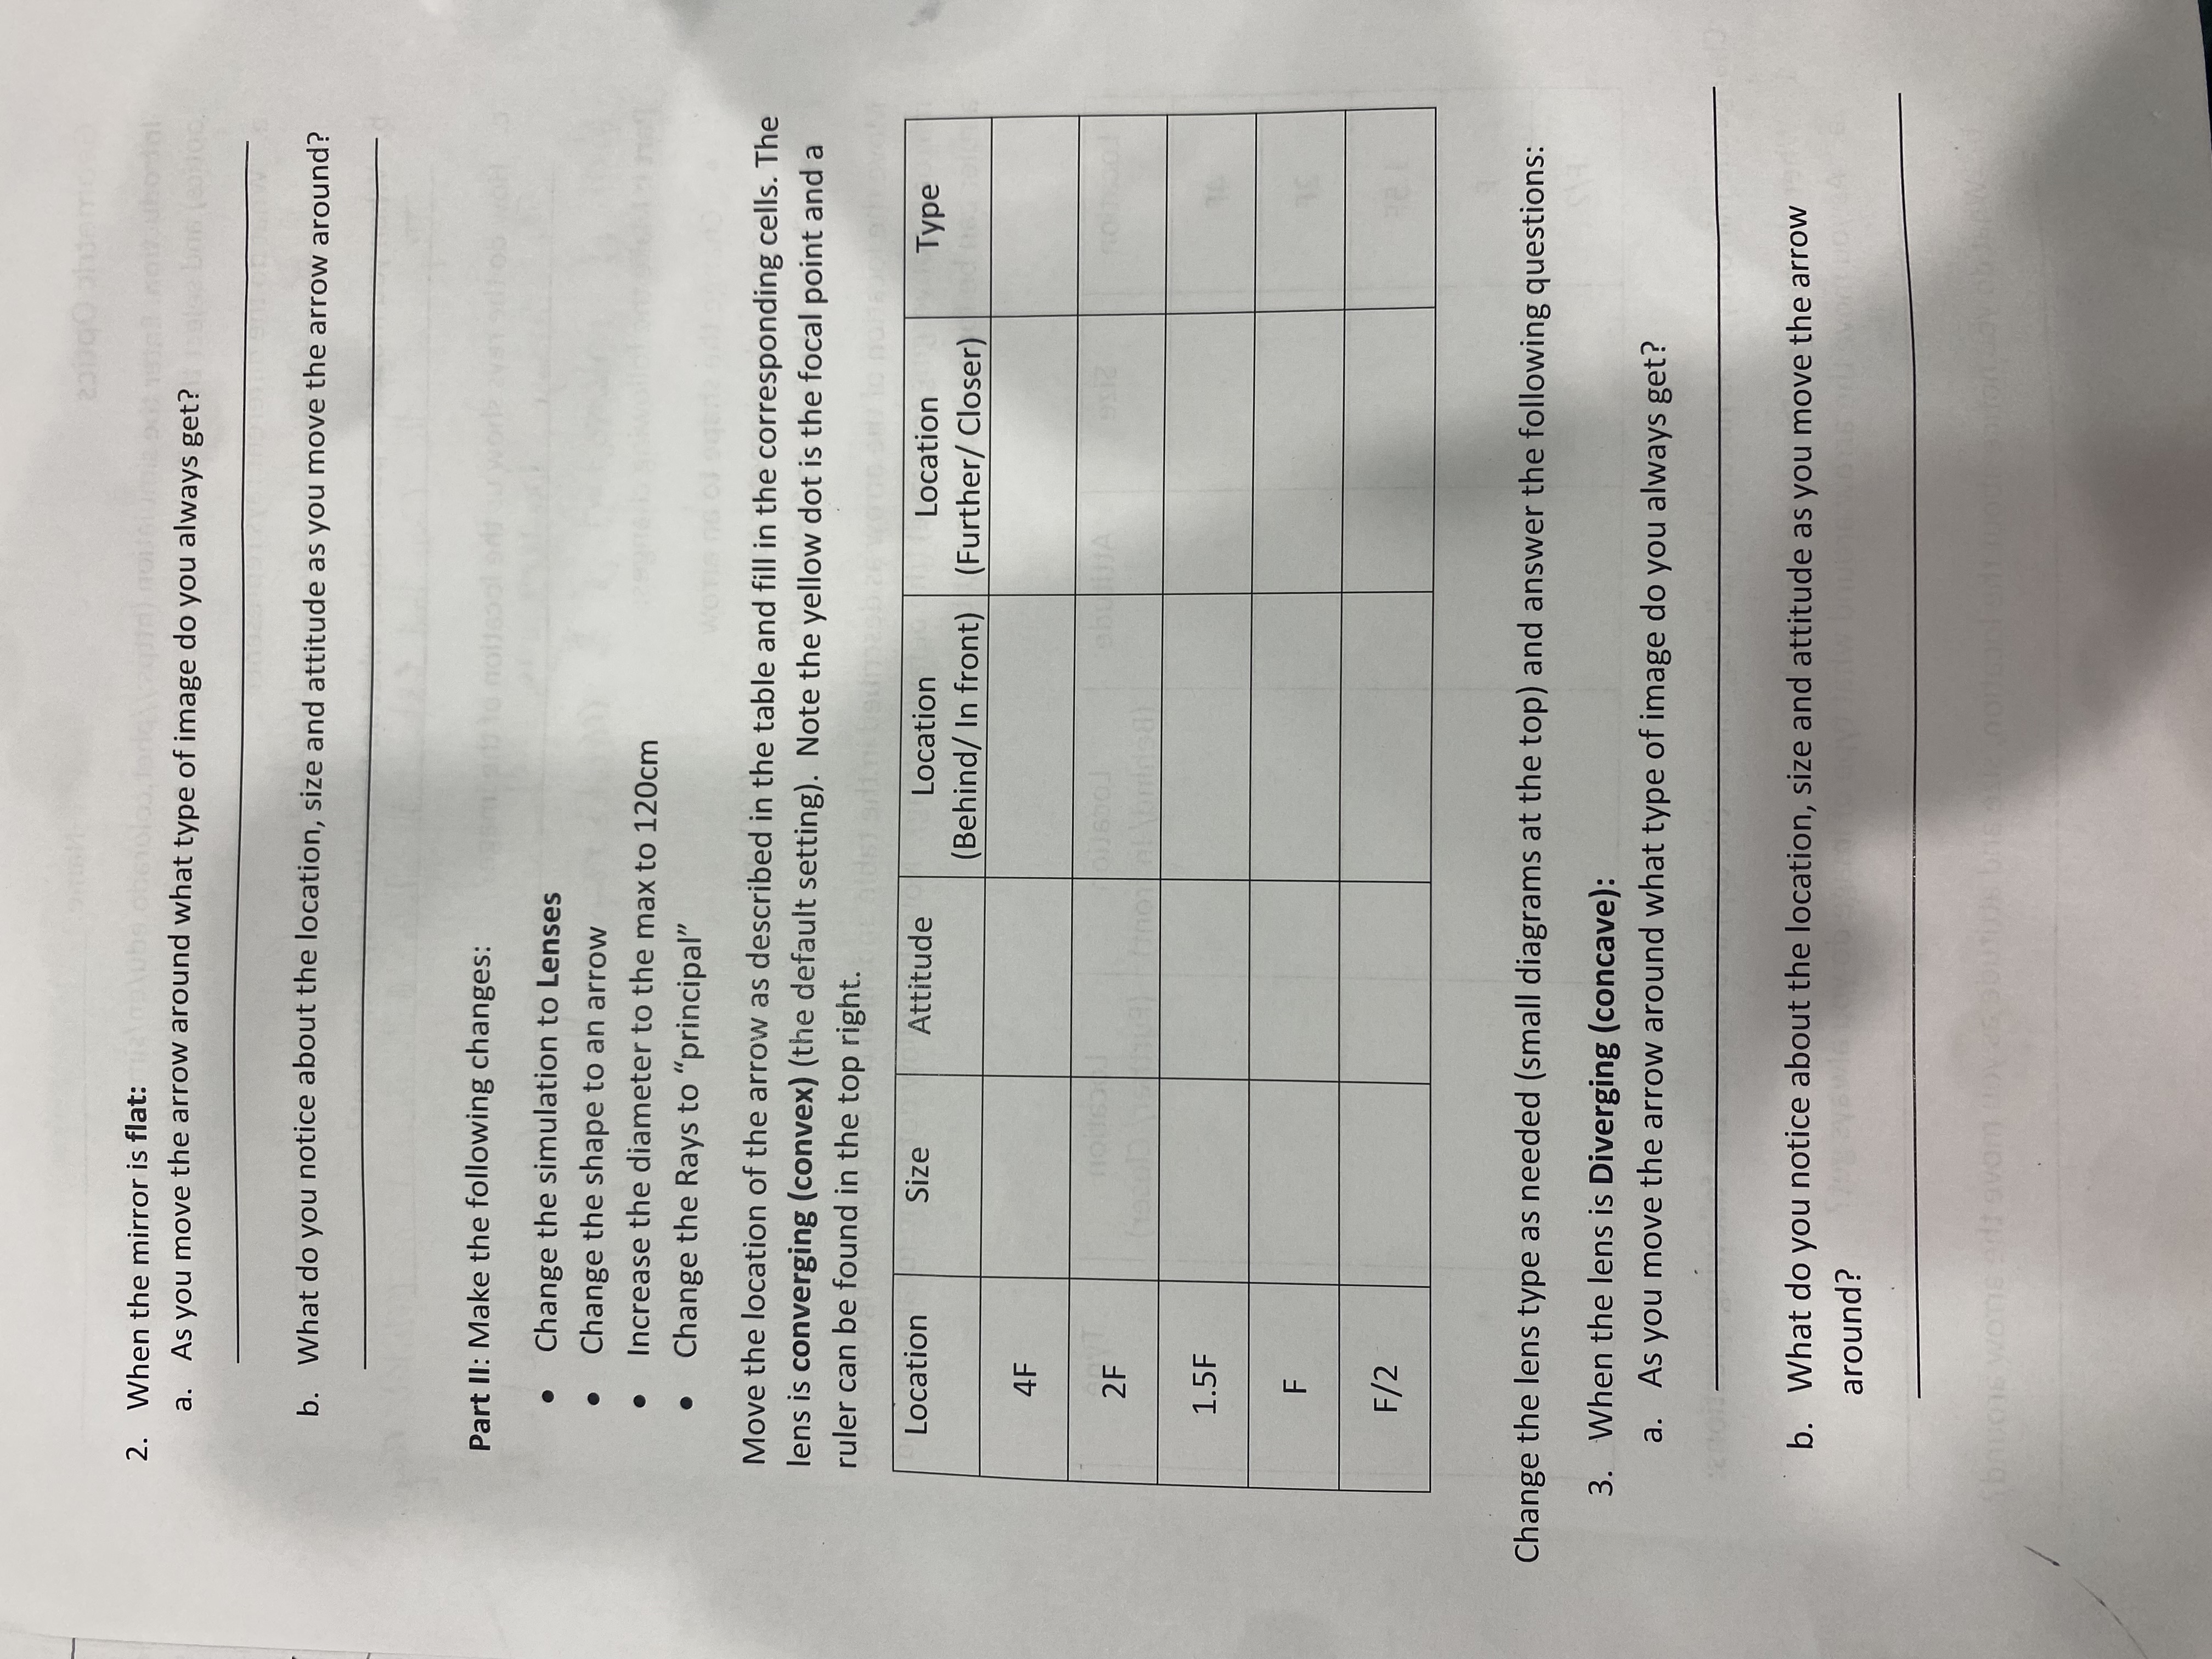
Geometric Optics Name: Introduction: Enter the simulation (https://phet.colorado.edu/en/simulations/geometric- optics) and select the following options: Mirror, Pencil, Concave, Many Rays a. What do the different rays represent? b. When you move the pencil close, what do the dotted rays represent? Thy c. How do the rays show us the location of the image? what the says interact . The point of intersection of the refracted rays is the image point. Part 1: Make the following changes: Change the shape to an arrow Increase the diameter to the maximum (120cm) Change the Rays to "principal" Move the location of the arrow as described in the table and fill in the corresponding cells. The mirror is Converging (concave) (the default setting). Note the yellow dot is the focal point and a ruler can be found in the top right. Location Size Attitude Location Location Type (Behind/ In front) (Further/ Closer) 4F 2 F 1.5F F F /2 Change the mirror type as needed (small diagrams at the top) and answer the following questions: 1. When the mirror is Diverging (convex): objsaw a. As you move the arrow around what type of image do you always get? b. What do you notice about the location, size and attitude as you move the arrow around?2. When the mirror is flat: hell now who dal a. As you move the arrow around what type of image do you always get? b. What do you notice about the location, size and attitude as you move the arrow around? Part II: Make the following changes: Change the simulation to Lenses Change the shape to an arrow . . Increase the diameter to the max to 120cm Change the Rays to "principal" Move the location of the arrow as described in the table and fill in the corresponding cells. The lens is converging (convex) (the default setting). Note the yellow dot is the focal point and a ruler can be found in the top right. Location Size Attitude Location Location Type (Behind/ In front) (Further/ Closer) 4F 2F 1.5F F F/2 Change the lens type as needed (small diagrams at the top) and answer the following questions: 3. When the lens is Diverging (concave): a. As you move the arrow around what type of image do you always get? b. What do you notice about the location, size and attitude as you move the arrow around? bauers wore add avam

Step by Step Solution

There are 3 Steps involved in it

Step: 1

blur-text-image

Get Instant Access to Expert-Tailored Solutions

See step-by-step solutions with expert insights and AI powered tools for academic success

Step: 2

blur-text-image

Step: 3

blur-text-image

Ace Your Homework with AI

Get the answers you need in no time with our AI-driven, step-by-step assistance

Get Started

Recommended Textbook for

Lectures On Quantum Mechanics

Authors: Steven Weinberg

2nd Edition

9781107111660

More Books

Students also viewed these Physics questions