Answered step by step
Verified Expert Solution
Question
1 Approved Answer
INTRODUCTION The purpose of this assignment is to gain more SQL experience using Oracle. In particular, you will get practice creating tables, inserting data
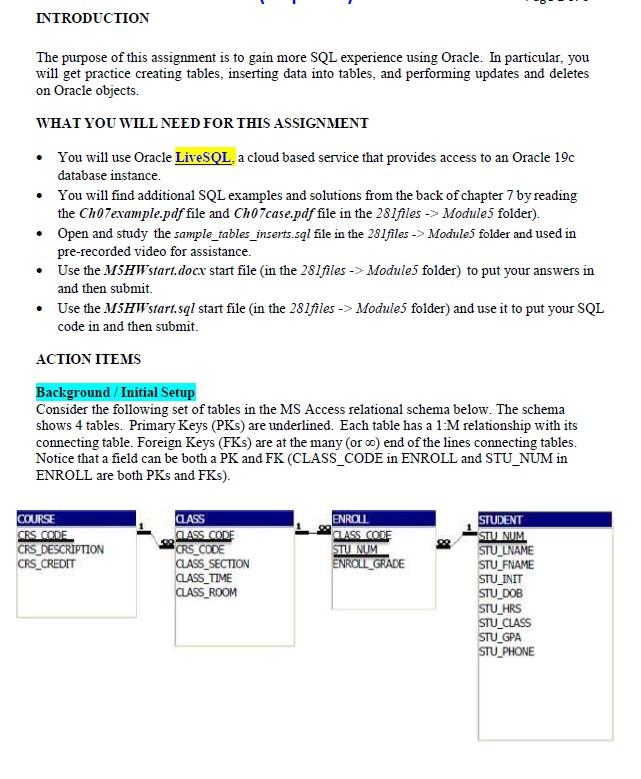
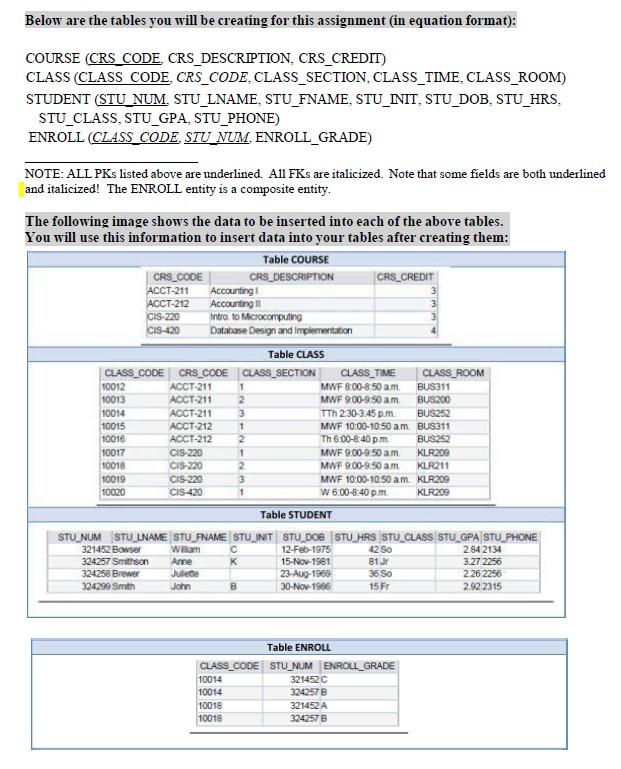
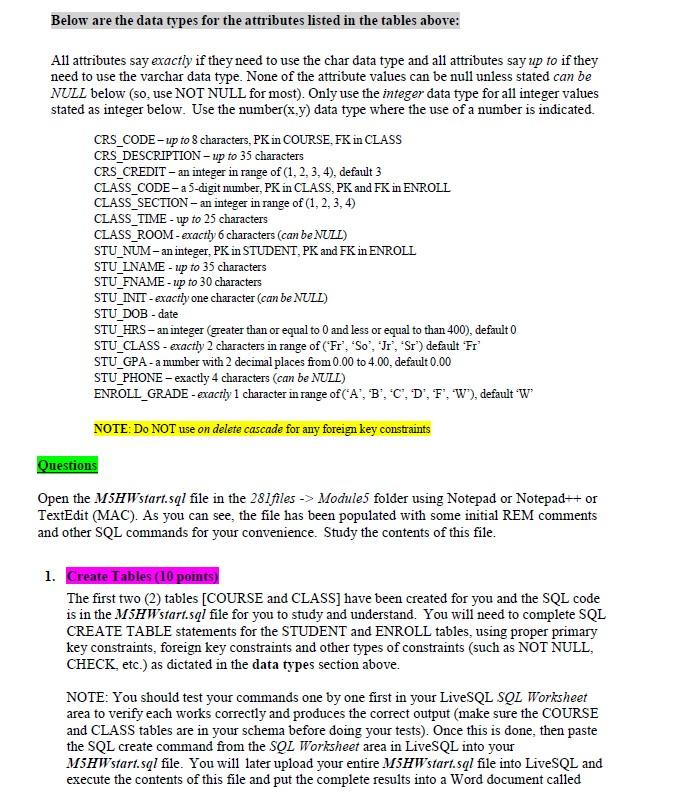
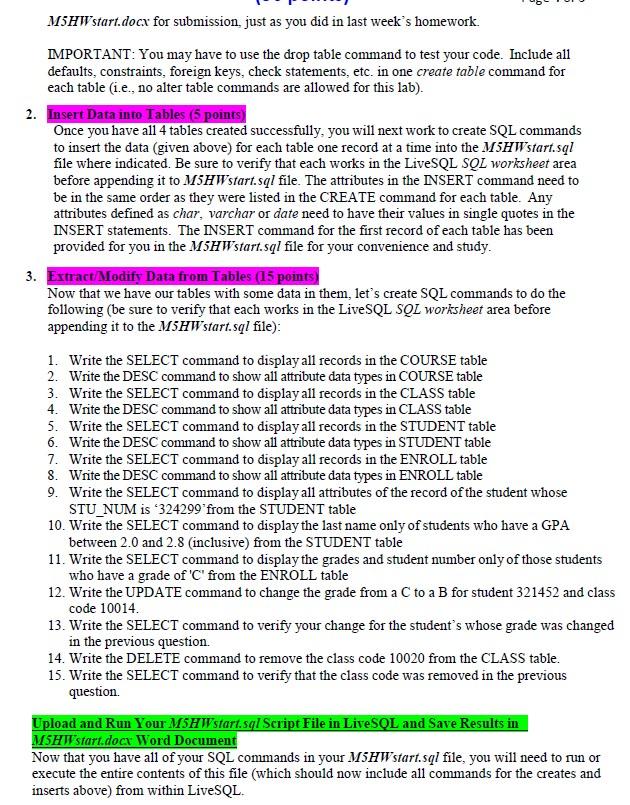
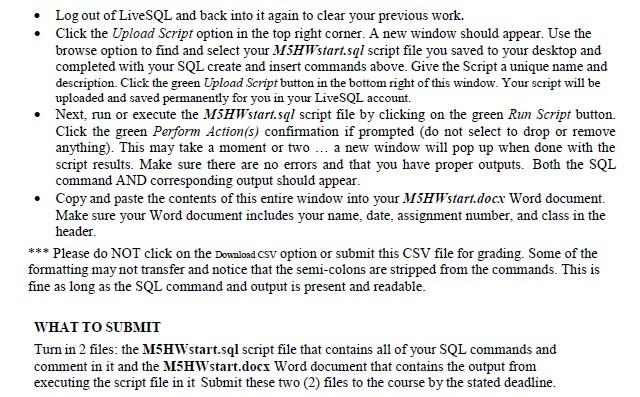
INTRODUCTION The purpose of this assignment is to gain more SQL experience using Oracle. In particular, you will get practice creating tables, inserting data into tables, and performing updates and deletes on Oracle objects. WHAT YOU WILL NEED FOR THIS ASSIGNMENT You will use Oracle LiveSQL. a cloud based service that provides access to an Oracle 19c database instance. You will find additional SQL examples and solutions from the back of chapter 7 by reading the Ch07example.pdf file and Ch07case.pdf file in the 281files Module5 folder). Open and study the sample_tables_inserts.sql file in the 281files > Module5 folder and used in pre-recorded video for assistance. Use the M5HW start.docx start file (in the 281files > Module5 folder) to put your answers in and then submit. Use the M5HW start.sql start file (in the 281files > Module5 folder) and use it to put your SQL code in and then submit. ACTION ITEMS Background/Initial Setup Consider the following set of tables in the MS Access relational schema below. The schema shows 4 tables. Primary Keys (PKs) are underlined. Each table has a 1:M relationship with its connecting table. Foreign Keys (FKs) are at the many (or ) end of the lines connecting tables. Notice that a field can be both a PK and FK (CLASS_CODE in ENROLL and STU_NUM in ENROLL are both PKs and FKs). COURSE CRS CODE CRS DESCRIPTION CRS CREDIT CLASS CLASS CODE CRS_CODE CLASS_SECTION CLASS TIME CLASS_ROOM ENROLL CLASS CODE STU NUM ENROLL_GRADE STUDENT STU NUM STU_LNAME STU_FNAME STU_INIT STU_DOB STU_HRS STU_CLASS STU_GPA STU_PHONE Below are the tables you will be creating for this assignment (in equation format): COURSE (CRS_CODE. CRS_DESCRIPTION, CRS_CREDIT) CLASS (CLASS CODE, CRS_CODE, CLASS SECTION, CLASS TIME, CLASS ROOM) STUDENT (STU_NUM. STU_LNAME. STU_FNAME. STU_INIT, STU_DOB, STU_HRS. STU_CLASS, STU_GPA, STU_PHONE) ENROLL (CLASS_CODE. STU_NUM. ENROLL_GRADE) NOTE: ALL PKs listed above are underlined. All FKs are italicized. Note that some fields are both underlined and italicized! The ENROLL entity is a composite entity. The following image shows the data to be inserted into each of the above tables. You will use this information to insert data into your tables after creating them: Table COURSE CRS_DESCRIPTION 10012 10013 CRS_CODE 10014 10015 10016 10017 10018 10019 10020 ACCT-211 ACCT-212 CIS-220 CIS-420 CLASS CODE CRS CODE ACCT-211 ACCT-211 ACCT-211 ACCT-212 ACCT-212 CIS-220 CIS-220 Accounting Accounting II Intro to Microcomputing Database Design and implementation Table CLASS CIS-220 CIS-420 William Anne Juliette John CLASS SECTION 1 2 3 1 2 1 2 10014 10014 10018 10018 C Table STUDENT STU NUM STU_LNAME STU_FNAME STU INIT STU_DOB STU HRS STU CLASS STU GPA STU_PHONE 321452 Bowser 12-Feb-1975 42 So 2.84 2134 3.27 2256 324257 Smithson 324258 Brewer 2.26 2256 2.922315 324299 Smith K B CRS_CREDIT CLASS TIME MWF 8:00-8:50 a.m. MWF 9:00-9:50 am TTh 2:30-3:45 pm MWF 10:00-10:50 am Th 6:00-8:40 pm MWF 9:00-9:50 am. MWF 9:00-9:50 am MWF 10:00-10:50 am W 6:00-8:40 pm 15-Nov-1981 23-Aug-1969 30-Nov-1966 81Jr 36 So 15 Fr Table ENROLL CLASS_CODE STU_NUM ENROLL GRADE 321452 C 324257 B 321452 A 324257 B CLASS ROOM BUS311 BUS200 BUS252 BUS311 BUS252 KLR209 KLR211 KLR209 KLR209 Below are the data types for the attributes listed in the tables above: All attributes say exactly if they need to use the char data type and all attributes say up to if they need to use the varchar data type. None of the attribute values can be null unless stated can be NULL below (so, use NOT NULL for most). Only use the integer data type for all integer values stated as integer below. Use the number(x,y) data type where the use of a number is indicated. CRS_CODE - up to 8 characters, PK in COURSE, FK in CLASS CRS_DESCRIPTION - up to 35 characters CRS_CREDIT- an integer in range of (1, 2, 3, 4), default 3 CLASS_CODE-a 5-digit number, PK in CLASS, PK and FK in ENROLL CLASS_SECTION - an integer in range of (1, 2, 3, 4) CLASS TIME - up to 25 characters CLASS ROOM - exactly 6 characters (can be NULL) STU_NUM- an integer, PK in STUDENT, PK and FK in ENROLL STU_LNAME - up to 35 characters STU_FNAME - up to 30 characters STU_INIT - exactly one character (can be NULL) STU_DOB - date STU_HRS- an integer (greater than or equal to 0 and less or equal to than 400), default 0 STU_CLASS-exactly 2 characters in range of ('Fr', 'So, Jr, Sr") default 'Fr' STU_GPA - a number with 2 decimal places from 0.00 to 4.00, default 0.00 STU_PHONE - exactly 4 characters (can be NULL) ENROLL_GRADE - exactly 1 character in range of ('A', B, C, D, F", "W'), default W NOTE: Do NOT use on delete cascade for any foreign key constraints Questions Open the M5HWstart.sql file in the 281files > Module5 folder using Notepad or Notepad++ or TextEdit (MAC). As you can see, the file has been populated with some initial REM comments and other SQL commands for your convenience. Study the contents of this file. 1. Create Tables (10 points) The first two (2) tables [COURSE and CLASS] have been created for you and the SQL code is in the M5HWstart.sql file for you to study and understand. You will need to complete SQL CREATE TABLE statements for the STUDENT and ENROLL tables, using proper primary key constraints, foreign key constraints and other types of constraints (such as NOT NULL, CHECK, etc.) as dictated in the data types section above. NOTE: You should test your commands one by one first in your LiveSQL SQL Worksheet area to verify each works correctly and produces the correct output (make sure the COURSE and CLASS tables are in your schema before doing your tests). Once this is done, then paste the SQL create command from the SQL Worksheet area in LiveSQL into your M5HW start.sql file. You will later upload your entire MSHWstart.sql file into LiveSQL and execute the contents of this file and put the complete results into a Word document called M5HW start.docx for submission, just as you did in last week's homework. IMPORTANT: You may have to use the drop table command to test your code. Include all defaults, constraints, foreign keys, check statements, etc. in one create table command for each table (i.e., no alter table commands are allowed for this lab). 2. Insert Data into Tables (5 points) Once you have all 4 tables created successfully, you will next work to create SQL commands to insert the data (given above) for each table one record at a time into the M5HWstart.sql file where indicated. Be sure to verify that each works in the LiveSQL SQL worksheet area before appending it to MSHWstart.sql file. The attributes in the INSERT command need to be in the same order as they were listed in the CREATE command for each table. Any attributes defined as char, varchar or date need to have their values in single quotes in the INSERT statements. The INSERT command for the first record of each table has been provided for you in the M5HW'start.sql file for your convenience and study. 3. Extract/Modify Data from Tables (15 points) Now that we have our tables with some data in them, let's create SQL commands to do the following (be sure to verify that each works in the LiveSQL SQL worksheet area before appending it to the MSHWstart.sql file): 1. Write the SELECT command to display all records in the COURSE table 2. Write the DESC command to show all attribute data types in COURSE table 3. Write the SELECT command to display all records in the CLASS table 4. Write the DESC command to show all attribute data types in CLASS table 5. Write the SELECT command to display all records in the STUDENT table 6. Write the DESC command to show all attribute data types in STUDENT table 7. Write the SELECT command to display all records in the ENROLL table 8. Write the DESC command to show all attribute data types in ENROLL table 9. Write the SELECT command to display all attributes of the record of the student whose STU_NUM is '324299 from the STUDENT table 10. Write the SELECT command to display the last name only of students who have a GPA between 2.0 and 2.8 (inclusive) from the STUDENT table 11. Write the SELECT command to display the grades and student number only of those students who have a grade of 'C' from the ENROLL table 12. Write the UPDATE command to change the grade from a C to a B for student 321452 and class code 10014. 13. Write the SELECT command to verify your change for the student's whose grade was changed in the previous question. 14. Write the DELETE command to remove the class code 10020 from the CLASS table. 15. Write the SELECT command to verify that the class code was removed in the previous question. Upload and Run Your MSHWstart.sql Script File in LiveSQL and Save Results in MSHWstart.docx Word Document Now that you have all of your SQL commands in your M5HW start.sql file, you will need to run or execute the entire contents of this file (which should now include all commands for the creates and inserts above) from within LiveSQL. Log out of LiveSQL and back into it again to clear your previous work. Click the Upload Script option in the top right corner. A new window should appear. Use the browse option to find and select your MSHWstart.sql script file you saved to your desktop and completed with your SQL create and insert commands above. Give the Script a unique name and description. Click the green Upload Script button in the bottom right of this window. Your script will be uploaded and saved permanently for you in your LiveSQL account. Next, run or execute the M5HWstart.sql script file by clicking on the green Run Script button. Click the green Perform Action(s) confirmation if prompted (do not select to drop or remove anything). This may take a moment or two... a new window will pop up when done with the script results. Make sure there are no errors and that you have proper outputs. Both the SQL command AND corresponding output should appear. Copy and paste the contents of this entire window into your M5HWstart.docx Word document. Make sure your Word document includes your name, date, assignment number, and class in the header. *** Please do NOT click on the Download CSV option or submit this CSV file for grading. Some of the formatting may not transfer and notice that the semi-colons are stripped from the commands. This is fine as long as the SQL command and output is present and readable. WHAT TO SUBMIT Turn in 2 files: the M5HWstart.sql script file that contains all of your SQL commands and comment in it and the M5HWstart.docx Word document that contains the output from executing the script file in it Submit these two (2) files to the course by the stated deadline.
Step by Step Solution
There are 3 Steps involved in it
Step: 1

Get Instant Access to Expert-Tailored Solutions
See step-by-step solutions with expert insights and AI powered tools for academic success
Step: 2

Step: 3

Ace Your Homework with AI
Get the answers you need in no time with our AI-driven, step-by-step assistance
Get Started


