Answered step by step
Verified Expert Solution
Question
1 Approved Answer
iPhone Production Standards Element ID Work Element Decription Precedence A Fixture and Secure the rear case (base) --- B Install the Lightning plug connector assembly

| iPhone Production Standards | ||
| Element ID | Work Element Decription | Precedence |
| A | Fixture and Secure the rear case (base) | --- |
| B | Install the Lightning plug connector assembly into the rear case (base) | A |
| C | Affix (fasten) the lightning connector assembly; 4 screws | B |
| D | Install the Power Button | A |
| E | Install 3 side buttons (Mute switch and volume controlS) | A |
| F | Install the Power & Volume button flex cable assembly | D,E |
| G | Prepare the Wifi antenna assy | --- |
| H | Install and fasten Blue tooth antenna PCBA assy | F |
| J | Secure/affix wifi and Bluetooth assemblies with metal bracket | G,H |
| K | install the taptic engine (vibrations & sensory motor) and secure the metal bracket | F |
| L | connect the side buttons to the power & volume flex cable | C,K |
| M | secure the button and cable assembly with 2 metal brackets and screws | L |
| N | Install the rear facing camera assembly (includes flex cable) | L |
| O | Install the front facing & infrared camera assembly (includes flex cable) | L |
| P | Install upper speaker assembly | J,O |
| Q | Quality check! Ensure proper fastening & function of the side buttons, toggle, Power, Vibration) | M,N,P |
| R | Prepare the SIM card tray and ejection mechanism/assembly | --- |
| S | Install Logic board PCBA_1 | Q |
| T | install Logic Board PCBA_2 | Q |
| U | Connect the rear facing camera flex cable to PCBA_1 | S |
| V | Connect the front facing camera with infrared camera assembly and IR flex cable to PCBA_2 | R,T |
| W | Connect the power switch/volume flex cable to PCBA_1 | S |
| X | Secure all cable connections with fasteners | U,V,W |
| Y | LCD screen & digitizer assembly is prepared by removing protective foils and attaching LCD to the digitizer via 4 screws | --- |
| Z | Attach and Secure (with 2 screws) the home button assembly within the LCD screen frame (hole provided). | --- |
| AA | Install front facing camera's flex cable assembly | Y,Z |
| BB | Install microphone and bottom speaker assembly and secure with metal bracket + 3 screws | R,AA |
| CC | Battery & Charging coil assembly is prepared by applying double-sided adhesive strip to both the battery assembly and the charging coil assembly. | --- |
| DD | Install (adhere) the charging coil onto the battery pack | CC |
| EE | Adhere the battery/coil assembly into the case (base) by press/hold allowing the adhesive to settle. | DD |
| FF | Connect the LCD screen to the logic boards_PCBA_1/2 & secure with metal plates (2 plates) (6 screws) | BB,EE |
| GG | Connect the home button flex cable to the logic board_PCBA | FF |
| HH | insert waterproofing gaskets | GG |
| JJ | Press/insert SIM card tray into side location of base/case | HH |
| KK | Snap-press together the base/case and LCD assembly to become an enclosed/finished assembly | X,JJ |
| LL | Secure the overall assembly with 2 screws in the lower end of the base/case assembly | KK |
| MM | Power up and test/inspect functionality of: screen touch activation, sounds, antennas, location services, swiping & setting of app preferences, battery health, cameras, utilities, and calling (send/receive), 360 Visual Check | LL |
| OO | Place phone into the fibreboard crate for transit to packaging depot (3rd party packager) | MM |
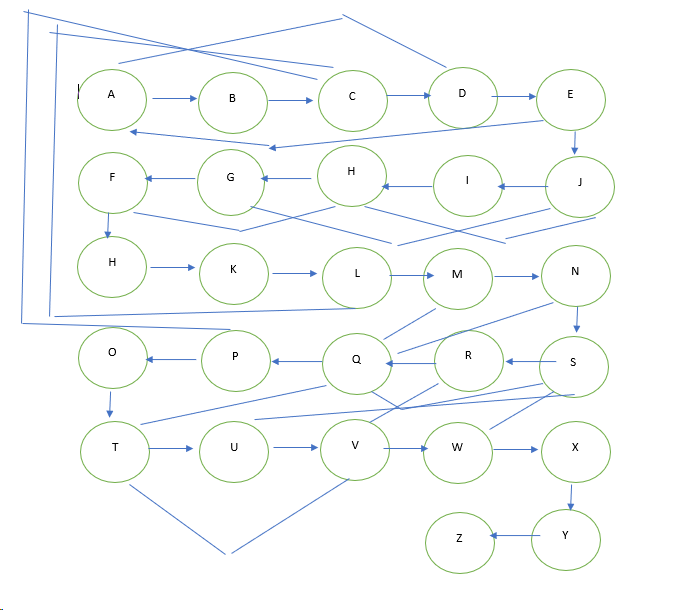
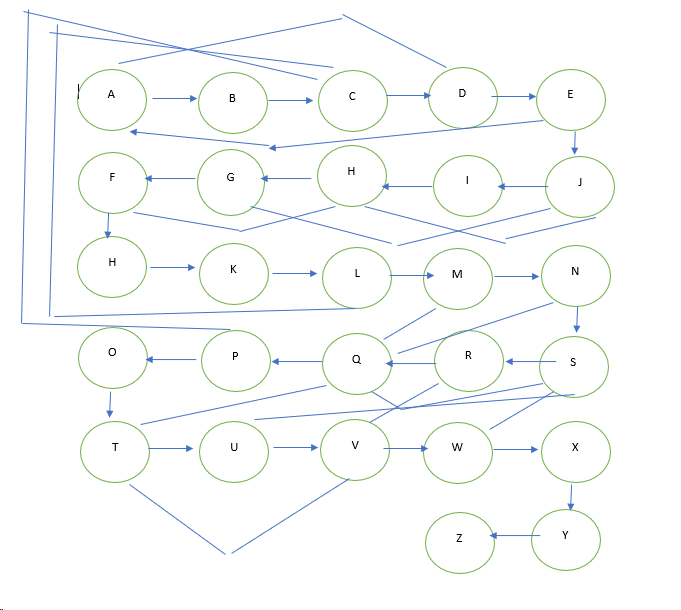
From the above table information, draw a precedence work flowchart to show activities or tasks in project, along with their relationships and dependencies. The purpose of the precedence diagram is to visually illustrate the order in which activities should be performed to make an iPhone production successfully. The flow chart should be in the below picture pattern.


Step by Step Solution
There are 3 Steps involved in it
Step: 1

Get Instant Access to Expert-Tailored Solutions
See step-by-step solutions with expert insights and AI powered tools for academic success
Step: 2

Step: 3

Ace Your Homework with AI
Get the answers you need in no time with our AI-driven, step-by-step assistance
Get Started


