Answered step by step
Verified Expert Solution
Question
1 Approved Answer
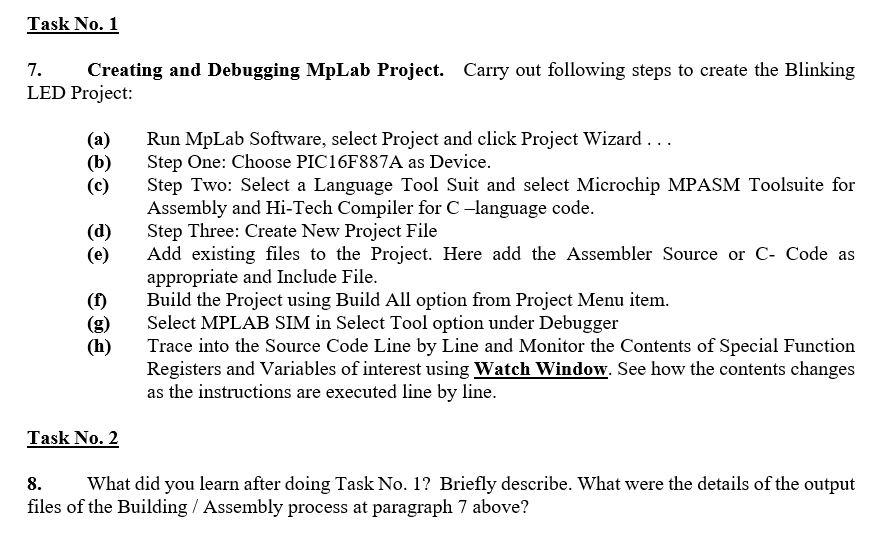
ONLY GIVE ANSWER FOR TASK 2 Task No. 1 7. Creating and Debugging MpLab Project. Carry out following steps to create the Blinking LED Project:

ONLY GIVE ANSWER FOR TASK 2
Task No. 1 7. Creating and Debugging MpLab Project. Carry out following steps to create the Blinking LED Project: (a) (b) (d) Run MpLab Software, select Project and click Project Wizard ... Step One: Choose PIC16F887A as Device. Step Two: Select a Language Tool Suit and select Microchip MPASM Toolsuite for Assembly and Hi-Tech Compiler for C-language code. Step Three: Create New Project File Add existing files to the Project. Here add the Assembler Source or C- Code as appropriate and Include File. Build the Project using Build All option from Project Menu item. Select MPLAB SIM in Select Tool option under Debugger Trace into the Source Code Line by Line and Monitor the Contents of Special Function Registers and Variables of interest using Watch Window. See how the contents changes as the instructions are executed line by line. (f) (h) Task No. 2 8. What did you learn after doing Task No. 1? Briefly describe. What were the details of the output files of the Building / Assembly process at paragraph 7 above? Task No. 1 7. Creating and Debugging MpLab Project. Carry out following steps to create the Blinking LED Project: (a) (b) (d) Run MpLab Software, select Project and click Project Wizard ... Step One: Choose PIC16F887A as Device. Step Two: Select a Language Tool Suit and select Microchip MPASM Toolsuite for Assembly and Hi-Tech Compiler for C-language code. Step Three: Create New Project File Add existing files to the Project. Here add the Assembler Source or C- Code as appropriate and Include File. Build the Project using Build All option from Project Menu item. Select MPLAB SIM in Select Tool option under Debugger Trace into the Source Code Line by Line and Monitor the Contents of Special Function Registers and Variables of interest using Watch Window. See how the contents changes as the instructions are executed line by line. (f) (h) Task No. 2 8. What did you learn after doing Task No. 1? Briefly describe. What were the details of the output files of the Building / Assembly process at paragraph 7 aboveStep by Step Solution
There are 3 Steps involved in it
Step: 1

Get Instant Access to Expert-Tailored Solutions
See step-by-step solutions with expert insights and AI powered tools for academic success
Step: 2

Step: 3

Ace Your Homework with AI
Get the answers you need in no time with our AI-driven, step-by-step assistance
Get Started


