Answered step by step
Verified Expert Solution
Question
1 Approved Answer
Recall that in Project 1-4, you surveyed available Azure subscription options and had the opportunity to create an Azure subscription. In this project, you'll


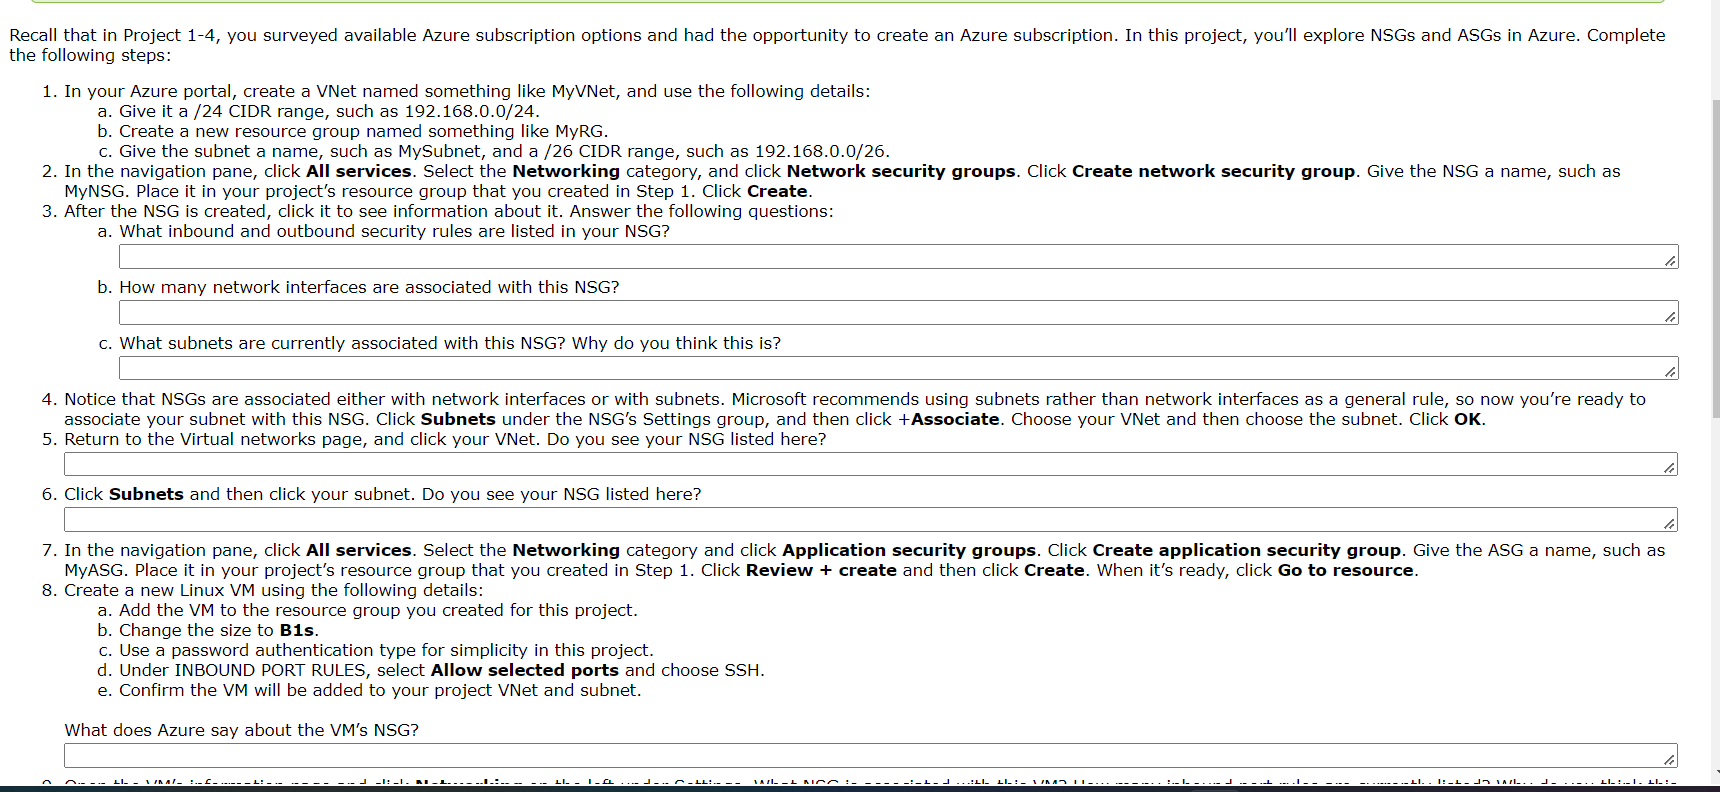
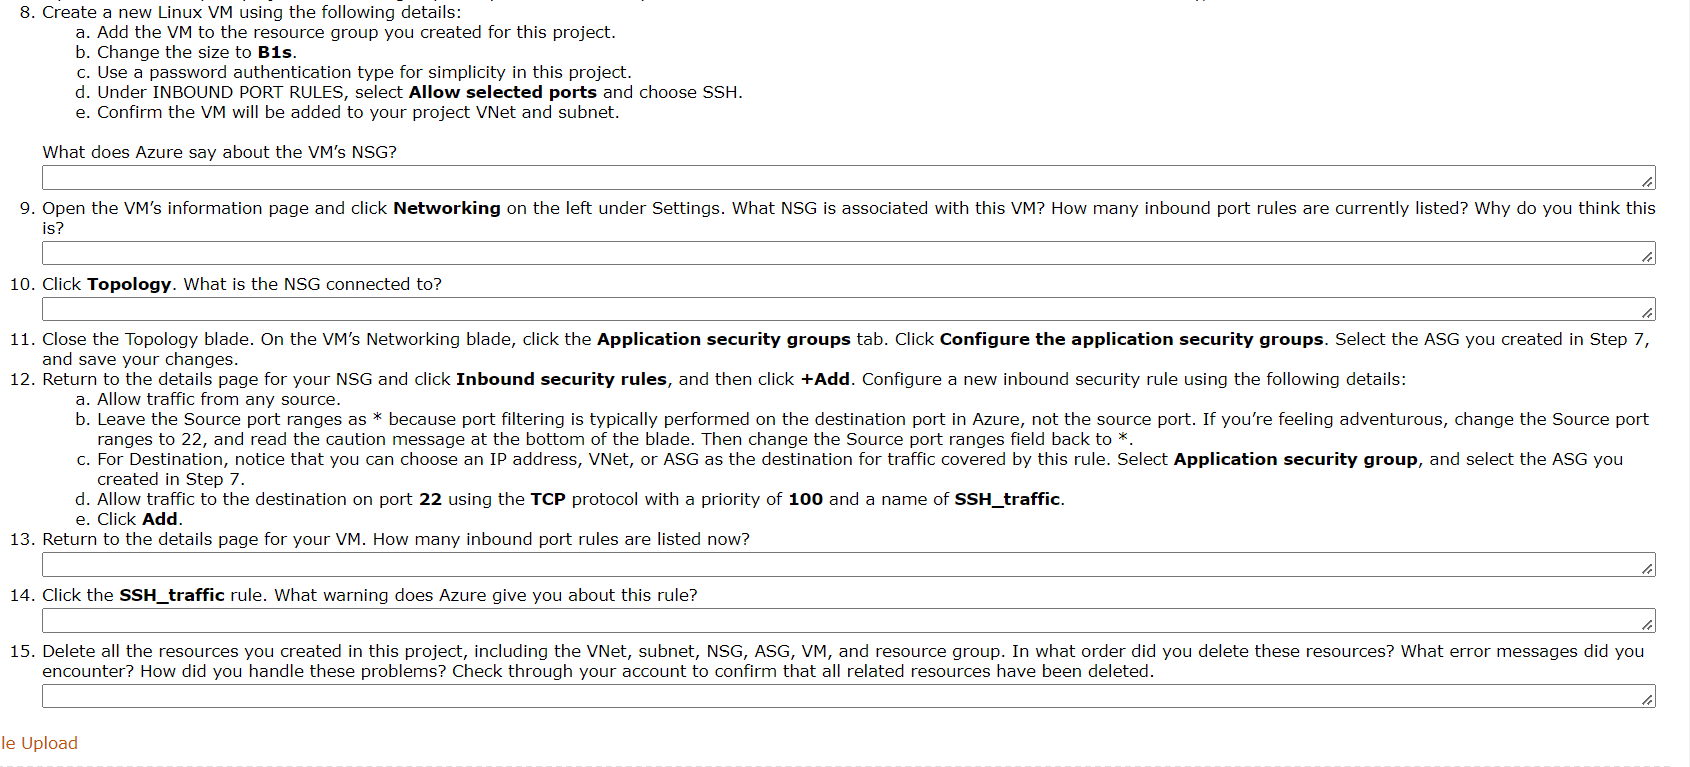
Recall that in Project 1-4, you surveyed available Azure subscription options and had the opportunity to create an Azure subscription. In this project, you'll explore NSGS and ASGs in Azure. Complete the following steps: 1. In your Azure portal, create a VNet named something like MyVNet, and use the following details: a. Give it a /24 CIDR range, such as 192.168.0.0/24. b. Create a new resource group named something like MyRG. c. Give the subnet a name, such as MySubnet, and a /26 CIDR range, such as 192.168.0.0/26. 2. In the navigation pane, click All services. Select the Networking category, and click Network security groups. Click Create network security group. Give the NSG a name, such as MyNSG. Place it in your project's resource group that you created in Step 1. Click Create. 3. After the NSG is created, click it to see information about it. Answer the following questions: a. What inbound and outbound security rules are listed in your NSG? b. How many network interfaces are associated with this NSG? c. What subnets are currently associated with this NSG? Why do you think this is? 4. Notice that NSGS are associated either with network interfaces or with subnets. Microsoft recommends using subnets rather than network interfaces as a general rule, so now you're ready to associate your subnet with this NSG. Click Subnets under the NSG's Settings group, and then click +Associate. Choose your VNet and then choose the subnet. Click OK. 5. Return to the Virtual networks page, and click your VNet. Do you see your NSG listed here? 6. Click Subnets and then click your subnet. Do you see your NSG listed here? 7. In the navigation pane, click All services. Select the Networking category and click Application security groups. Click Create application security group. Give the ASG a name, such as MyASG. Place it in your project's resource group that you created in Step 1. Click Review + create and then click Create. When it's ready, click Go to resource. 8. Create a new Linux VM using the following details: a. Add the VM to the resource group you created for this project. b. Change the size to B1s. c. Use a password authentication type for simplicity in this project. d. Under INBOUND PORT RULES, select Allow selected ports and choose SSH. e. Confirm the VM will be added to your project VNet and subnet. What does Azure say about the VM's NSG? ---- 1/NAI_ 1 L! -- LIVKA/_ _1: _I_ AL... --- LI I_FL -FLI---- MAILL NOO - J.LI -L_L L: 1/1- Il-. : L 11. - 1: _^ Da vark. LI_:__. LL:- 8. Create a new Linux VM using the following details: a. Add the VM to the resource group you created for this project. b. Change the size to B1s. c. Use a password authentication type for simplicity in this project. d. Under INBOUND PORT RULES, select Allow selected ports and choose SSH. e. Confirm the VM will be added to your project VNet and subnet. What does Azure say about the VM's NSG? 9. Open the VM's information page and click Networking on the left under Settings. What NSG is associated with this VM? How many inbound port rules are currently listed? Why do you think this is? 10. Click Topology. What is the NSG connected to? le 11. Close the Topology blade. On the VM's Networking blade, click the Application security groups tab. Click Configure the application security groups. Select the ASG you created in Step 7, and save your changes. 12. Return to the details page for your NSG and click Inbound security rules, and then click +Add. Configure a new inbound security rule using the following details: a. Allow traffic from any source. b. Leave the Source port ranges as * because port filtering is typically performed on the destination port in Azure, not the source port. If you're feeling adventurous, change the Source port ranges to 22, and read the caution message at the bottom of the blade. Then change the Source port ranges field back to *. c. For Destination, notice that you can choose an IP address, VNet, or ASG as the destination for traffic covered by this rule. Select Application security group, and select the ASG you created in Step 7. d. Allow traffic to the destination on port 22 using the TCP protocol with a priority of 100 and a name of SSH_traffic. e. Click Add. 13. Return to the details page for your VM. How many inbound port rules are listed now? 14. Click the SSH_traffic rule. What warning does Azure give you about this rule? le 15. Delete all the resources you created in this project, including the VNet, subnet, NSG, ASG, VM, and resource group. In what order did you delete these resources? What error messages did you encounter? How did you handle these problems? Check through your account to confirm that all related resources have been deleted. le Upload
Step by Step Solution
There are 3 Steps involved in it
Step: 1

Get Instant Access to Expert-Tailored Solutions
See step-by-step solutions with expert insights and AI powered tools for academic success
Step: 2

Step: 3

Ace Your Homework with AI
Get the answers you need in no time with our AI-driven, step-by-step assistance
Get Started


