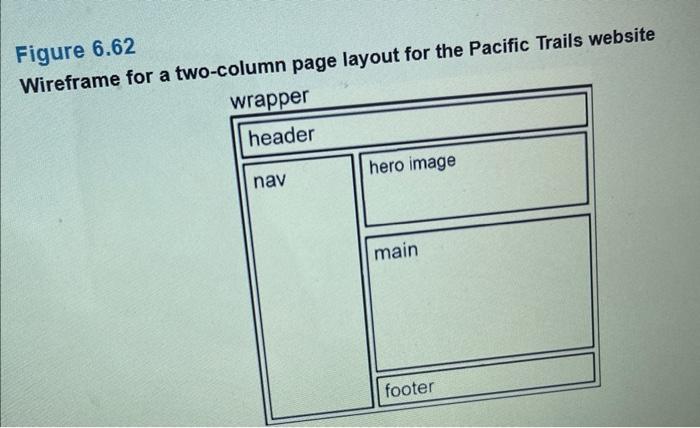
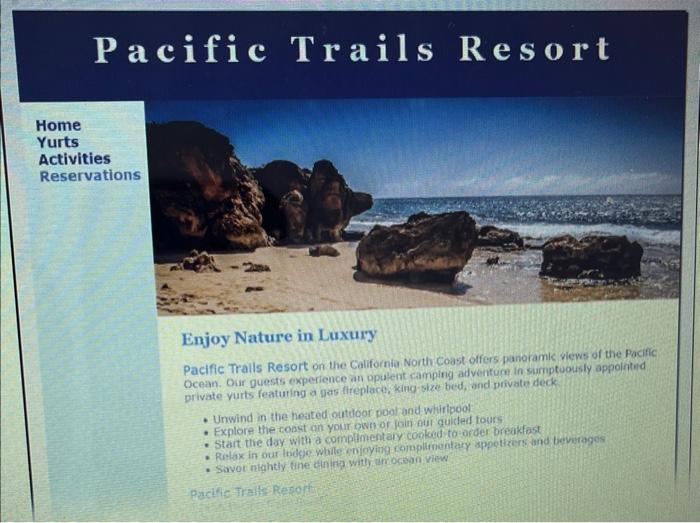
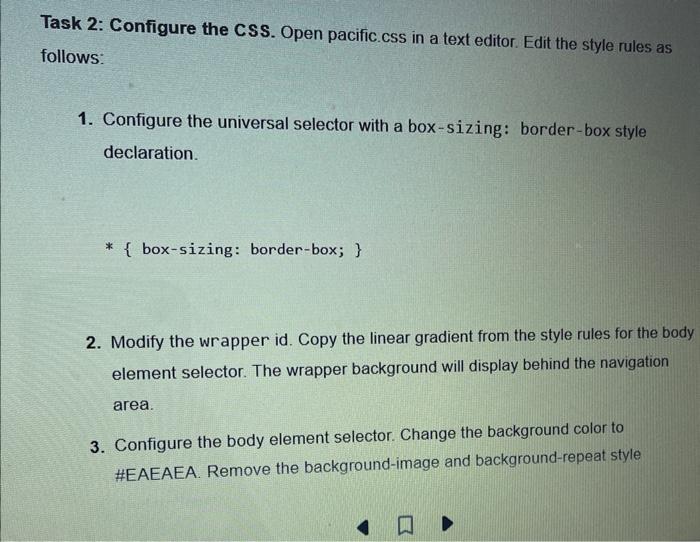
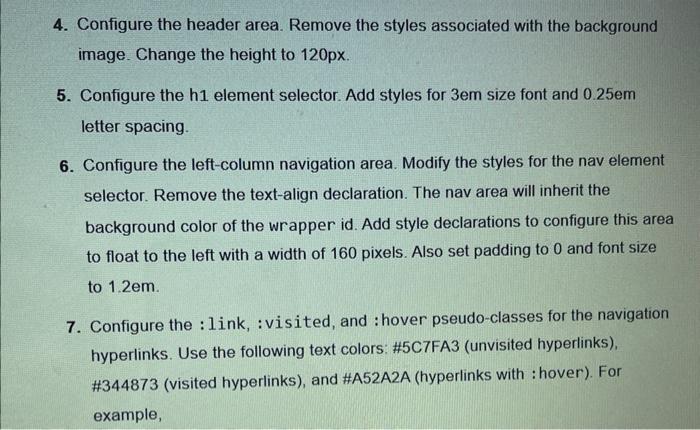
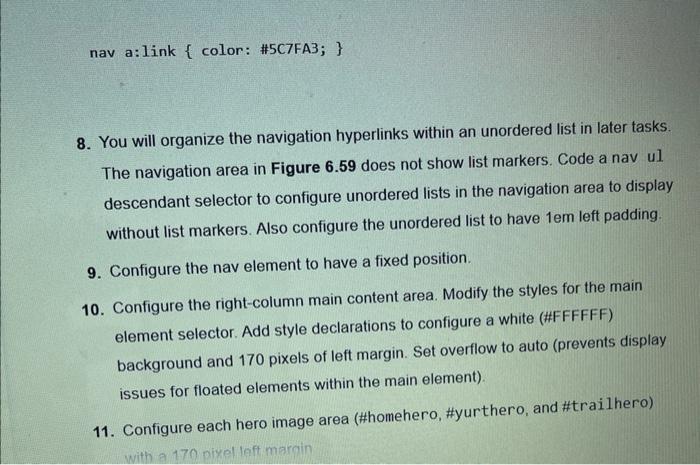
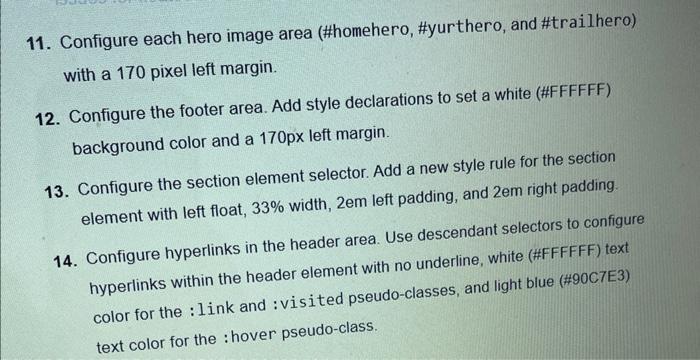
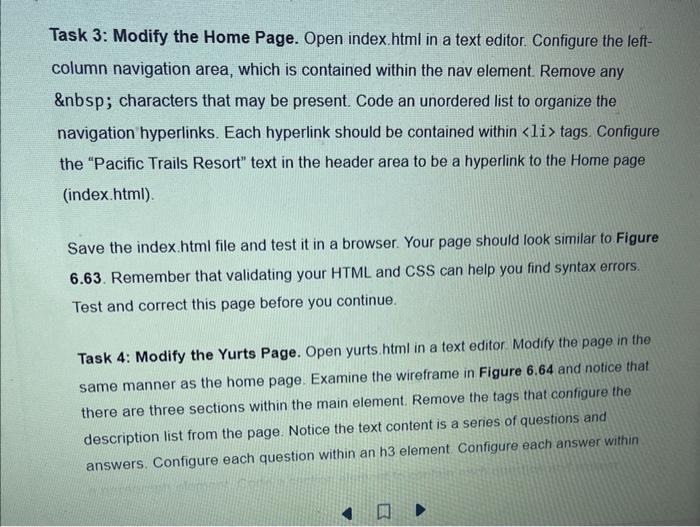
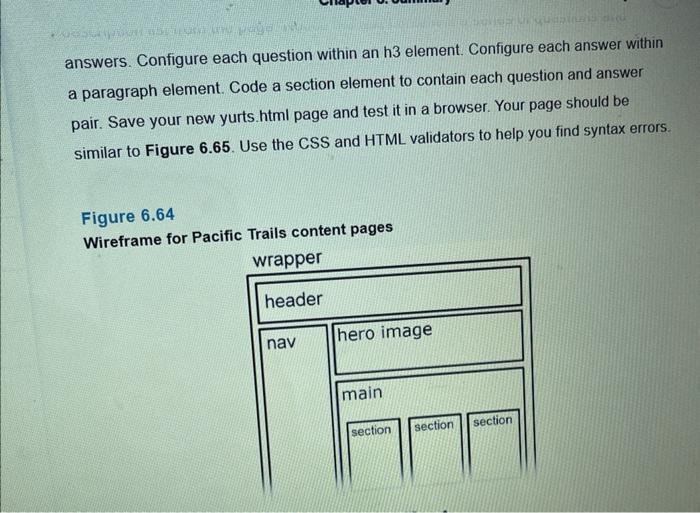
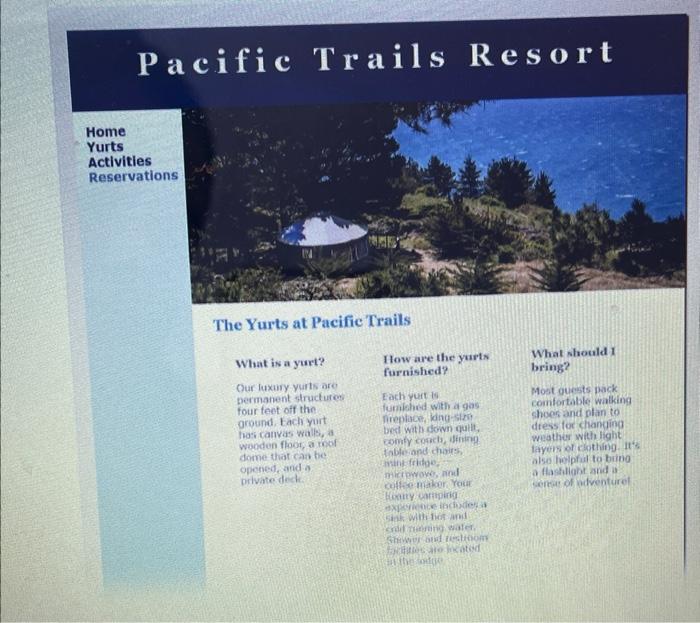
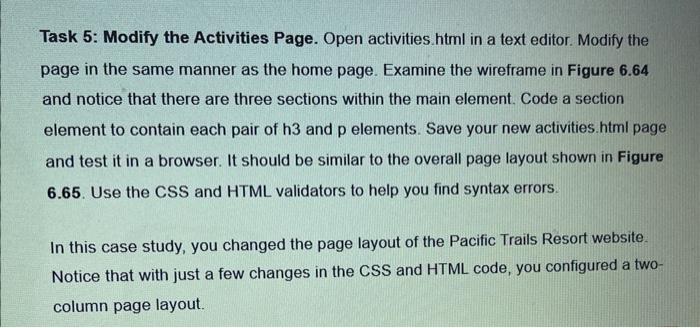
See Chapter 2 for an introduction to the Pacific Trails Resort case study. Figure 2.40 shows a site map for Pacific Trails. The pages were created in earlier chapters. In this case study, you will implement a new two-column CSS page layout. Figure 6.62 displays a wireframe for a two-column page layout with wrapper, header, nav, main content, hero image, and footer areas. You will modify the external style sheet and the Home, Yurts, and Activities pages. Use the Chapter 4 Pacific Trails website as a starting point for this case study. You have five tasks in this case study: 1. Create a new folder for the Pacific Trails case study. 2. Modify the style rules in the pacific.css file to configure a two-column page layout, as shown in Figure 6.62. 3. Modify the Home page to implement the two-column page layout, as shown in Figure 6.63. 4. Modify the Yurts page to be consistent with the Home page. 5. Modify the Activities page to be consistent with the Home page. Hands-On Practice Case Task 1: The Website Folder. Create a folder called pacific6. Copy all of the files from your Chapter 4 pacific4 folder into the pacific6 folder. You will modify the pacific css file and each web page file (index.html, yurts.html, and activities.html) to implement the two-column page layout, as shown in Figure 6.62. See the new Pacific Trails home page, as shown in Figure 6.63. Wireframe for a two-column page layout for the Pacific Trails website Figure 6.62 Enjoy Nature in Luxury Pacific Trails Resort on the California North Coast offers panoramk views of the Pacific Ocean. Our guests experience an ppulent camping adventume in sumptuously appointed private yurts featuring a jas fireplace, king-size bed, and private deck. - Unwind in the heated outctoor pooland whirtpool - Explore the const an your bwn or join ous quided tours - Start the day with a complinentary conked to-order breakfost - Rolax in ous indege whilg cmioying complienentary sppotizers and bevemeges - Sovor nightir tine cinind wity an ocean view Task 2: Configure the CSS. Open pacific.cSs in a text editor. Edit the style rules as follows: 1. Configure the universal selector with a box-sizing: border-box style declaration. *{box-sizing:border-box;} 2. Modify the wrapper id. Copy the linear gradient from the style rules for the body element selector. The wrapper background will display behind the navigation area. 3. Configure the body element selector. Change the background color to \#EAEAEA. Remove the background-image and background-repeat style 4. Configure the header area. Remove the styles associated with the background image. Change the height to 120px. 5. Configure the h1 element selector. Add styles for 3em size font and 0.25em letter spacing. 6. Configure the left-column navigation area. Modify the styles for the nav element selector. Remove the text-align declaration. The nav area will inherit the background color of the wrapper id. Add style declarations to configure this area to float to the left with a width of 160 pixels. Also set padding to 0 and font size to 1.2em. 7. Configure the :link, : visited, and : hover pseudo-classes for the navigation hyperlinks. Use the following text colors: \#5C7FA3 (unvisited hyperlinks), \#344873 (visited hyperlinks), and \#A52A2A (hyperlinks with : hover). For example, nav a: link { color: \#5C7FA3; } 8. You will organize the navigation hyperlinks within an unordered list in later tasks. The navigation area in Figure 6.59 does not show list markers. Code a nav ul descendant selector to configure unordered lists in the navigation area to display without list markers. Also configure the unordered list to have 1 em left padding. 9. Configure the nav element to have a fixed position. 10. Configure the right-column main content area. Modify the styles for the main element selector. Add style declarations to configure a white (\#FFFFFF) background and 170 pixels of left margin. Set overflow to auto (prevents display issues for floated elements within the main element). 11. Configure each hero image area (\#homehero, \#yurthero, and \#trailhero) 11. Configure each hero image area (\#homehero, \#yurthero, and \#trailhero) with a 170 pixel left margin. 12. Configure the footer area. Add style declarations to set a white (\#FFFFFF) background color and a 170px left margin. 13. Configure the section element selector. Add a new style rule for the section element with left float, 33% width, 2em left padding, and 2em right padding. 14. Configure hyperlinks in the header area. Use descendant selectors to configure hyperlinks within the header element with no underline, white (\#FFFFFF) text color for the : link and : visited pseudo-classes, and light blue (\#90C7E3) Task 3: Modify the Home Page. Open index.html in a text editor. Configure the leftcolumn navigation area, which is contained within the nav element. Remove any \ characters that may be present. Code an unordered list to organize the navigation hyperlinks. Each hyperlink should be contained within > tags. Configure the "Pacific Trails Resort" text in the header area to be a hyperlink to the Home page (index.html). Save the index.html file and test it in a browser. Your page should look similar to Figure 6.63. Remember that validating your HTML and CSS can help you find syntax errors. Test and correct this page before you continue. Task 4: Modify the Yurts Page. Open yurts.html in a text editor. Modify the page in the same manner as the home page. Examine the wireframe in Figure 6.64 and notice that there are three sections within the main element. Remove the tags that configure the description list from the page. Notice the text content is a series of questions and answers. Configure each question within an h3 element Configure each answer within answers. Configure each question within an h3 element. Configure each answer within a paragraph element. Code a section element to contain each question and answer pair. Save your new yurts. html page and test it in a browser. Your page should be similar to Figure 6.65. Use the CSS and HTML validators to help you find syntax errors. Figure 6.64 Wireframe for Pacific Trails content pages The Yurts at Pacific Trails Wlat is a yurt? How are the yurts What should 1 furnished? bring? Our luxary yurts are bermanent itructures Each yurt 19 Most ouensts pack comfortable waiking four feet off the Cumahed with a gas: ground, tach yurt. shoer and ptan to hat canvas wals, as besi with down gatli. deess tor clianging wooden flood, a toof comiy cosels, Itring? weather withlight dome that caa be inbleand chares. opened, and a. thine frldpe, mictowoves and also lieipfil to bino privatedeck. a flastilinh and is culter Hiaker Yout fontry martipinio axprinace ipcioder at Siats Wili hos and cond ratematie waleShapue abd tiehtoom raddanes me micatod. Task 5: Modify the Activities Page. Open activities.html in a text editor. Modify the page in the same manner as the home page. Examine the wireframe in Figure 6.64 and notice that there are three sections within the main element. Code a section element to contain each pair of h3 and p elements. Save your new activities. html page and test it in a browser. It should be similar to the overall page layout shown in Figure 6.65. Use the CSS and HTML validators to help you find syntax errors. In this case study, you changed the page layout of the Pacific Trails Resort website. Notice that with just a few changes in the CSS and HTML code, you configured a twocolumn page layout
