

Answered step by step
Verified Expert Solution
Question
1 Approved Answer
The code import javax.swing.*; import java.awt.*; import java.awt.event.*; import java.io.File; import java.awt.image.PixelGrabber; import java.awt.image.MemoryImageSource; class IMP implements MouseListener{ JFrame frame; JPanel mp; JButton start; JScrollPane
The code
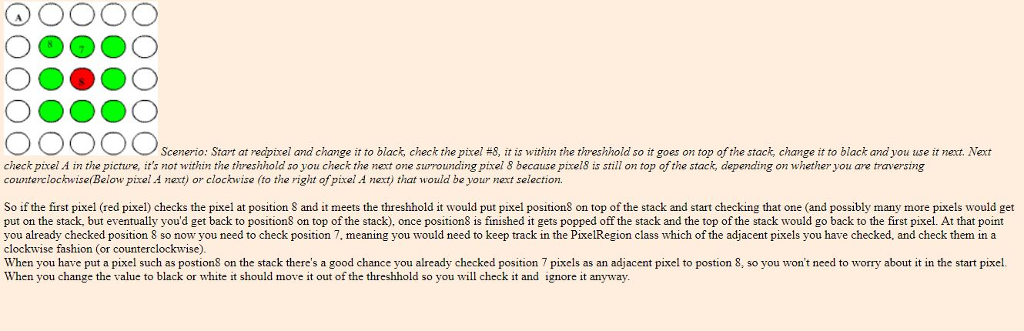
import javax.swing.*; import java.awt.*; import java.awt.event.*; import java.io.File; import java.awt.image.PixelGrabber; import java.awt.image.MemoryImageSource; class IMP implements MouseListener{ JFrame frame; JPanel mp; JButton start; JScrollPane scroll; JMenuItem openItem, exitItem, resetItem; Toolkit toolkit; File pic; ImageIcon img; int colorX, colorY; int [] pixels; int [] results; //Instance Fields you will be using below //This will be your height and width of your 2d array int height=0, width=0; //your 2D array of pixels int picture[][]; /* * In the Constructor I set up the GUI, the frame the menus. The open pulldown * menu is how you will open an image to manipulate. */ IMP() { toolkit = Toolkit.getDefaultToolkit(); frame = new JFrame("Image Processing Software by Hunter"); JMenuBar bar = new JMenuBar(); JMenu file = new JMenu("File"); JMenu functions = getFunctions(); frame.addWindowListener(new WindowAdapter(){ @Override public void windowClosing(WindowEvent ev){quit();} }); openItem = new JMenuItem("Open"); openItem.addActionListener(new ActionListener(){ @Override public void actionPerformed(ActionEvent evt){ handleOpen(); } }); resetItem = new JMenuItem("Reset"); resetItem.addActionListener(new ActionListener(){ @Override public void actionPerformed(ActionEvent evt){ reset(); } }); exitItem = new JMenuItem("Exit"); exitItem.addActionListener(new ActionListener(){ @Override public void actionPerformed(ActionEvent evt){ quit(); } }); file.add(openItem); file.add(resetItem); file.add(exitItem); bar.add(file); bar.add(functions); frame.setSize(600, 600); mp = new JPanel(); mp.setBackground(new Color(0, 0, 0)); scroll = new JScrollPane(mp); frame.getContentPane().add(scroll, BorderLayout.CENTER); JPanel butPanel = new JPanel(); butPanel.setBackground(Color.black); start = new JButton("start"); start.setEnabled(false); start.addActionListener(new ActionListener(){ @Override public void actionPerformed(ActionEvent evt){ fun2(); } }); butPanel.add(start); frame.getContentPane().add(butPanel, BorderLayout.SOUTH); frame.setJMenuBar(bar); frame.setVisible(true); } /* * This method creates the pulldown menu and sets up listeners to selection of the menu choices. If the listeners are activated they call the methods * for handling the choice, fun1, fun2, fun3, fun4, etc. etc. */ private JMenu getFunctions() { JMenu fun = new JMenu("Functions"); JMenuItem firstItem = new JMenuItem("MyExample - fun1 method"); firstItem.addActionListener(new ActionListener(){ @Override public void actionPerformed(ActionEvent evt){fun1();} }); //fun.add(firstItem); fun.add(firstItem); return fun; } /* * This method handles opening an image file, breaking down the picture to a one-dimensional array and then drawing the image on the frame. * You don't need to worry about this method. */ private void handleOpen() { img = new ImageIcon(); JFileChooser chooser = new JFileChooser(); int option = chooser.showOpenDialog(frame); if(option == JFileChooser.APPROVE_OPTION) { pic = chooser.getSelectedFile(); img = new ImageIcon(pic.getPath()); } width = img.getIconWidth(); height = img.getIconHeight(); JLabel label = new JLabel(img); label.addMouseListener(this); pixels = new int[width*height]; results = new int[width*height]; Image image = img.getImage(); PixelGrabber pg = new PixelGrabber(image, 0, 0, width, height, pixels, 0, width ); try{ pg.grabPixels(); }catch(InterruptedException e) { System.err.println("Interrupted waiting for pixels"); return; } for(int i = 0; i> 24) & 0xff; temp[1] = (pixel >> 16) & 0xff; temp[2] = (pixel >> 8) & 0xff; temp[3] = (pixel ) & 0xff; return temp; } /* * This method takes an array of size 4 and combines the first 8 bits of each to create one integer. */ private int getPixels(int rgb[]) { int alpha = 0; int rgba = (rgb[0]
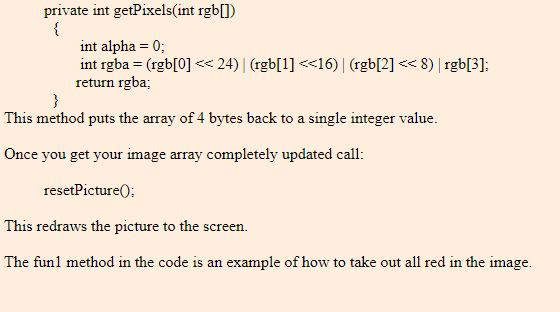
Download Imp java and create a new project with the stubbed code. About the Software Imp is the shell of a image processing application. It will allow you to open an image, jpg or (I think, but don't really remember) gif file Once an image is open it breaks down each pixel of the image into first a single dimensional array, and then converts that into a 2D array of pixels. Each pixel in the 2D array, which is called "pixels" in the array is an integer value, a large integer value that is of no use to you as just an int. Embedded into each integer value is a one byte value for red, green, blue and a alpha channel (transparency). In order to get the values of a pixel at some random location, let's say X-100, Y 200. you would request an int from the array: int currentPixel-picture[Y]X]; notice Y is first, Y is the height of the image, X is the width. Then in order to breakdown that pixel to it's red, green, blue, alpha channel you need to set up an array and send that int to getPixelArray method like this int rgbArray[] = new int[4] rgbArray = getPixelArray(currentPixel): Now the rgbArray has the value for Red in rgbArray[1]. Green in rgbArray[2], and Blue in rgbArray[2]. rgbArray[0] is transparency, don't mess with this for now, it should always come back as 255. If yoru switch it to 0 your pixel becomes transparent. Here is how the integer gets broken down to 4 bytes, it's bit twiddling private int [ getPixelArray int pixel) int temp[] = new int[4] temp[0] = (pixel >> 24) & 0xff, temp[1] (pixel >> 16) & 0xff. temp[2] = (pixel >> 8) & 0xff. temp[3] = (pixel ) & 0xff. return temp Then you get a rgbArray back from this method, do tests, manipulate based on values, and when you're ready to put it back to an int you can put back into an array that can be drawn to the screen you call this method Step by Step Solution
There are 3 Steps involved in it
Step: 1

Get Instant Access to Expert-Tailored Solutions
See step-by-step solutions with expert insights and AI powered tools for academic success
Step: 2

Step: 3
Ace Your Homework with AI
Get the answers you need in no time with our AI-driven, step-by-step assistance
Get Started
Seven Databases In Seven Weeks A Guide To Modern Databases And The NoSQL Movement
Authors: Eric Redmond ,Jim Wilson
1st Edition
1934356921, 978-1934356920