Answered step by step
Verified Expert Solution
Question
1 Approved Answer
Timers in LPC2148 Code: #include void initClocks(void); // Setup PLL and Clock Frequency void initTimer0(void); // Setup and Initialize Timer0 void delay_ms(unsigned int counts); //
Timers in LPC2148 Code:
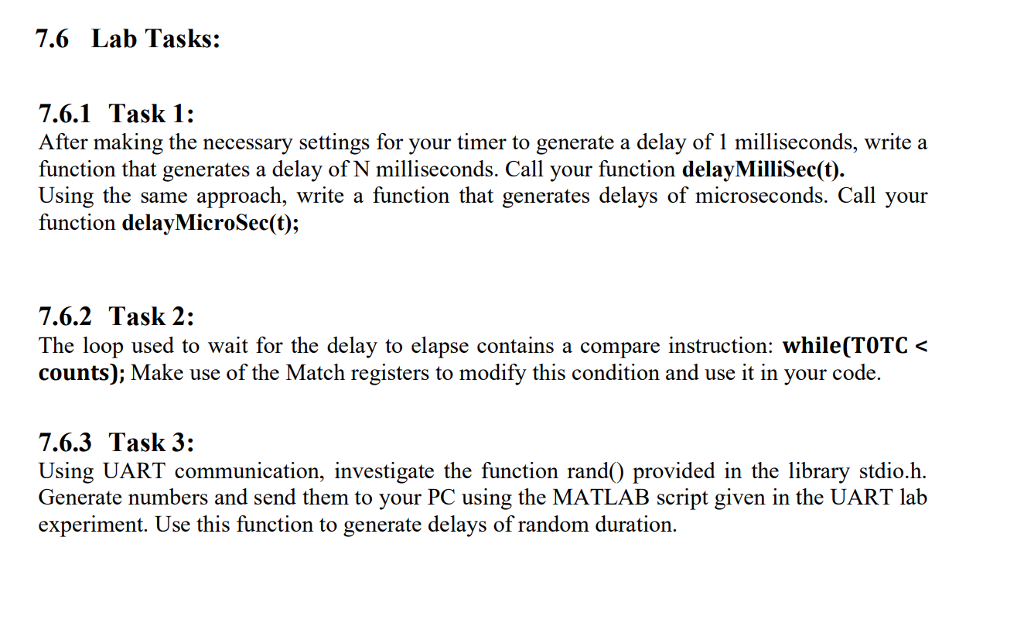
#include7.6 Lab Tasks: 7.6.1Task 1: After making the necessary settings for your timer to generate a delay of 1 milliseconds, write a function that generates a delay of N milliseconds. Call your function delayMilliSec(t). Using the same approach, write a function that generates delays of microseconds. Call your function delayMicroSec(t); 7.6.2 Task 2: The loop used to wait for the delay to elapse contains a compare instruction: while(TOTC< counts); Make use of the Match registers to modify this condition and use it in your code. 7.6.3 Task 3: Using UART communication, investigate the function rand0 provided in the library stdio.h. Generate numbers and send them to your PC using the MATLAB script given in the UART lab experiment. Use this function to generate delays of random duration. 7.6 Lab Tasks: 7.6.1Task 1: After making the necessary settings for your timer to generate a delay of 1 milliseconds, write a function that generates a delay of N milliseconds. Call your function delayMilliSec(t). Using the same approach, write a function that generates delays of microseconds. Call your function delayMicroSec(t); 7.6.2 Task 2: The loop used to wait for the delay to elapse contains a compare instruction: while(TOTC< counts); Make use of the Match registers to modify this condition and use it in your code. 7.6.3 Task 3: Using UART communication, investigate the function rand0 provided in the library stdio.h. Generate numbers and send them to your PC using the MATLAB script given in the UART lab experiment. Use this function to generate delays of random durationvoid initClocks(void); // Setup PLL and Clock Frequency void initTimer0(void); // Setup and Initialize Timer0 void delay_ms(unsigned int counts); // Generate delay int main(void) { initClocks(); //Initialize CPU and Peripheral Clocks @ 60Mhz initTimer0(); //Initialize Timer0 IO0DIR = (1<<10); //Configure Pin P0.10 as Output while(1) { IO0SET = (1<<10); //Turn ON LED delay_ms(1000); IO0CLR = (1<<10); //Turn LED OFF delay_ms(1000); } //return 0; } void initTimer0(void) { T0CTCR = 0x0; //Set Timer 0 into Timer Mode T0PR = 59999; //Increment T0TC at every 60000 clock cycles //Count begins from zero hence subtracting 1 //60000 clock cycles @60Mhz = 1 mS T0TCR = 0x02; //Reset Timer } void delay_ms(unsigned int counts) //Using Timer0 { T0TCR = 0x02; //Reset Timer T0TCR = 0x01; //Enable timer while(T0TC < counts);//wait until TC reaches the desired delay T0TCR = 0x00; //Disable timer } void initClocks(void) { PLL0CON = 0x01; //Enable PLL PLL0CFG = 0x24; //Multiplier and divider setup PLL0FEED = 0xAA; //Feed sequence PLL0FEED = 0x55; while(!(PLL0STAT & 0x00000400)); //is locked? PLL0CON = 0x03; //Connect PLL after PLL is locked PLL0FEED = 0xAA; //Feed sequence PLL0FEED = 0x55; VPBDIV = 0x01; // PCLK is same as CCLK i.e.60 MHz }
Step by Step Solution
There are 3 Steps involved in it
Step: 1

Get Instant Access to Expert-Tailored Solutions
See step-by-step solutions with expert insights and AI powered tools for academic success
Step: 2

Step: 3

Ace Your Homework with AI
Get the answers you need in no time with our AI-driven, step-by-step assistance
Get Started


