Question: Use Android Studio to complete this assignment: Use this code and modify on it This is the assignment Final answer Output screenshot :- This assignment
Use Android Studio to complete this assignment:
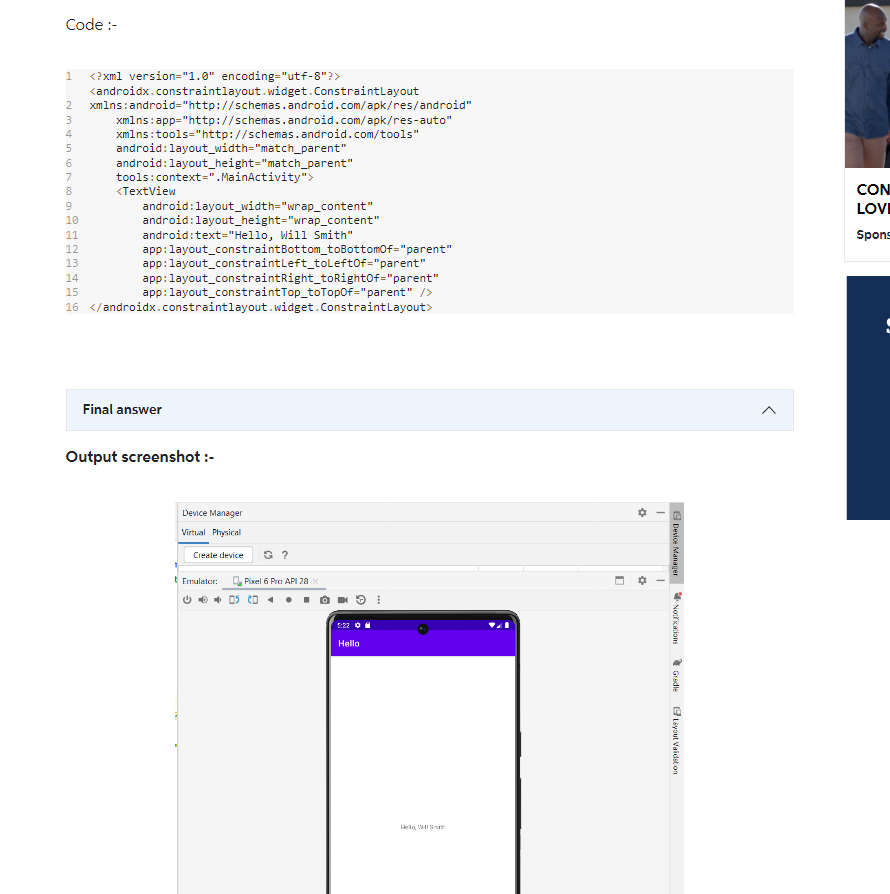
Use this code and modify on it

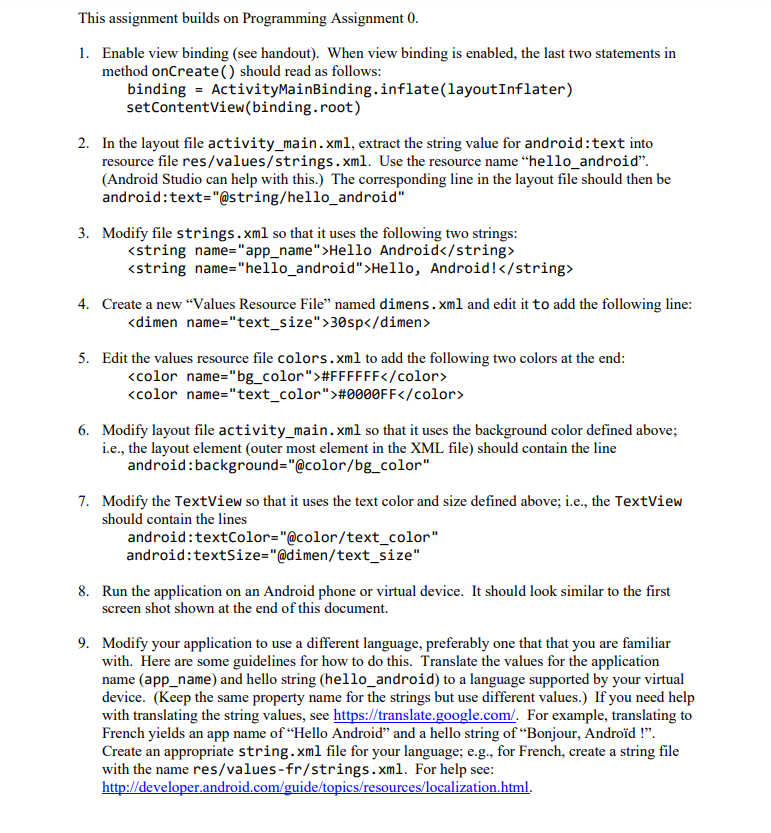
This is the assignment


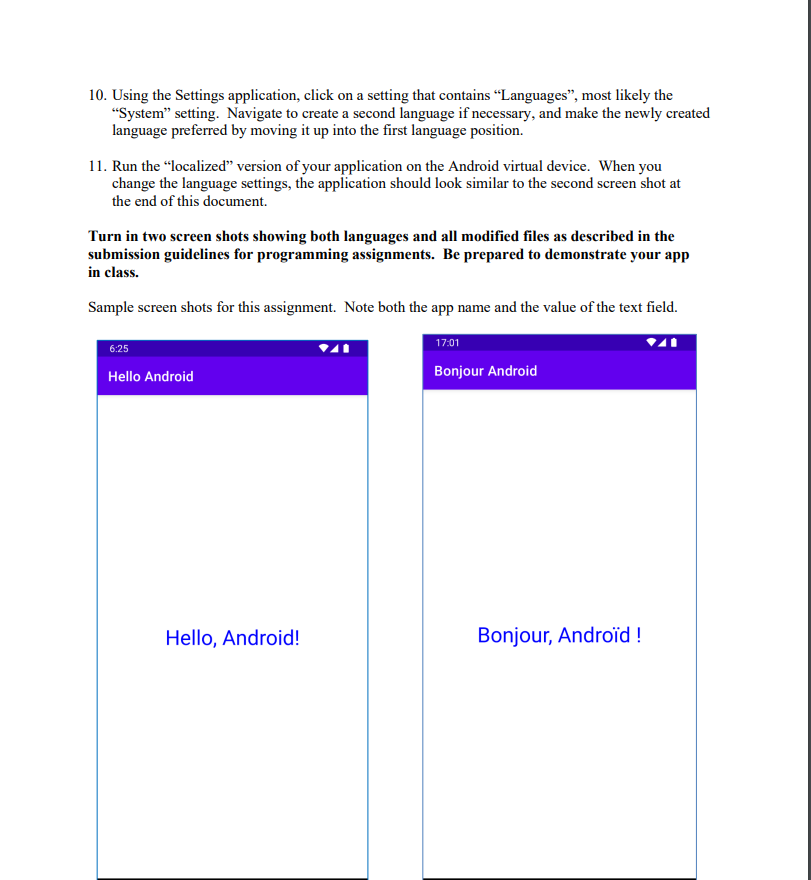
Final answer Output screenshot :- This assignment builds on Programming Assignment 0 . 1. Enable view binding (see handout). When view binding is enabled, the last two statements in method oncreate () should read as follows: binding = ActivityMainBinding.inflate(layoutInflater) setContentView(binding.root) 2. In the layout file activity_main.xml, extract the string value for android:text into resource file res/values/strings. xml. Use the resource name "hello_android". (Android Studio can help with this.) The corresponding line in the layout file should then be android:text="@string/hello_android" 3. Modify file strings. xml so that it uses the following two strings: string name="app_name" Hello Android Hello, Android! / string 4. Create a new "Values Resource File" named dimens. xml and edit it to add the following line: dimen name="text_size" >30sp/ dimen 5. Edit the values resource file colors. xml to add the following two colors at the end: color name="bg_color" #FFFFFF/ color color name = "text_color " "\#000FF /color 6. Modify layout file activity_main. xml so that it uses the background color defined above; i.e., the layout element (outer most element in the XML file) should contain the line android: background="@color/bg_color" 7. Modify the TextView so that it uses the text color and size defined above; i.e., the TextView should contain the lines android:textColor="@color/text_color" android:textSize="@dimen/text_size" 8. Run the application on an Android phone or virtual device. It should look similar to the first screen shot shown at the end of this document. 9. Modify your application to use a different language, preferably one that that you are familiar with. Here are some guidelines for how to do this. Translate the values for the application name (app_name) and hello string (hello_android) to a language supported by your virtual device. (Keep the same property name for the strings but use different values.) If you need help with translating the string values, see https://translate.google.com/. For example, translating to French yields an app name of "Hello Android" and a hello string of "Bonjour, Androd !". Create an appropriate string. xml file for your language; e.g., for French, create a string file with the name res/values-fr/strings .xml. For help see: http://developer.android.com/guide/topics/resources/localization.html. 10. Using the Settings application, click on a setting that contains "Languages", most likely the "System" setting. Navigate to create a second language if necessary, and make the newly created language preferred by moving it up into the first language position. 11. Run the "localized" version of your application on the Android virtual device. When you change the language settings, the application should look similar to the second screen shot at the end of this document. Turn in two screen shots showing both languages and all modified files as described in the submission guidelines for programming assignments. Be prepared to demonstrate your app in class. Sample screen shots for this assignment. Note both the app name and the value of the text field
Step by Step Solution
There are 3 Steps involved in it

Get step-by-step solutions from verified subject matter experts


