Answered step by step
Verified Expert Solution
Question
1 Approved Answer
You will need to adapt the configuration on both Newton and Einstein and configure the Heisenberg and Schrodinger switches to complete this task. You
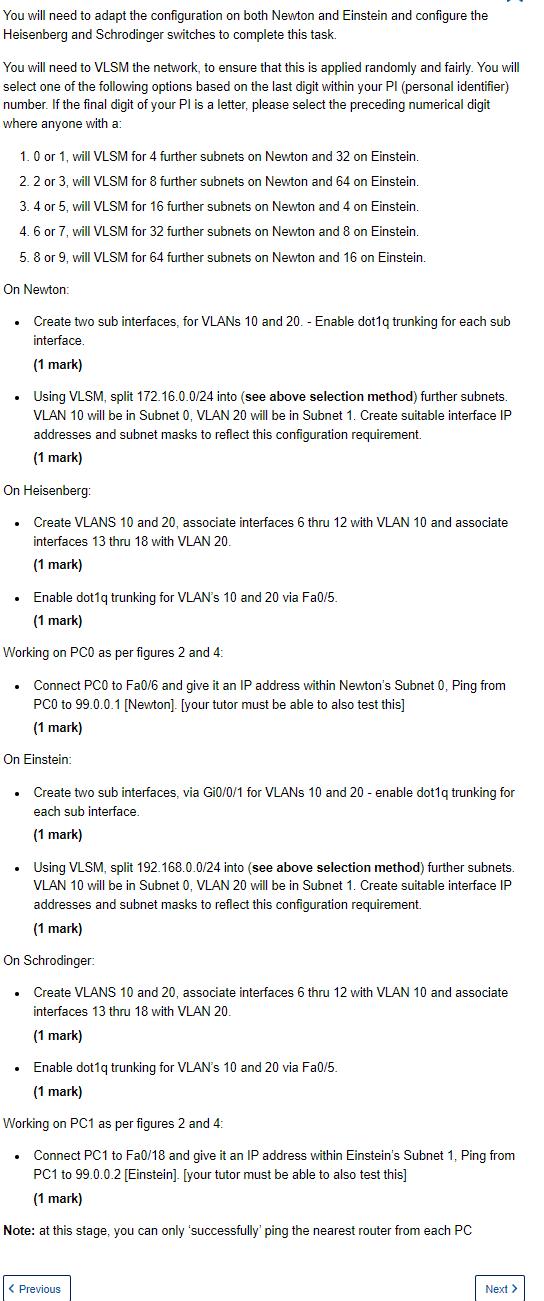
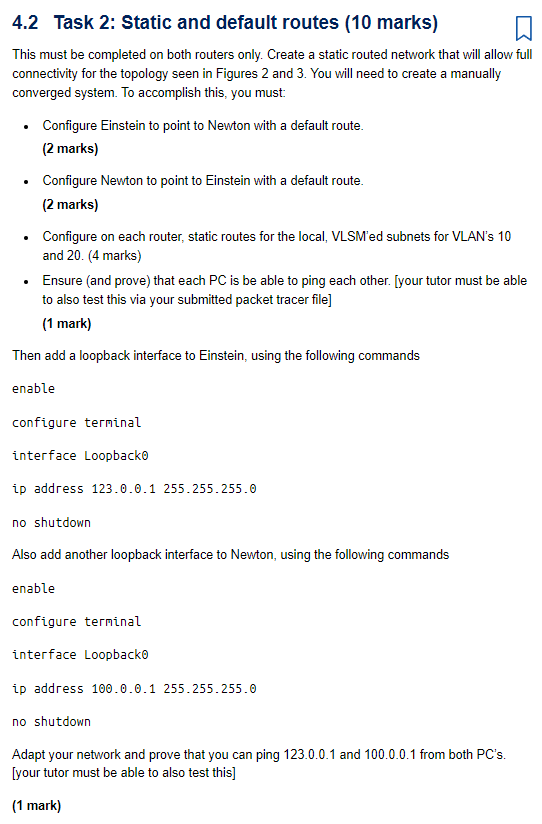
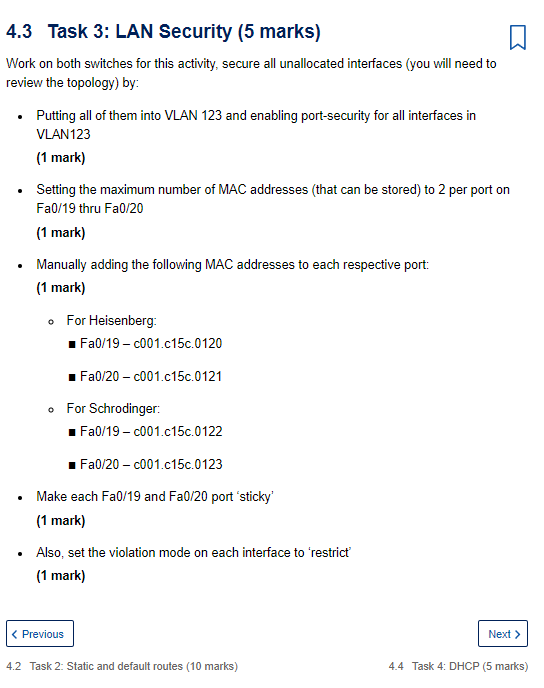
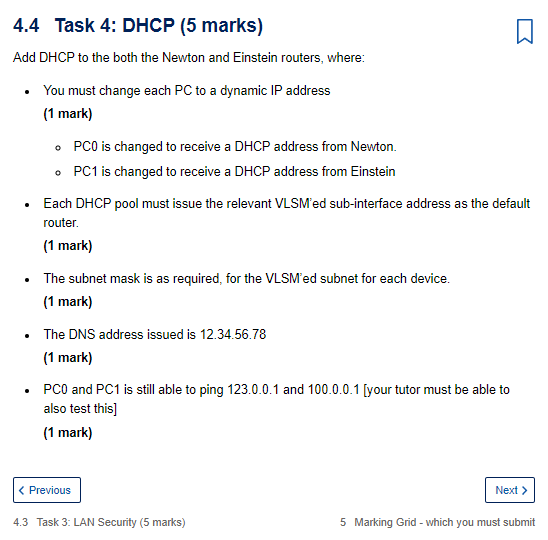
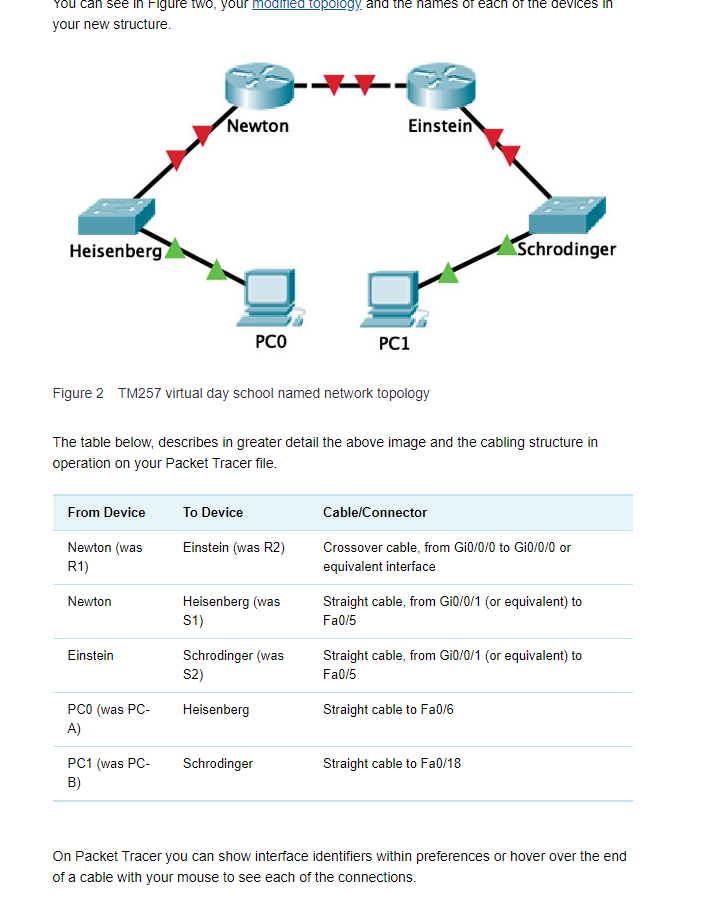
You will need to adapt the configuration on both Newton and Einstein and configure the Heisenberg and Schrodinger switches to complete this task. You will need to VLSM the network, to ensure that this is applied randomly and fairly. You will select one of the following options based on the last digit within your Pl (personal identifier) number. If the final digit of your PI is a letter, please select the preceding numerical digit where anyone with a: 1. 0 or 1, will VLSM for 4 further subnets on Newton and 32 on Einstein. 2.2 or 3, will VLSM for 8 further subnets on Newton and 64 on Einstein. 3. 4 or 5, will VLSM for 16 further subnets on Newton and 4 on Einstein. 4. 6 or 7, will VLSM for 32 further subnets on Newton and 8 on Einstein. 5. 8 or 9, will VLSM for 64 further subnets on Newton and 16 on Einstein. On Newton: Create two sub interfaces, for VLANs 10 and 20. - Enable dot1q trunking for each sub interface. (1 mark) Using VLSM, split 172.16.0.0/24 into (see above selection method) further subnets. VLAN 10 will be in Subnet 0, VLAN 20 will be in Subnet 1. Create suitable interface IP addresses and subnet masks to reflect this configuration requirement. (1 mark) On Heisenberg: Create VLANS 10 and 20, associate interfaces 6 thru 12 with VLAN 10 and associate interfaces 13 thru 18 with VLAN 20. (1 mark) .Enable dot1q trunking for VLAN's 10 and 20 via Fa0/5. (1 mark) Working on PCO as per figures 2 and 4: Connect PC0 to Fa0/6 and give it an IP address within Newton's Subnet 0, Ping from PC0 to 99.0.0.1 [Newton] [your tutor must be able to also test this] (1 mark) On Einstein: Create two sub interfaces, via Gi0/0/1 for VLANs 10 and 20 - enable dot1q trunking for each sub interface. (1 mark) Using VLSM, split 192.168.0.0/24 into (see above selection method) further subnets. VLAN 10 will be in Subnet 0, VLAN 20 will be in Subnet 1. Create suitable interface IP addresses and subnet masks to reflect this configuration requirement. (1 mark) On Schrodinger: Create VLANS 10 and 20, associate interfaces 6 thru 12 with VLAN 10 and associate interfaces 13 thru 18 with VLAN 20. (1 mark) Enable dot1q trunking for VLAN's 10 and 20 via Fa0/5.. (1 mark) Working on PC1 as per figures 2 and 4: Connect PC1 to Fa0/18 and give it an IP address within Einstein's Subnet 1, Ping from PC1 to 99.0.0.2 [Einstein]. [your tutor must be able to also test this] (1 mark) Note: at this stage, you can only 'successfully' ping the nearest router from each PC Previous Next > 4.2 Task 2: Static and default routes (10 marks) This must be completed on both routers only. Create a static routed network that will allow full connectivity for the topology seen in Figures 2 and 3. You will need to create a manually converged system. To accomplish this, you must: Configure Einstein to point to Newton with a default route. (2 marks) Configure Newton to point to Einstein with a default route. (2 marks) Configure on each router, static routes for the local, VLSM'ed subnets for VLAN's 10 and 20. (4 marks) Ensure (and prove) that each PC is be able to ping each other. [your tutor must be able to also test this via your submitted packet tracer file] (1 mark) Then add a loopback interface to Einstein, using the following commands enable configure terminal interface Loopback0 ip address 123.0.0.1 255.255.255.0 no shutdown Also add another loopback interface to Newton, using the following commands enable configure terminal interface Loopback0 ip address 100.0.0.1 255.255.255.0 no shutdown Adapt your network and prove that you can ping 123.0.0.1 and 100.0.0.1 from both PC's. [your tutor must be able to also test this] (1 mark) 4.3 Task 3: LAN Security (5 marks) Work on both switches for this activity, secure all unallocated interfaces (you will need to review the topology) by: Putting all of them into VLAN 123 and enabling port-security for all interfaces in VLAN123 (1 mark) Setting the maximum number of MAC addresses (that can be stored) to 2 per port on Fa0/19 thru Fa0/20 (1 mark) Manually adding the following MAC addresses to each respective port: (1 mark) For Heisenberg: Fa0/19 c001.c15c.0120 + Fa0/20 c001.c15c.0121 For Schrodinger: = Fa0/19 c001.c15c.0122 I Fa0/20 c001.c15c.0123 Make each Fa0/19 and Fa0/20 port 'sticky' (1 mark) Also, set the violation mode on each interface to 'restrict' (1 mark) < Previous Next > 4.2 Task 2: Static and default routes (10 marks) 4.4 Task 4: DHCP (5 marks) 4.4 Task 4: DHCP (5 marks) Add DHCP to the both the Newton and Einstein routers, where: You must change each PC to a dynamic IP address (1 mark) PCO is changed to receive a DHCP address from Newton. PC1 is changed to receive a DHCP address from Einstein Each DHCP pool must issue the relevant VLSM'ed sub-interface address as the default router. (1 mark) The subnet mask is as required, for the VLSM'ed subnet for each device. (1 mark) The DNS address issued is 12.34.56.78 (1 mark) PC0 and PC1 is still able to ping 123.0.0.1 and 100.0.0.1 [your tutor must be able to also test this] (1 mark) < Previous Next > 4.3 Task 3: LAN Security (5 marks) 5 Marking Grid - which you must submit You can see in Figure two, your modified topology, and the names or each of the devices in your new structure. Heisenberg Newton Einstein Schrodinger PCO PC1 Figure 2 TM257 virtual day school named network topology The table below, describes in greater detail the above image and the cabling structure in operation on your Packet Tracer file. From Device To Device Cable/Connector Newton (was Einstein (was R2) R1) Crossover cable, from Gi0/0/0 to Gi0/0/0 or equivalent interface Newton Heisenberg (was S1) Einstein Schrodinger (was S2) PC0 (was PC- Heisenberg Straight cable, from Gi0/0/1 (or equivalent) to Fa0/5 Straight cable, from Gi0/0/1 (or equivalent) to Fa0/5 Straight cable to Fa0/6 A) PC1 (was PC- Schrodinger Straight cable to Fa0/18 B) On Packet Tracer you can show interface identifiers within preferences or hover over the end of a cable with your mouse to see each of the connections.
Step by Step Solution
There are 3 Steps involved in it
Step: 1

Get Instant Access to Expert-Tailored Solutions
See step-by-step solutions with expert insights and AI powered tools for academic success
Step: 2

Step: 3

Ace Your Homework with AI
Get the answers you need in no time with our AI-driven, step-by-step assistance
Get Started


