add photos of process.
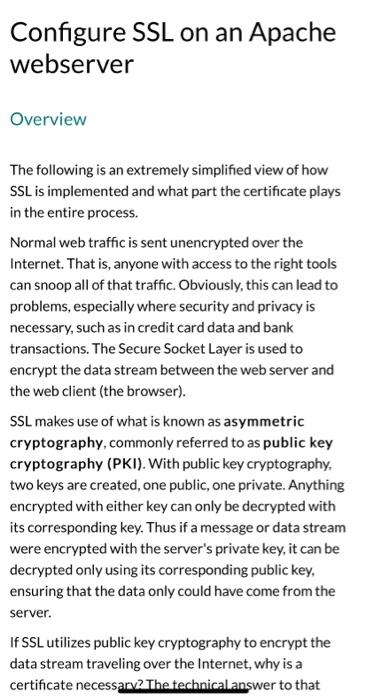
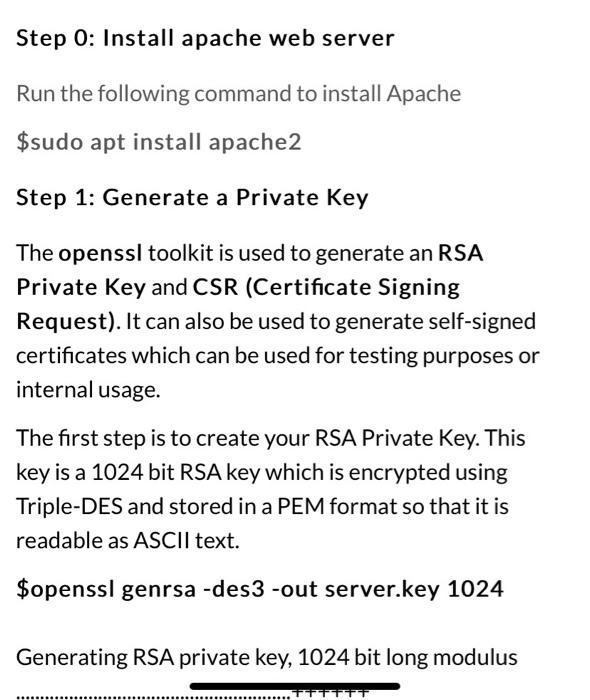
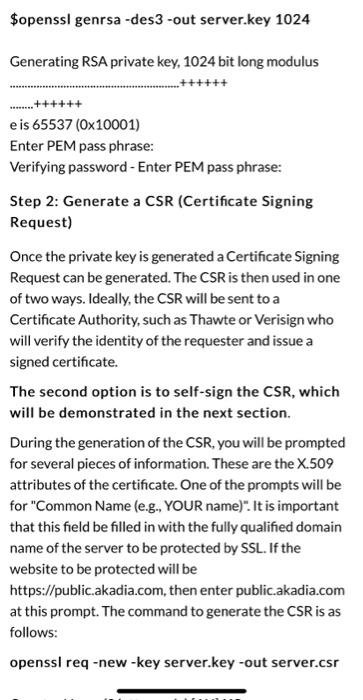
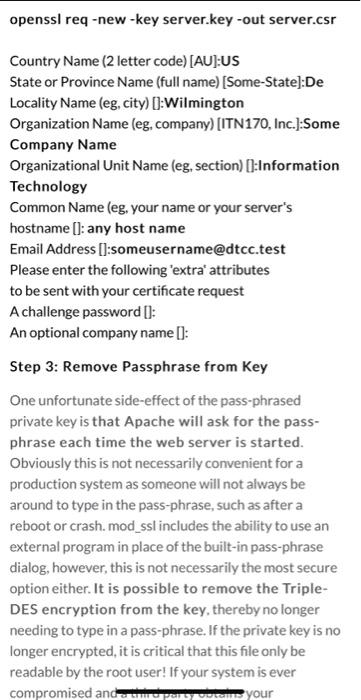
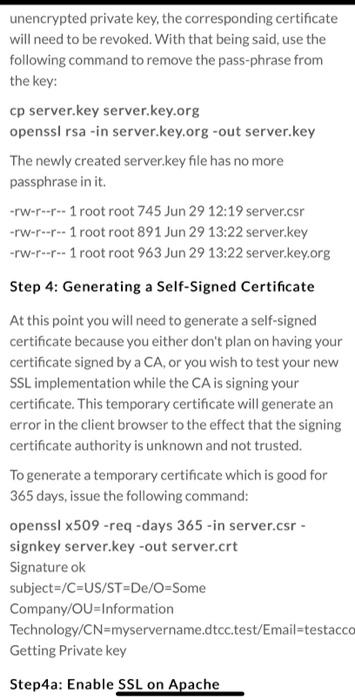
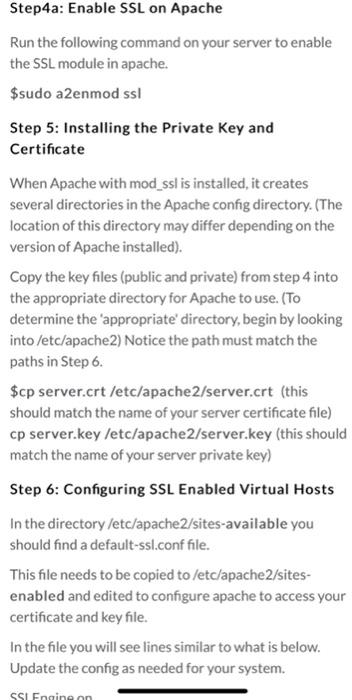
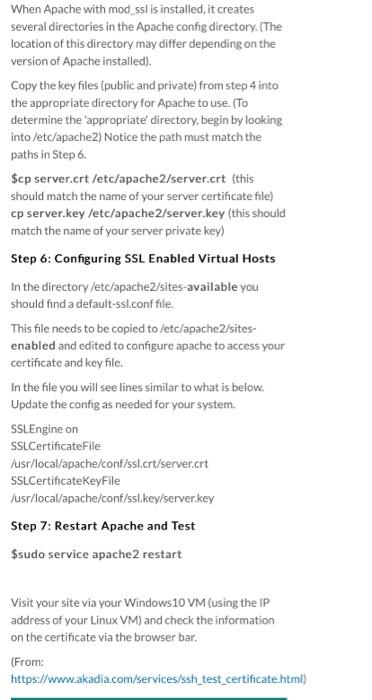
Configure SSL on an Apache webserver Overview The following is an extremely simplified view of how SSL is implemented and what part the certificate plays in the entire process. Normal web traffic is sent unencrypted over the Internet. That is, anyone with access to the right tools can snoop all of that traffic. Obviously, this can lead to problems, especially where security and privacy is necessary, such as in credit card data and bank transactions. The Secure Socket Layer is used to encrypt the data stream between the web server and the web client (the browser). SSL makes use of what is known as asymmetric cryptography, commonly referred to as public key cryptography (PKI). With public key cryptography, two keys are created, one public, one private. Anything encrypted with either key can only be decrypted with its corresponding key. Thus if a message or data stream were encrypted with the server's private key, it can be decrypted only using its corresponding public key, ensuring that the data only could have come from the server. If SSL utilizes public key cryptography to encrypt the data stream traveling over the Internet, why is a certificate necessarv2The technical answer to that Step 0: Install apache web server Run the following command to install Apache $sudo apt install apache2 Step 1: Generate a Private Key The openssl toolkit is used to generate an RSA Private Key and CSR (Certificate Signing Request). It can also be used to generate self-signed certificates which can be used for testing purposes or internal usage. The first step is to create your RSA Private Key. This key is a 1024 bit RSA key which is encrypted using Triple-DES and stored in a PEM format so that it is readable as ASCII text. $openssl genrsa-des3 -out server.key 1024 Generating RSA private key, 1024 bit long modulus TTTT $openssl genrsa-des3 -out server.key 1024 Generating RSA private key, 1024 bit long modulus .....++++++ e is 65537 (0x10001) Enter PEM pass phrase: Verifying password - Enter PEM pass phrase: Step 2: Generate a CSR (Certificate Signing Request) Once the private key is generated a Certificate Signing Request can be generated. The CSR is then used in one of two ways. Ideally, the CSR will be sent to a Certificate Authority, such as Thawte or Verisign who will verify the identity of the requester and issue a signed certificate. The second option is to self-sign the CSR, which will be demonstrated in the next section. During the generation of the CSR, you will be prompted for several pieces of information. These are the X.509 attributes of the certificate. One of the prompts will be for "Common Name (e.g., YOUR name)". It is important that this field be filled in with the fully qualified domain name of the server to be protected by SSL. If the website to be protected will be https://public.akadia.com, then enter public.akadia.com at this prompt. The command to generate the CSR is as follows: openssl req-new-key server.key-out server.csr unencrypted private key, the corresponding certificate will need to be revoked. With that being said, use the following command to remove the pass-phrase from the key: cp server.key server.key.org openssl rsa -in server.key.org -out server.key The newly created server.key file has no more passphrase in it. -rw-r-- -- 1 root root 745 Jun 29 12:19 server.csr -rw-r----- 1 root root 891 Jun 29 13:22 server.key -rw-r-- -- 1 root root 963 Jun 29 13:22 server.key.org Step 4: Generating a Self-Signed Certificate At this point you will need to generate a self-signed certificate because you either don't plan on having your certificate signed by a CA, or you wish to test your new SSL implementation while the CA is signing your certificate. This temporary certificate will generate an error in the client browser to the effect that the signing certificate authority is unknown and not trusted. To generate a temporary certificate which is good for 365 days, issue the following command: openssl x509-req-days 365-in server.csr- signkey server.key-out server.crt Signature ok subject=/C-US/ST-De/O=Some Company/OU=Information Technology/CN=myservername.dtcc.test/Email=testacco Getting Private key Step4a: Enable SSL on Apache Step4a: Enable SSL on Apache Run the following command on your server to enable the SSL module in apache. $sudo a2enmod ssl Step 5: Installing the Private Key and Certificate When Apache with mod_ssl is installed, it creates several directories in the Apache config directory. (The location of this directory may differ depending on the version of Apache installed). Copy the key files (public and private) from step 4 into the appropriate directory for Apache to use. (To determine the appropriate' directory, begin by looking into /etc/apache2) Notice the path must match the paths in Step 6. $cp server.crt /etc/apache2/server.crt (this should match the name of your server certificate file) cp server.key /etc/apache2/server.key (this should match the name of your server private key) Step 6: Configuring SSL Enabled Virtual Hosts In the directory /etc/apache2/sites-available you should find a default-ssl.conf file. This file needs to be copied to /etc/apache2/sites- enabled and edited to configure apache to access your certificate and key file. In the file you will see lines similar to what is below. Update the config as needed for your system. SSIFnaine on When Apache with mod_ssl is installed, it creates several directories in the Apache config directory. (The location of this directory may differ depending on the version of Apache installed). Copy the key files (public and private) from step 4 into the appropriate directory for Apache to use. (TO determine the appropriate' directory, begin by looking into /etc/apache2) Notice the path must match the paths in Step 6. $cp server.crt /etc/apache2/server.crt (this should match the name of your server certificate file) cp server.key /etc/apache2/server.key (this should match the name of your server private key) Step 6: Configuring SSL Enabled Virtual Hosts In the directory /etc/apache2/sites-available you should find a default-ssl.conffile. This file needs to be copied to /etc/apache2/sites- enabled and edited to configure apache to access your certificate and key file. In the file you will see lines similar to what is below. Update the config as needed for your system. SSL.Engine on SSLCertificateFile /usr/local/apache/conf/ssl.crt/server.crt SSLCertificateKeyFile /usr/local/apache/conf/ssl.key/server.key Step 7: Restart Apache and Test $sudo service apache2 restart Visit your site via your Windows 10 VM (using the IP address of your Linux VM) and check the information on the certificate via the browser bar. (From: https://www.akadia.com/services/ssh_test_certificate.html)


