Arduino kit required. Please show connections and code. Thank you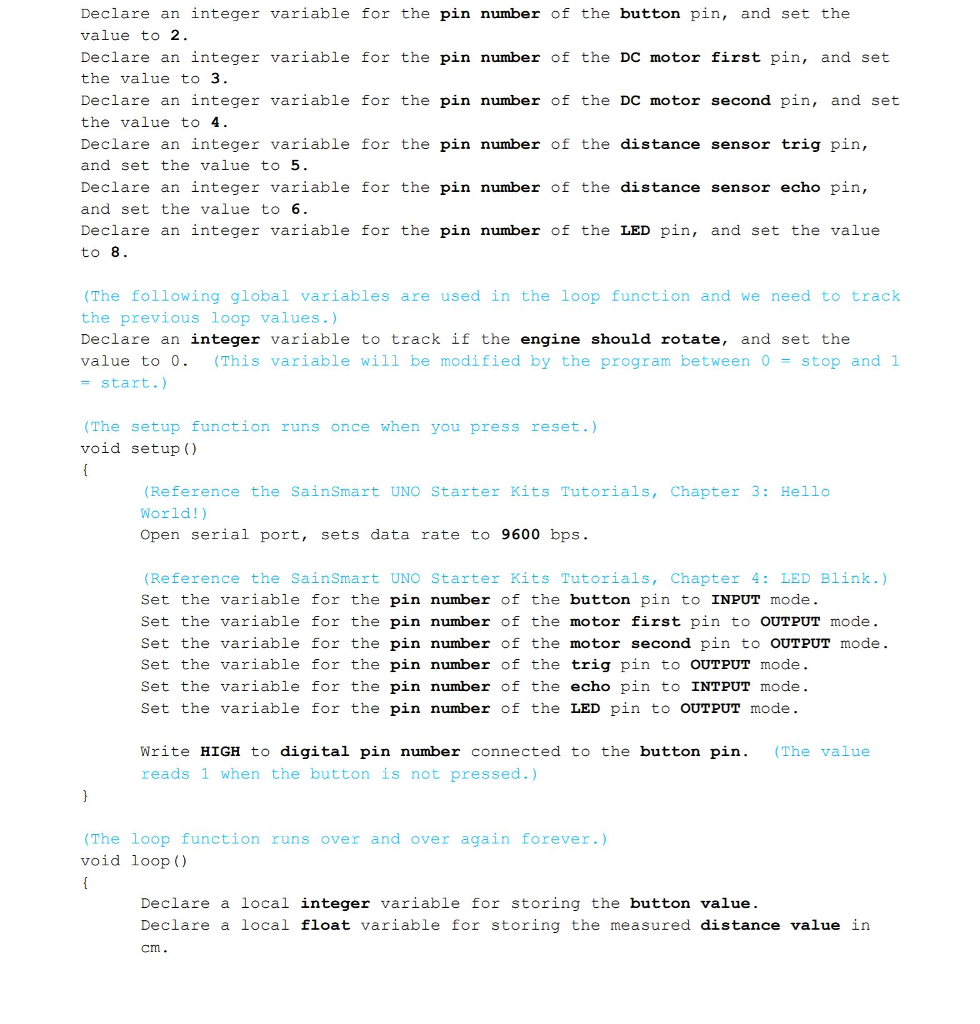
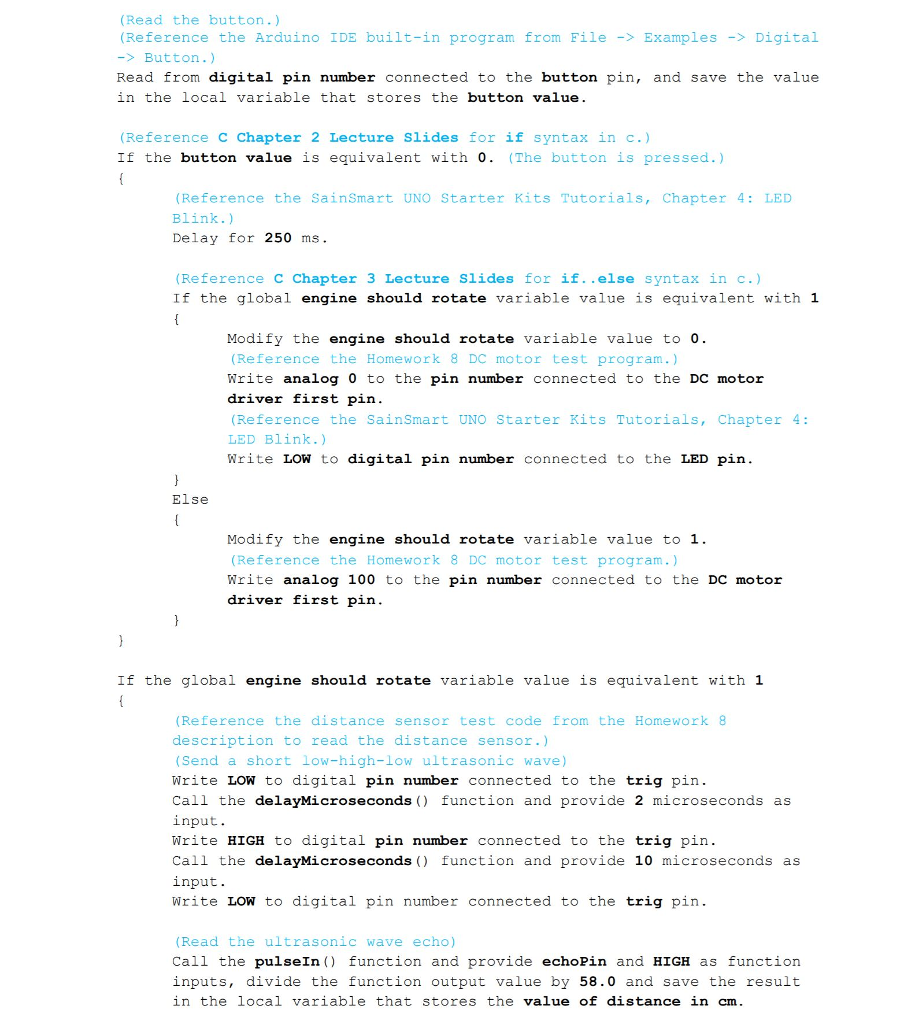
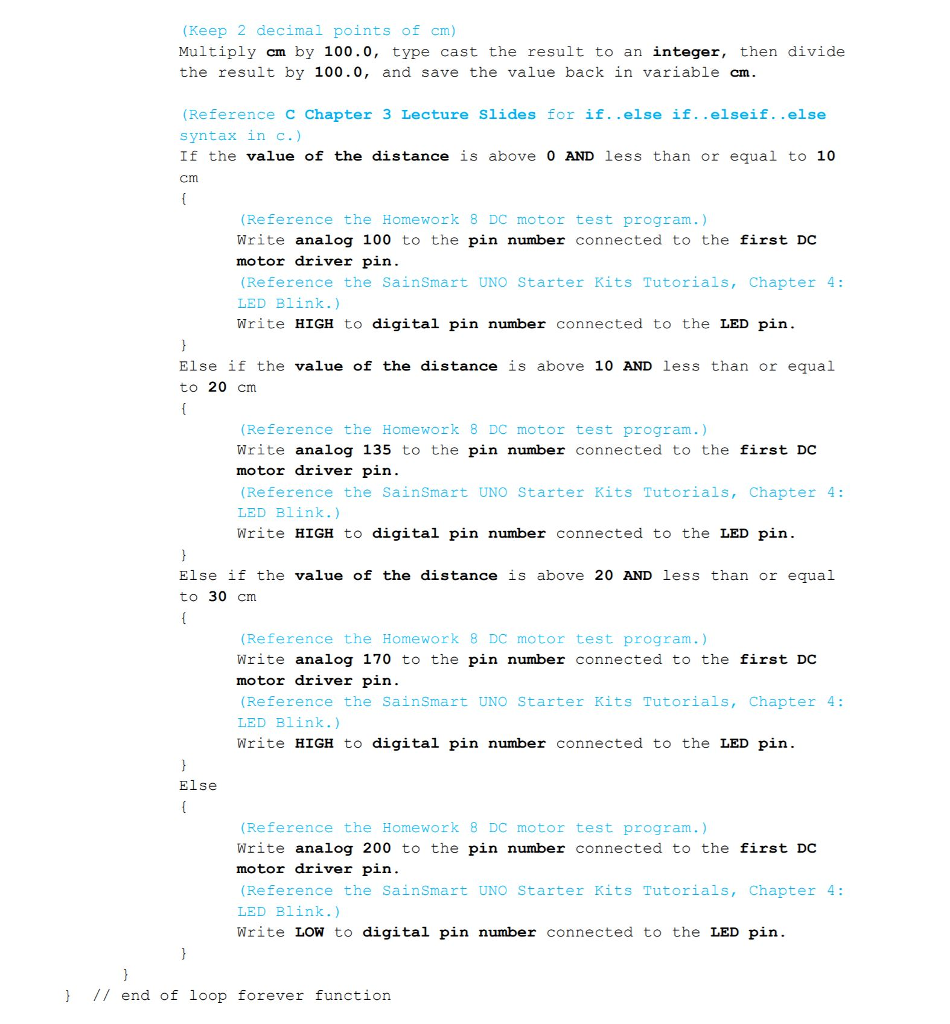
Declare an integer variable for the pin number of the button pin, and set the value to 2 Declare an integer variable for the pin number of the DC motor first pin, and set the value to 3 Declare an integer variable for the pin number of the DC motor second pin, and set the value to 4. Declare an integer variable for the pin number of the distance sensor trig pin, and set the value to 5 Declare an integer variable for the pin number of the distance sensor echo pin, and set the value to 6 Declare an integer variable for the pin number of the LED pin, and set the value to 8. (The following global variables are used in the loop function and we need to track the previous loop values.) Declare an integer variable to track if the engine should rotate, and set the value to 0. (This variable will be modified by the program between 0stop and 1 start.) (The setup function runs once when you press reset.) void setup () (Reference the SainSmart UNO Starter Kits Tutorials, Chapter 3 Hello World! Open serial port, sets data rate to 9600 bps. (Reference the SainSmart UNO Starter Kits Tutorials, Chapter 4 LED Blink.) Set the variable for the pin number of the button pin to INPUT mode Set the variable for the pin number of the motor first pin to OUTPUT mode Set the variable for the pin number of the motor second pin to OUTPUT mode. Set the variable for the pin number of the trig pin to OUTPUT mode Set the variable for the pin number of the echo pin to INTPUT mode Set the variable for the pin number of the LED pin to oUTPUT mode. Write HIGH to digital pin number connected to the button pin.(The value reads 1 when the button is not pressed.) (The loop function runs over and over again forever.) void loop () Declare a local integer variable for storing the button value. Declare a local float variable for storing the measured distance value in cm Declare an integer variable for the pin number of the button pin, and set the value to 2 Declare an integer variable for the pin number of the DC motor first pin, and set the value to 3 Declare an integer variable for the pin number of the DC motor second pin, and set the value to 4. Declare an integer variable for the pin number of the distance sensor trig pin, and set the value to 5 Declare an integer variable for the pin number of the distance sensor echo pin, and set the value to 6 Declare an integer variable for the pin number of the LED pin, and set the value to 8. (The following global variables are used in the loop function and we need to track the previous loop values.) Declare an integer variable to track if the engine should rotate, and set the value to 0. (This variable will be modified by the program between 0stop and 1 start.) (The setup function runs once when you press reset.) void setup () (Reference the SainSmart UNO Starter Kits Tutorials, Chapter 3 Hello World! Open serial port, sets data rate to 9600 bps. (Reference the SainSmart UNO Starter Kits Tutorials, Chapter 4 LED Blink.) Set the variable for the pin number of the button pin to INPUT mode Set the variable for the pin number of the motor first pin to OUTPUT mode Set the variable for the pin number of the motor second pin to OUTPUT mode. Set the variable for the pin number of the trig pin to OUTPUT mode Set the variable for the pin number of the echo pin to INTPUT mode Set the variable for the pin number of the LED pin to oUTPUT mode. Write HIGH to digital pin number connected to the button pin.(The value reads 1 when the button is not pressed.) (The loop function runs over and over again forever.) void loop () Declare a local integer variable for storing the button value. Declare a local float variable for storing the measured distance value in cm