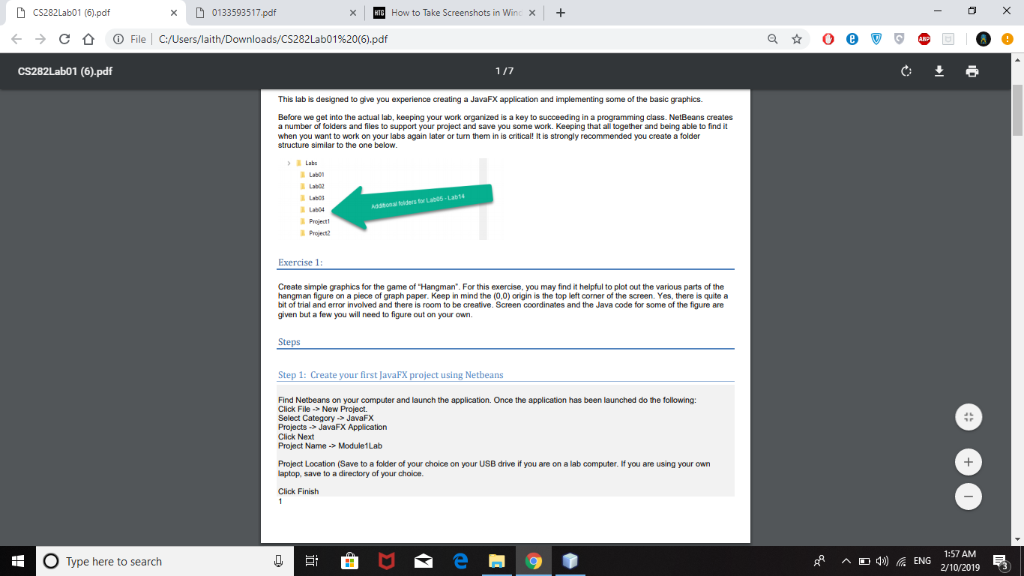
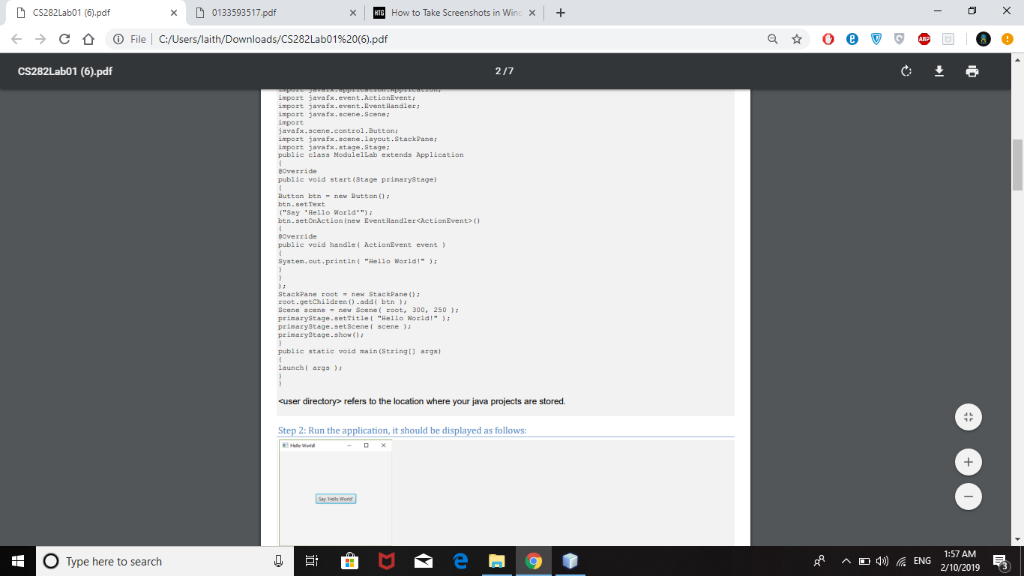
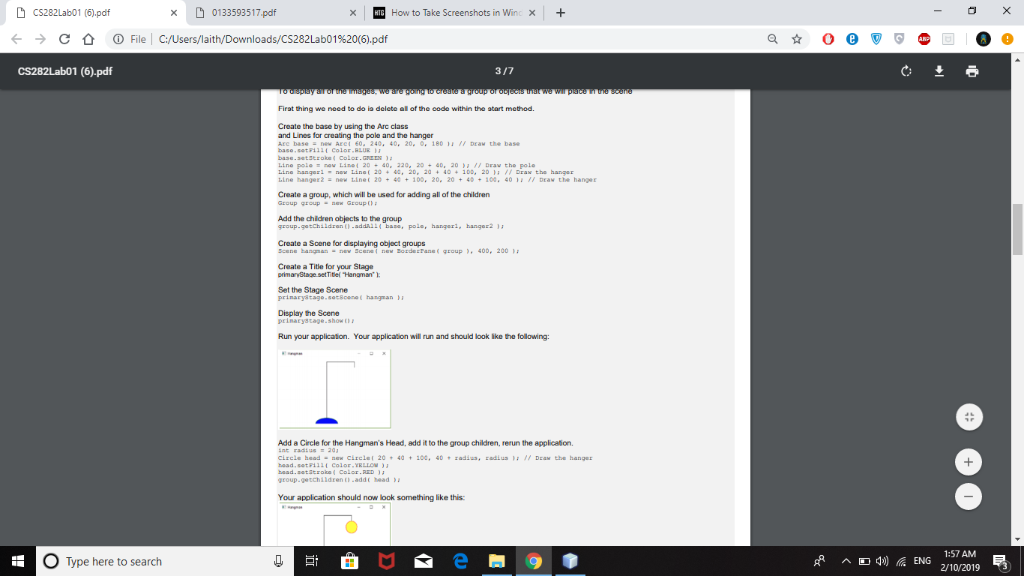
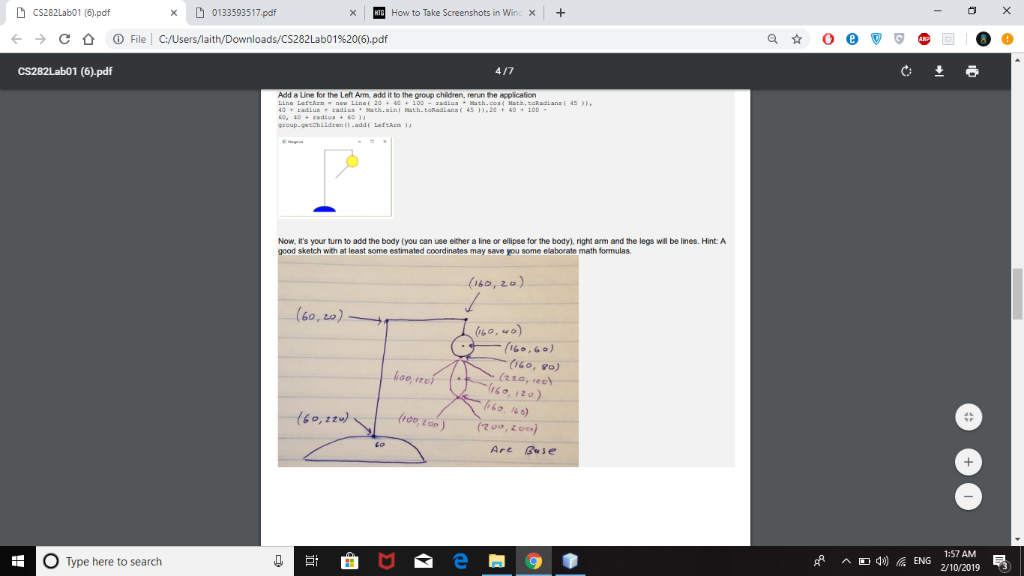
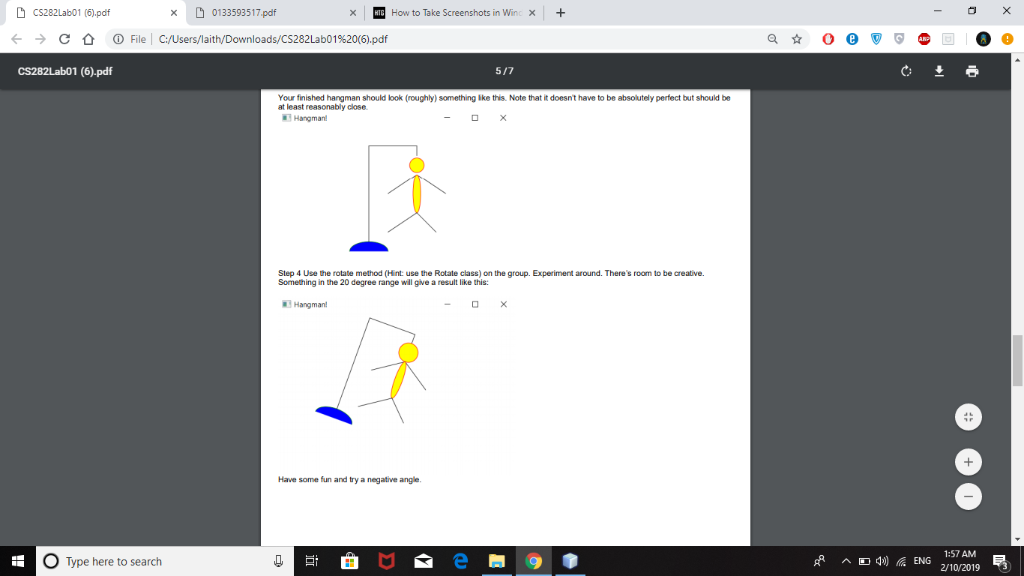
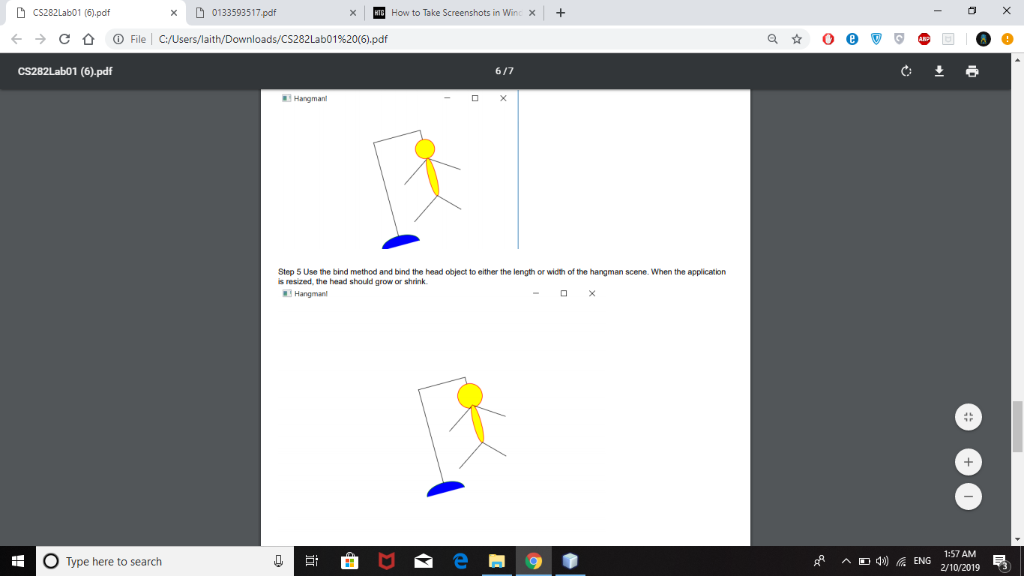
CS282Lab01 (6),pdf CS282Lab01 (6).pdf x0133593517 pdf How to Take Screenshots in Win x (D File | C:/Users/laith/Downloads/CS282Labol%20(6).pdf This lab is designed to give you experience creating a JavaFX application and implementing some of the basic graphics Before we get into the actual lab, keeping your work orgarized is a key to succeeding in a programming class. NetBeans creates a number of folders and files to support your project and save you some work. Keeping that all together and being able to find it when you want to work on your labs again later or turn them in is critical! It is strongly recommended you ereate a folder structure similar to the one below. Lab Project Project Exercise 1 Create simple graphics for the game of "Hangman. For this exercise, you may find it helpful to plot out the various parts of the hangman figure on a plece of graph paper. Keep in mind the (0,0) onigin is the top left comer of the screen. Yes, there is quite a bit of trial and error involved and there is room to be creative. Screen coordinates and the Java code for some of the figure are given but a few you will need to figure out on your own Steps Step 1: Create your first JavaFX project using Netbeans Find Netbeans on your computer and launch the application. Once the application has been launched do the following: Click FileNew Project Select CategoryJavaFX Projects JavaFX Application Click Next Project Name -> Module1Lab Project Location (Save to a folder of your choice on your USB drve if you are on alab computerrfyou are usin your own aptop, save to a directory of your choice Click Finish O Type here to search 1:57 AM rP ^ 41) ENG 2/10/2019 CS282Lab01 (6),pdf CS282Lab01 (6).pdf x0133593517 pdf xow to Take Screenshots in Winc + (D File | C:/Users/laith/Downloads/CS282Labol%20(6).pdf tpost jerafz.event.AetienEvent, port javatx.scene.Scene Ixport avaEx.acene.ccmtzol.Button port jarafx.acene.layout.StackPane port javatx.stage,Stag publie elasa Nodulellab extends Applicstion pubiie vold start(Stage prinarystage) "say Hello World" publie void handlefhetionEvene event ysten. out printin "Hello Worldl" StackPane root-nex StackPane1 echiidzen prinaryStage-settitlet "Hello Noridl primaryStage.setScene i scene peinazyeage.show pubiic static roid main (Stringtl args launch args cuser directory> relers to the location where your java projects are stored 2: Run the a tion, it should be d d as follows 1 O Type here to search 1:57 AM rP ^ 41) ENG 2/10/2019 CS282Lab01 (6),pdf CS282Lab01 (6).pdf x0133593517 pdf How to Take Screenshots in Win x (D File | C:/Users/laith/Downloads/CS282Labol%20(6).pdf Firat thing we need to do ia delete al of the code within the atart method. Create the base by using the Arc class and Lines for creating the pole and the hanger ArC basenew AECI 60 240 40, 20. . 180 1 / DEaW the bas Line pole naw Lane 4 20 + 40. 220. 20 + 40. 20 >, // Dra., the Pale Line hangezlnow Linat 20+, 2D, 204O1D, 20 Line hanger2 new Linet 20 + 40 + 100. 20. 20 + 40 + 10. 40 // Draw the hanger Draw the hangaE Create a group, which will be used for addng all of the children Group group-e Geoupt Add the chidren objects to the group group-garchildran -addniL base, pole, hangarl, hanger2 Create a Scene for displaying object groups Create a Title for your Stage Set the Stage Scene prinaryarage.set8oonat hangan Display the Scene prinarystage.show Run your application. Your application will run and should look lke the following: Add a Circle for the Hangman's Head, add it to the group children, rerun the applicaion. group-getchiidrenaddt head Your application should now look something like this O Type here to search 1:57 AM rP ^ 41) ENG 2/10/2019 CS282Lab01 (6),pdf CS282Lab01 (6).pdf x0133593517 pdf How to Take Screenshots in Win x (D File | C:/Users/laith/Downloads/CS282Labol%20(6).pdf Add a Line for the Left Arm, add it to the group chidren, rerun the application 0 adlus zadiusNath.ainI Wath.tofadians( 45 11,20 4D1OD Now, it's your turn to add the body (you can use either a line or ellipse for the body), right arm and the legs wll be lines. Hint: A good sketch with at least some estimated coordinates may save you some elaborate math formulas (Lo, O) Are GuSe 0 Type here to search 1:57 AM rP ^ 41) ENG 2/10/2019 CS282Lab01 (6),pdf CS282Lab01 (6).pdf x0133593517 pdf How to Take Screenshots in Win x (D File | C:/Users/laith/Downloads/CS282Labol%20(6).pdf Your finished hangman should look (roughly) something lke this. Note that it doesn't have to be absolutely perfect but should be at least reasonably close Hangman! Step 4 Use the rotate method (Hint: use the Rotate class) on the group. Experiment around. There's room to be creative. Something in the 20 degree range will give a result like this: Hangman! Have some fun and try a negative angle O Type here to search 1:57 AM rP ^ 41) ENG 2/10/2019 CS282Lab01 (6),pdf CS282Lab01 (6).pdf x0133593517 pdf How to Take Screenshots in Win x -) File | C:/Users/1aith/Downloads/CS282Labol%20(6).pdf Step 5 Use the bind method and bind the head object to either the length or width of the hangman scene. When the application s resized, the head should grow or shrink Hangman! 1:57 AM O Type here to search rP ^ E ENG 2/10/2019


