

Answered step by step
Verified Expert Solution
Question
1 Approved Answer
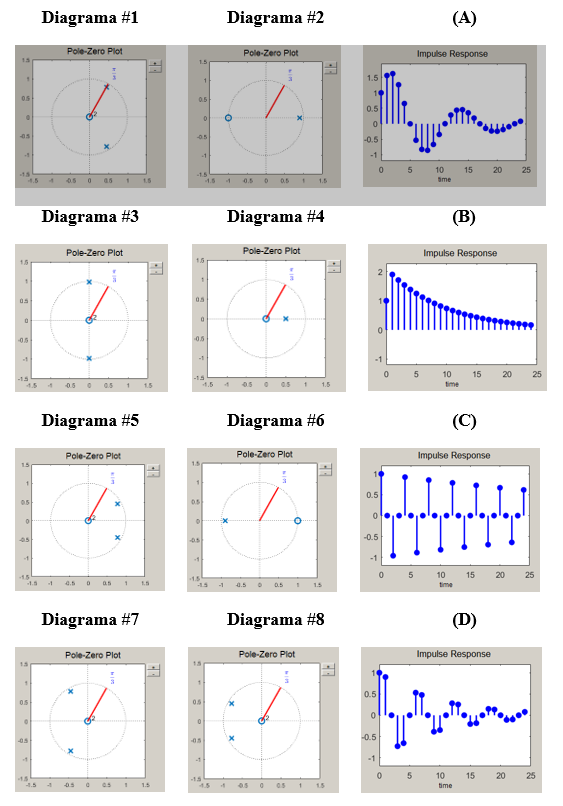
For each of the impulse response (A-D), select the required pole-zero diagram. Explain your choice. Diagrama #1 Diagrama #2 (A) Pole-Zero Plot Pole-Zero Plot Impulse
For each of the impulse response (A-D), select the required pole-zero diagram. Explain your choice.
Step by Step Solution
There are 3 Steps involved in it
Step: 1

Get Instant Access to Expert-Tailored Solutions
See step-by-step solutions with expert insights and AI powered tools for academic success
Step: 2

Step: 3
Ace Your Homework with AI
Get the answers you need in no time with our AI-driven, step-by-step assistance
Get Started
Professional Visual Basic 6 Databases
Authors: Charles Williams
1st Edition
1861002025, 978-1861002020