 Help asap please. Please make sure to label each question and task and i will rate
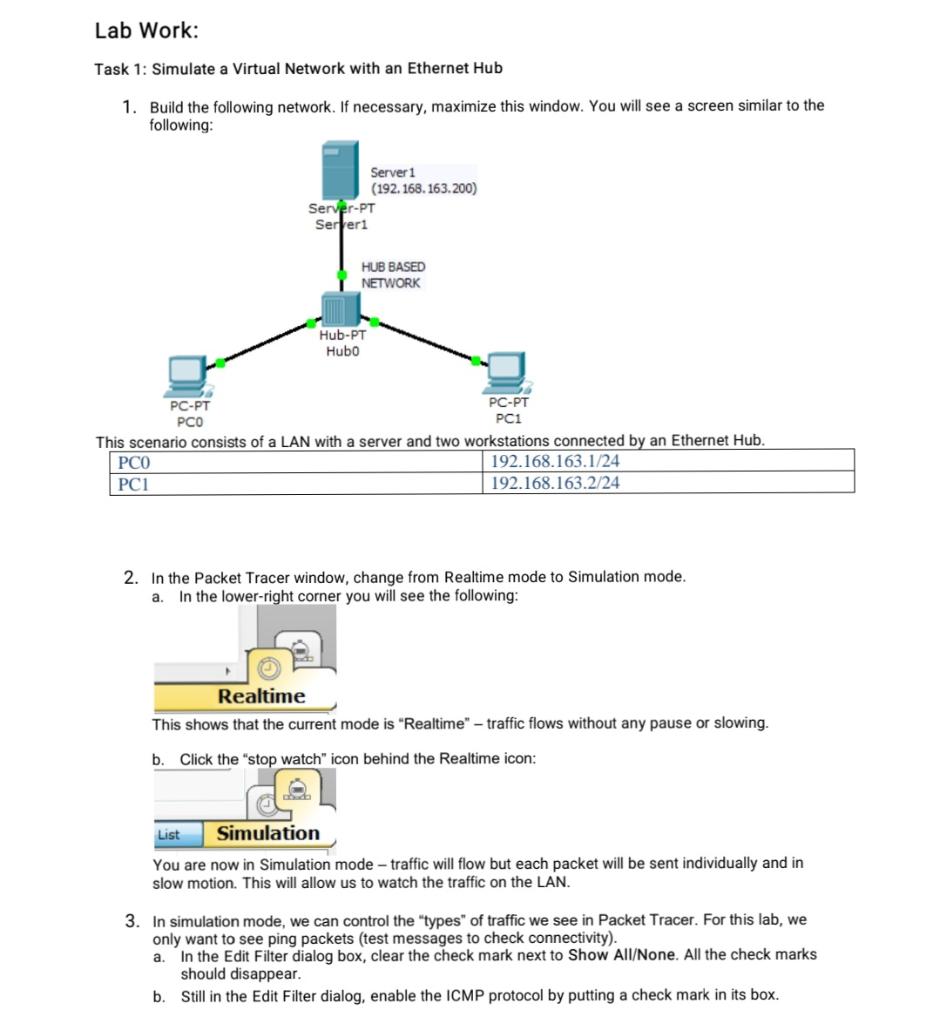
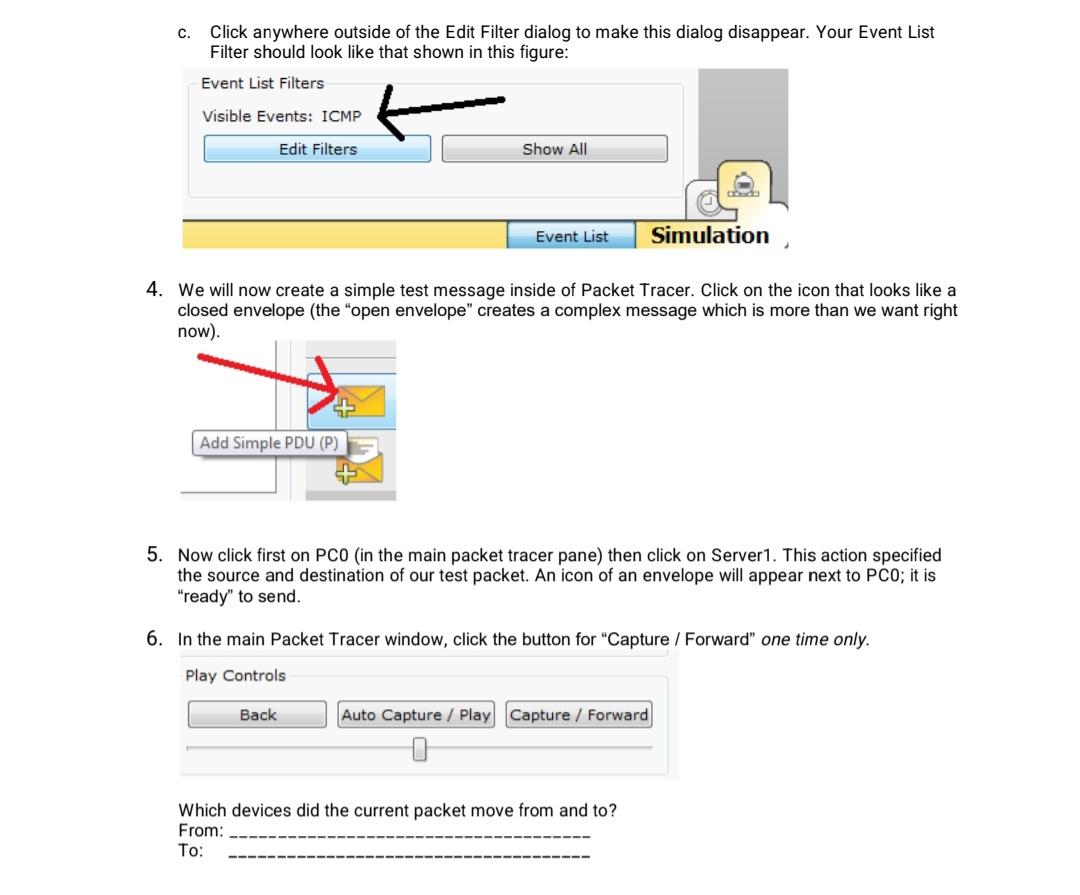
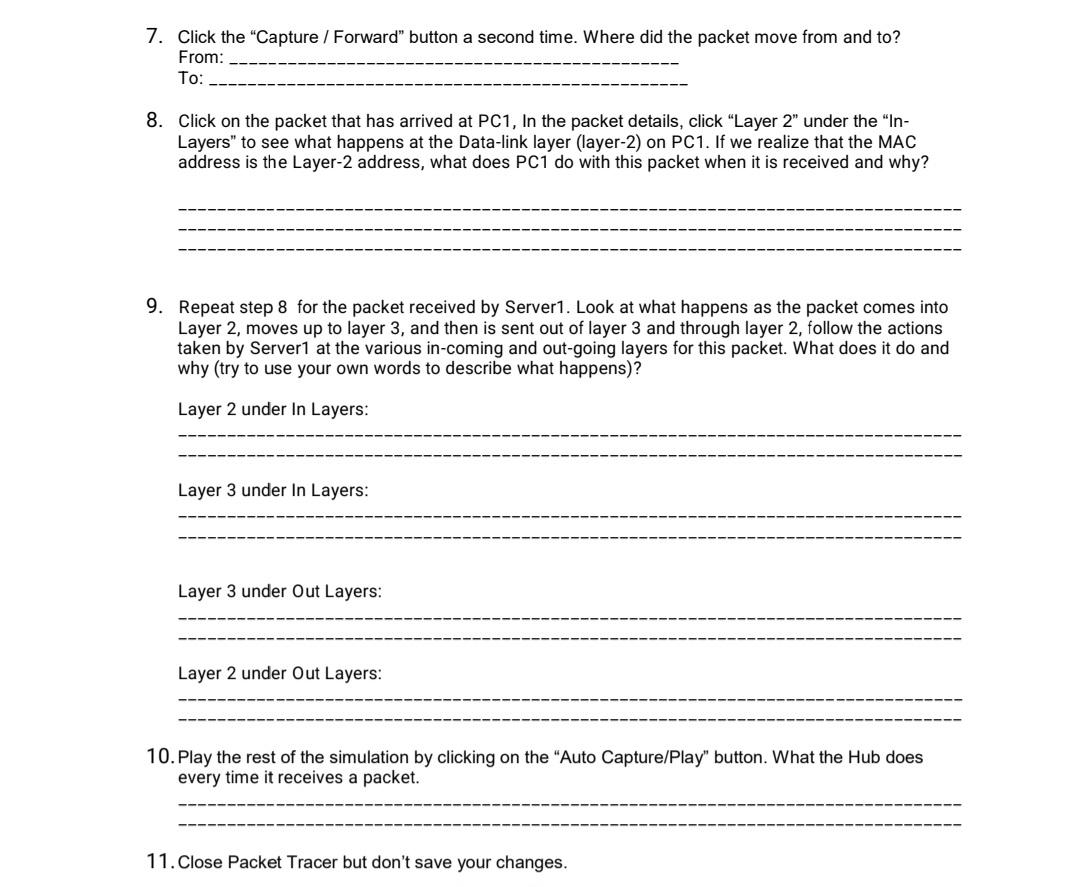
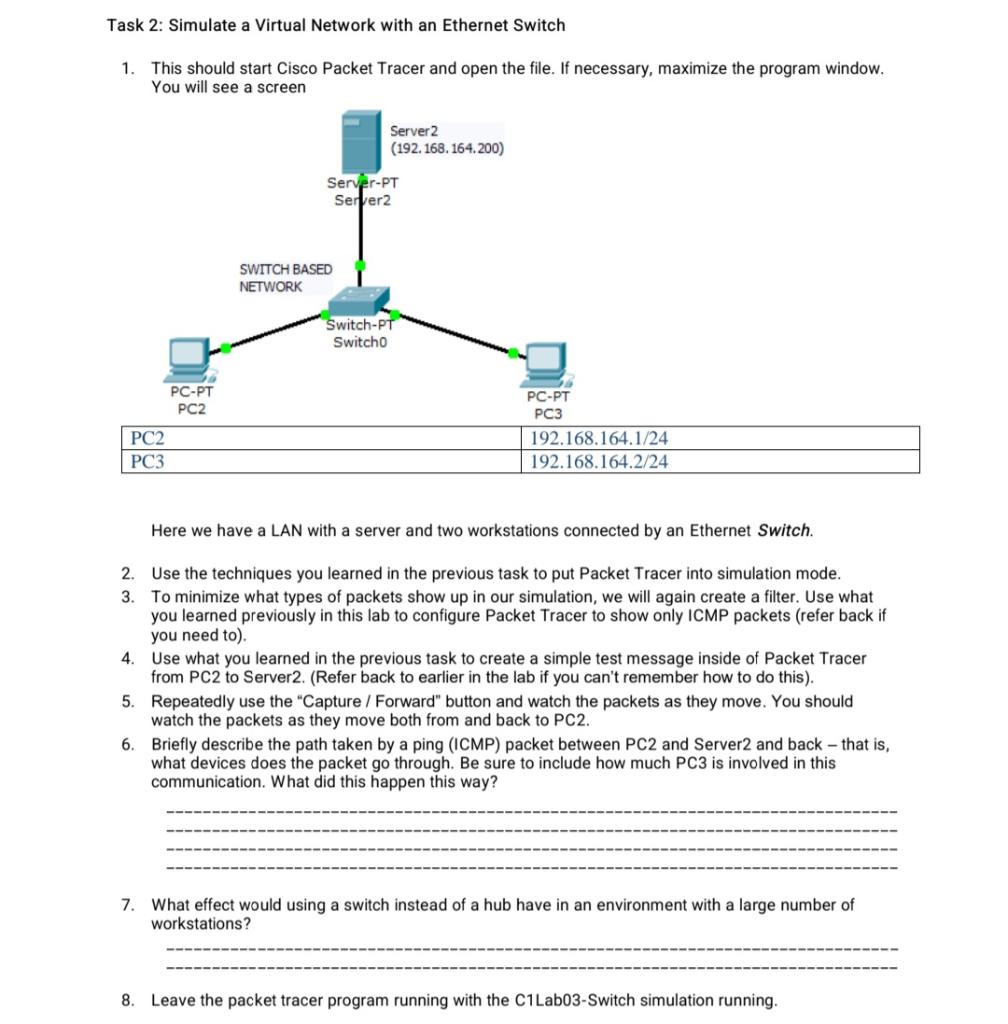
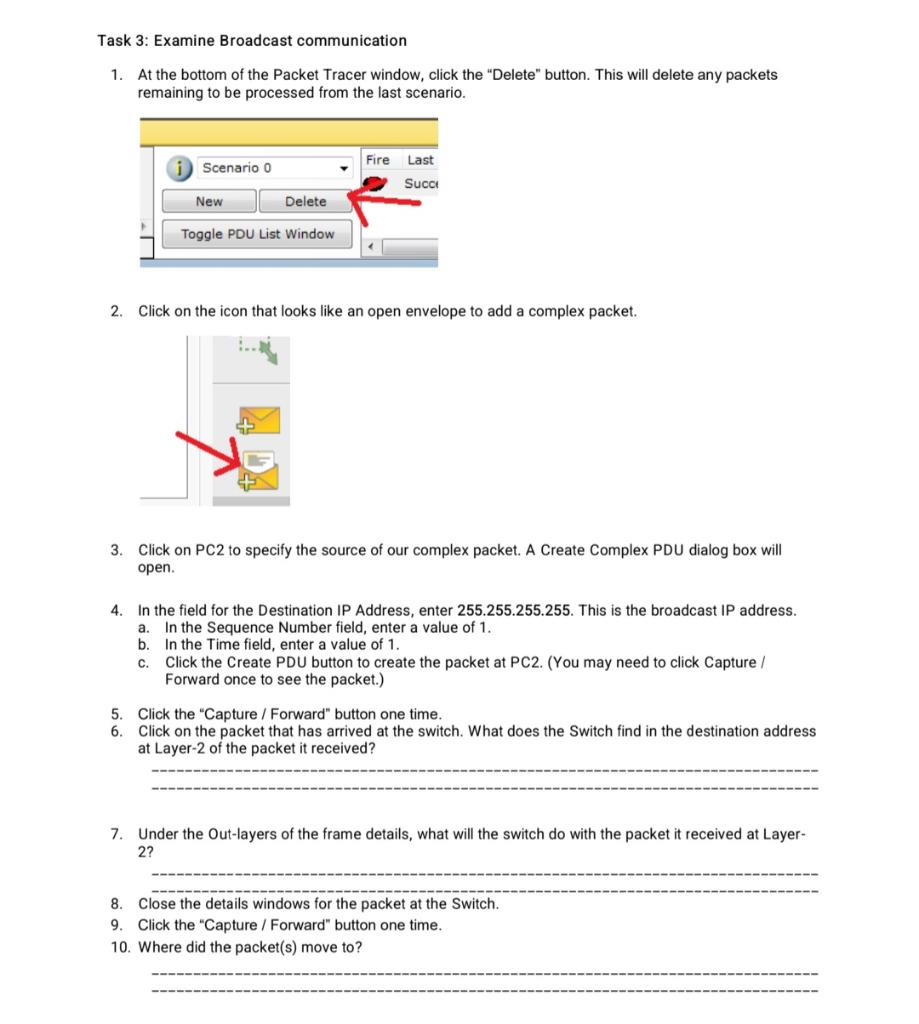
Lab Work: Task 1: Simulate a Virtual Network with an Ethernet Hub 1. Build the following network. If necessary, maximize this window. You will see a screen similar to the following: This scenario consists of a LAN with a server and two workstations connected by an Ethernet Hub. 2. In the Packet Tracer window, change from Realtime mode to Simulation mode. a. In the lower-right corner you will see the following: This shows that the current mode is "Realtime" - traffic flows without any pause or slowing. b. Click the "stop watch" icon behind the Realtime icon: You are now in Simulation mode - traffic will flow but each packet will be sent individually and in slow motion. This will allow us to watch the traffic on the LAN. 3. In simulation mode, we can control the "types" of traffic we see in Packet Tracer. For this lab, we only want to see ping packets (test messages to check connectivity). a. In the Edit Filter dialog box, clear the check mark next to Show All/None. All the check marks should disappear. b. Still in the Edit Filter dialog, enable the ICMP protocol by putting a check mark in its box. c. Click anywhere outside of the Edit Filter dialog to make this dialog disappear. Your Event List Filter should look like that shown in this figure: We will now create a simple test message inside of Packet Tracer. Click on the icon that looks like a closed envelope (the "open envelope" creates a complex message which is more than we want right now). Now click first on PC0 (in the main packet tracer pane) then click on Server1. This action specified the source and destination of our test packet. An icon of an envelope will appear next to PC0; it is "ready" to send. In the main Packet Tracer window, click the button for "Capture / Forward" one time only. Play Controls Which devices did the current packet move from and to? From: To: 7. Click the "Capture / Forward" button a second time. Where did the packet move from and to? From: To: 8. Click on the packet that has arrived at PC1, In the packet details, click "Layer 2" under the "InLayers" to see what happens at the Data-link layer (layer-2) on PC1. If we realize that the MAC address is the Layer-2 address, what does PC1 do with this packet when it is received and why? 9. Repeat step 8 for the packet received by Server1. Look at what happens as the packet comes into Layer 2, moves up to layer 3 , and then is sent out of layer 3 and through layer 2, follow the actions taken by Server1 at the various in-coming and out-going layers for this packet. What does it do and why (try to use your own words to describe what happens)? Layer 2 under In Layers: Layer 3 under In Layers: Layer 3 under Out Layers: Layer 2 under Out Layers: 10. Play the rest of the simulation by clicking on the "Auto Capture/Play" button. What the Hub does every time it receives a packet. 11. Close Packet Tracer but don't save your changes. Task 2: Simulate a Virtual Network with an Ethernet Switch 1. This should start Cisco Packet Tracer and open the file. If necessary, maximize the program window. You will see a screen \begin{tabular}{r|} 1.1/24 \\ \hline .2/24 \\ \hline \end{tabular} Here we have a LAN with a server and two workstations connected by an Ethernet Switch. 2. Use the techniques you learned in the previous task to put Packet Tracer into simulation mode. 3. To minimize what types of packets show up in our simulation, we will again create a filter. Use what you learned previously in this lab to configure Packet Tracer to show only ICMP packets (refer back if you need to). 4. Use what you learned in the previous task to create a simple test message inside of Packet Tracer from PC2 to Server2. (Refer back to earlier in the lab if you can't remember how to do this). 5. Repeatedly use the "Capture / Forward" button and watch the packets as they move. You should watch the packets as they move both from and back to PC2. 6. Briefly describe the path taken by a ping (ICMP) packet between PC2 and Server2 and back - that is, what devices does the packet go through. Be sure to include how much PC3 is involved in this communication. What did this happen this way? 7. What effect would using a switch instead of a hub have in an environment with a large number of workstations? 8. Leave the packet tracer program running with the C1Lab03-Switch simulation running. Task 3: Examine Broadcast communication 1. At the bottom of the Packet Tracer window, click the "Delete" button. This will delete any packets remaining to be processed from the last scenario. 2. Click on the icon that looks like an open envelope to add a complex packet. 3. Click on PC2 to specify the source of our complex packet. A Create Complex PDU dialog box will open. 4. In the field for the Destination IP Address, enter 255.255.255.255. This is the broadcast IP address. a. In the Sequence Number field, enter a value of 1 . b. In the Time field, enter a value of 1. c. Click the Create PDU button to create the packet at PC2. (You may need to click Capture / Forward once to see the packet.) 5. Click the "Capture / Forward" button one time. 6. Click on the packet that has arrived at the switch. What does the Switch find in the destination address at Layer-2 of the packet it received? 7. Under the Out-layers of the frame details, what will the switch do with the packet it received at Layer2 ? 11. What will Server 2 do with the packet it received? What will PC3 do with the packet it received? If necessary, look at the details of the packets received by each of the machines. 12. Continue clicking the "Capture / Forward" button to check yourself


 Help asap please. Please make sure to label each question and task and i will rate


