help with exercise 1


Exercise 1

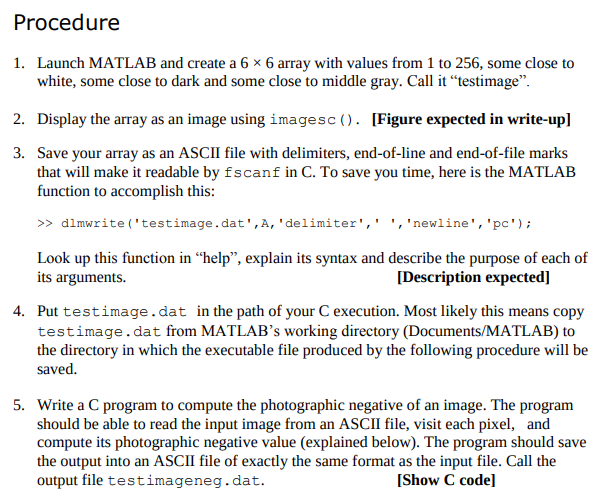
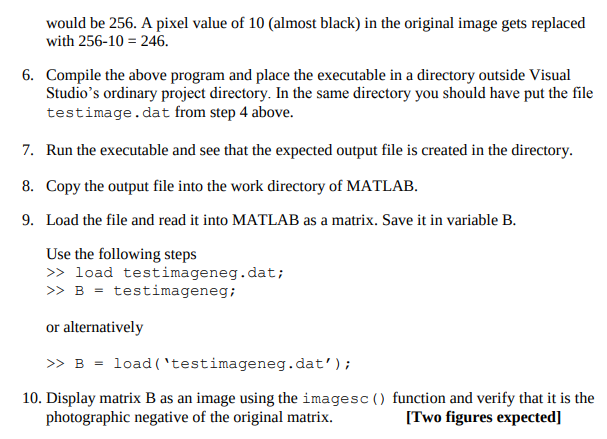
Procedure 1. Launch MATLAB and create a 6 x 6 array with values from 1 to 256, some close to white, some close to dark and some close to middle gray. Call it testimage. 2. Display the array as an image using imagesc(). [Figure expected in write-up] 3. Save your array as an ASCII file with delimiters, end-of-line and end-of-file marks that will make it readable by fscanf in C. To save you time, here is the MATLAB function to accomplish this: >> dimwrite('testimage.dat',A,'delimiter',' ', 'newline', 'po'); Look up this function in help, explain its syntax and describe the purpose of each of its arguments. [Description expected] 4. Put testimage.dat in the path of your C execution. Most likely this means copy testimage.dat from MATLAB's working directory (Documents/MATLAB) to the directory in which the executable file produced by the following procedure will be saved. 5. Write a C program to compute the photographic negative of an image. The program should be able to read the input image from an ASCII file, visit each pixel, and compute its photographic negative value (explained below). The program should save the output into an ASCII file of exactly the same format as the input file. Call the output file testimageneg.dat. [Show C code] would be 256. A pixel value of 10 (almost black) in the original image gets replaced with 256-10 = 246. 6. Compile the above program and place the executable in a directory outside Visual Studio's ordinary project directory. In the same directory you should have put the file testimage.dat from step 4 above. 7. Run the executable and see that the expected output file is created in the directory. 8. Copy the output file into the work directory of MATLAB. 9. Load the file and read it into MATLAB as a matrix. Save it in variable B. Use the following steps >> load testimageneg.dat; >> B = testimageneg; or alternatively >> B = load('testimageneg.dat'); 10. Display matrix B as an image using the imagesc() function and verify that it is the photographic negative of the original matrix. [Two figures expected] Apply the above procedure to the image that your instructor will provide. It will be a color image in bitmap format. You will be required to extract one of the three color matrices and treating it as B&W, you will use it as input to the above process, with the goal of generating its photographic negative. [Two figures and C code] Procedure 1. Launch MATLAB and create a 6 x 6 array with values from 1 to 256, some close to white, some close to dark and some close to middle gray. Call it testimage. 2. Display the array as an image using imagesc(). [Figure expected in write-up] 3. Save your array as an ASCII file with delimiters, end-of-line and end-of-file marks that will make it readable by fscanf in C. To save you time, here is the MATLAB function to accomplish this: >> dimwrite('testimage.dat',A,'delimiter',' ', 'newline', 'po'); Look up this function in help, explain its syntax and describe the purpose of each of its arguments. [Description expected] 4. Put testimage.dat in the path of your C execution. Most likely this means copy testimage.dat from MATLAB's working directory (Documents/MATLAB) to the directory in which the executable file produced by the following procedure will be saved. 5. Write a C program to compute the photographic negative of an image. The program should be able to read the input image from an ASCII file, visit each pixel, and compute its photographic negative value (explained below). The program should save the output into an ASCII file of exactly the same format as the input file. Call the output file testimageneg.dat. [Show C code] would be 256. A pixel value of 10 (almost black) in the original image gets replaced with 256-10 = 246. 6. Compile the above program and place the executable in a directory outside Visual Studio's ordinary project directory. In the same directory you should have put the file testimage.dat from step 4 above. 7. Run the executable and see that the expected output file is created in the directory. 8. Copy the output file into the work directory of MATLAB. 9. Load the file and read it into MATLAB as a matrix. Save it in variable B. Use the following steps >> load testimageneg.dat; >> B = testimageneg; or alternatively >> B = load('testimageneg.dat'); 10. Display matrix B as an image using the imagesc() function and verify that it is the photographic negative of the original matrix. [Two figures expected] Apply the above procedure to the image that your instructor will provide. It will be a color image in bitmap format. You will be required to extract one of the three color matrices and treating it as B&W, you will use it as input to the above process, with the goal of generating its photographic negative. [Two figures and C code]


