Question: I was given an assignment on Image Processing with Python and I am stumped on the final two steps. No matter how much I fiddle
I was given an assignment on Image Processing with Python and I am stumped on the final two steps. No matter how much I fiddle with the code, I cannot get it to produce what I need. I have completed the step 1, but I need help on the last two.
The assignment sheet reads as follows:
"CSC 130: The World of Computer Science
Asn 3: Image Processing
Due Friday, October 30, 2019
Copy the Asn3 folder from trace to your desktop development area. Complete the Asn3.py program as directed below, then copy the entire folder into your upload folder on the class server. The graphics module documentation is included in the folder. For full credit, use only techniques discussed in class or presented in the text. You may be asked to explain your code.
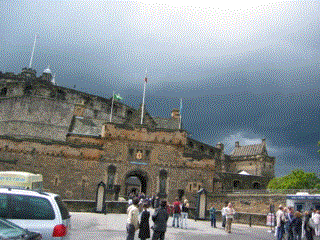
1.Complete the draw_lines() function to draw two lines on edinburgh-castle.gif: a green vertical line 1/3 of the way from the left edge, and a horizontal blue line 1/3 from the top. The vertical line should extend from the top of the image to the bottom; the horizontal line should extend from the left edge to the right edge.
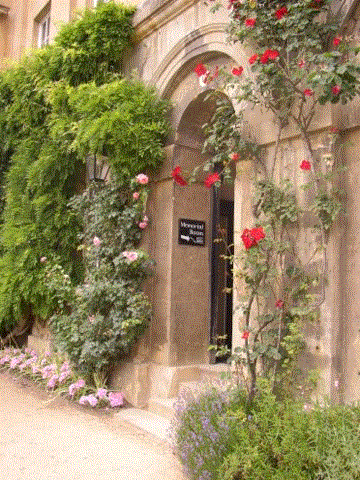
2.Complete the border() function to draw a black border 10 pixels wide around arch.gif. Don't make the image larger?draw the border over the top and bottom 10 rows, and the leftmost and rightmost 10 columns of the image. For full credit, draw the lines using loops and draw them pixel by pixel.
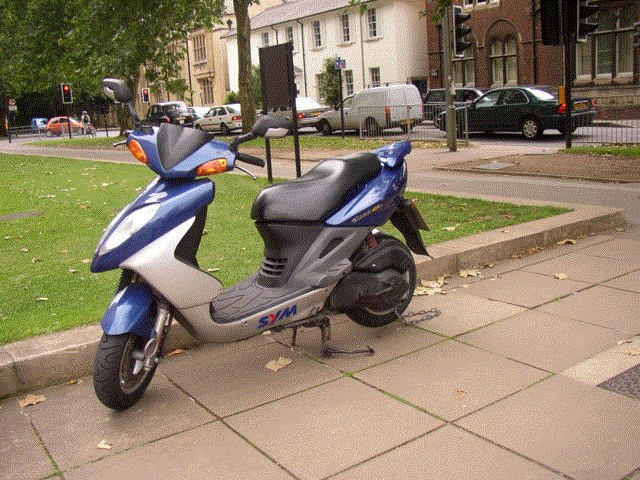
3.Complete the blend() function to blend two images. For each pixel, you will add 60% (0.6) of the pixel from img1 to 40% (0.4) of the pixel from img2. Assume the two images are the same size."
The website wouldn't let me attach it as a document. Next is the documentation for the cImage module that was provided to us by our instructor and the code itself.
"cImage.py must be in the same folder as your program.
cImage Functions (The following assumes you have imported cImage as image)
image.Image(filename) Loads an image from the file and returns an image object
image.ImageWin(title, width, height) Returns a display window
image.EmptyImage(width, height) Returns a blank image
image.Pixel(r, g, b) Returns a pixel object with specified red, green, and blue values
Image Methods (The following assumes the name of the image is img)
img.getWidth() Returns the width of img
img.getHeight() Returns the height of img
img.getPixel(x, y) Returns a pixel from the x, y position in img
img.setPixel(x, y, pixel) Sets a pixel at the x, y position
Note: pixel must be a pixel object; you can create one using image.Pixel(r, g, b)
img.draw(win) Displays img in the display window specified by win
img.clone() Returns a copy of img
img.save() Saves the image to its filename if it has one; not recommended
img.save(filename) Saves the image to specified file
Note: The file type is determined by the extension (.png, etc); default is .jpg
Pixel Methods (The following assumes the name of the pixel is p)
p.getRed()Gets the red channel from pixel p
p.getGreen()Gets the green channel from pixel p
p.getBlue()Gets the blue channel from pixel p"
"""image.pyThis module provides a simple interface to create a window, load an image and experimentwith image based algorithms. Many of which require pixel-by-pixel manipulation. Thisis a educational module, its not intended to replace the excellent Python Image Library, in factit uses PIL.The module and its interface and some of the code were inspired/copied by/from John Zelle's graphics.pywhich serves a similar purpose in the graphics primitive world.DO NOT EDIT THIS MODULE"""# Release Notes:# Version 1.0 Fall 2005## Brad Miller, Luther College## Version 1.1 December 7, 2005# Changes:# Modify class name for base image to be AbstractImage This way we don't have a lower case# class name running around. We still don't expect people to create an AbstractImage but# rather create an image through FileImage, ListImage, or EmptyImage.# Add ability to convert an image to a list# Add save function to write an image back to disk.## Version 1.2 November 2007# Changes:# Modify the setPosition function to position the image by the top left corner rather than# the center.# Add the exitOnClick method to ImageWin. Use this as the last call in the program to# avoid early exits when running from the command line, and nasty hangs when running# from within IDLE## Version 1.3 May 2008# Changes:# Modify all code to be Python 3.0 ready. -- still runs under 2.x# Modify all code so that if PIL is not available then image.py will still# function using Tkimages. N.B. Tk restricts image types to gif or ppm## Andrew Mertz, Eastern Illinois University# October 2014# Changes:# Negative indices can be used in Pixel's __getitem__ function# Pixel's __getitem__ function now supports looping i.e. for value in Pixel(0, 1, 2):## Giovanni Moretti, Massey University, Palmerston North, New Zealand# April 2015# Changes:# Added _imroot.lift() to ensure that pictures aren't hidden under other Windows# (needed on Windows 7 & Python 3.4. Ubuntu 14.04 was fine without it).## version 1.4# Brad Miller# distribute on pypi#try: import tkinterexcept: import Tkinter as tkinterpilAvailable = Truetry: from PIL import Image as PIL_Image from PIL import ImageTkexcept: pilAvailable = False#import exceptions# Borrow some ideas from Zelle# create an invisible global main root for all windowstk = tkinter_imroot = tk.Tk()_imroot.withdraw()# Make sure the displayed window is on top - otherwise drawing can appear to fail.# The _imroot.lift() call was required on Windows 7 - Linux was fine without it# not sure about Mac, but there are some tips at# http://stackoverflow.com/questions/8691655/how-to-put-a-tkinter-window-on-top-of-the-others_imroot.lift()#_imroot.call('wm', 'attributes', '.', '-topmost', True)#_imroot.after_idle(_imroot.call, 'wm', 'attributes', '.', '-topmost', False)def formatPixel(data): if type(data) == tuple: return '{#%02x%02x%02x}'%data elif isinstance(data,Pixel): return '{#%02x%02x%02x}'%data.getColorTuple()class ImageWin(tk.Canvas): """ ImageWin: Make a frame to display one or more images. """ def __init__(self,title="image window",width=640,height=640): """ Create a window with a title, width and height. """ master = tk.Toplevel(_imroot) master.protocol("WM_DELETE_WINDOW", self._close) #super(ImageWin, self).__init__(master, width=width, height=height) tk.Canvas.__init__(self, master, width=width, height=height) self.master.title(title) self.pack() master.resizable(0,0) self.foreground = "black" self.items = [] self.mouseX = None self.mouseY = None self.bind("" , self._onClick) self.height = height self.width = width self._mouseCallback = None self.trans = None _imroot.update() def _close(self): """Close the window""" self.master.destroy() self.quit() _imroot.update() def getMouse(self): """Wait for mouse click and return a tuple with x,y position in screen coordinates after the click""" self.mouseX = None self.mouseY = None while self.mouseX == None or self.mouseY == None: self.update() return ((self.mouseX,self.mouseY)) def setMouseHandler(self, func): self._mouseCallback = func def _onClick(self, e): self.mouseX = e.x self.mouseY = e.y if self._mouseCallback: self._mouseCallback(e.x, e.y) def exitOnClick(self): """When the Mouse is clicked close the window and exit""" self.getMouse() self._close() def exitonclick(self): self.exitOnClick()class Pixel(object): """This simple class abstracts the RGB pixel values.""" def __init__(self, red, green, blue): super(Pixel, self).__init__() self.__red = red self.__green = green self.__blue = blue self.max = 255 def getRed(self): """Return the red component of the pixel""" return self.__red def getGreen(self): """Return the green component of the pixel""" return self.__green def getBlue(self): """Return the blue component of the pixel""" return self.__blue def getColorTuple(self): """Return all color information as a tuple""" return (self.__red, self.__green, self.__blue) def setRed(self,red): """Modify the red component""" if self.max >= red >= 0: self.__red = red else: raise ValueError("Error: pixel value %d is out of range" % red) def setGreen(self,green): """Modify the green component""" if self.max >= green >= 0: self.__green = green else: raise ValueError("Error: pixel value %d is out of range" % green) def setBlue(self,blue): """Modify the blue component""" if self.max >= blue >= 0: self.__blue = blue else: raise ValueError("Error: pixel value %d is out of range" % blue) def __getitem__(self,key): """Allow new style pixel class to act like a color tuple: 0 --> red 1 --> green 2 --> blue """ if isinstance(key, slice): raise TypeError("Slicing is not supported") if key == 0 or key == -3: return self.__red elif key == 1 or key == -2: return self.__green elif key == 2 or key == -1: return self.__blue else: raise IndexError("Error %d Index out of range" % key) def setRange(self,pmax): """docstring for setRange""" if pmax == 1.0: self.max = 1.0 elif pmax == 255: self.max = 255 else: raise ValueError("Error range must be 1.0 or 256") def __str__(self): return str(self.getColorTuple()) def __repr__(self): """docstring for __repr__""" return str(self.getColorTuple()) red = property(getRed, setRed, None, "I'm the red property.") green = property(getGreen, setGreen, None, "I'm the green property.") blue = property(getBlue, setBlue, None, "I'm the blue property.")class AbstractImage(object): """ Create an image. The image may be created in one of four ways: 1. From an image file such as gif, jpg, png, ppm for example: i = image('fname.jpb) 2. From a list of lists 3. From another image object 4. By specifying the height and width to create a blank image. """ imageCache = {} # tk photoimages go here to avoid GC while drawn imageId = 1 def __init__(self,fname=None,data=[],imobj=None,height=0,width=0): """ An image can be created using any of the following keyword parameters. When image creation is complete the image will be an rgb image. fname: A filename containing an image. Can be jpg, gif, and others data: a list of lists representing the image. This might be something you construct by reading an asii format ppm file, or an ascii art file and translate into rgb yourself. imobj: Make a copy of another image. height: width: Create a blank image of a particular height and width. """ super(AbstractImage, self).__init__() # if PIL is available then use the PIL functions otherwise fall back to Tk if pilAvailable: self.loadImage = self.loadPILImage self.createBlankImage = self.createBlankPILImage self.setPixel = self.setPILPixel self.getPixel = self.getPILPixel self.save = self.savePIL else: self.loadImage = self.loadTkImage self.createBlankImage = self.createBlankTkImage self.setPixel = self.setTkPixel self.getPixel = self.getTkPixel self.save = self.saveTk if fname: self.loadImage(fname) self.imFileName = fname elif data: height = len(data) width = len(data[0]) self.createBlankImage(height,width) for row in range(height): for col in range(width): self.setPixel(col,row,Pixel(data[row][col])) elif height > 0 and width > 0: self.createBlankImage(height,width) elif imobj: self.im = imobj.copy() if pilAvailable: self.width,self.height = self.im.size else: self.width = self.im.width() self.height = self.im.height() self.centerX = self.width/2+3 # +3 accounts for the ~3 pixel border in Tk windows self.centerY = self.height/2+3 self.id = None def loadPILImage(self,fname): self.im = PIL_Image.open(fname) ni = self.im.convert("RGB") self.im = ni def loadTkImage(self,fname): sufstart = fname.rfind('.') if sufstart 0: suffix = "" else: suffix = fname[sufstart:] if suffix not in ['.gif', '.ppm']: raise ValueError("Bad Image Type: %s : Without PIL, only .gif or .ppm files are allowed" % suffix) self.im = tkinter.PhotoImage(file=fname) def createBlankPILImage(self,height,width): self.im = PIL_Image.new("RGB",(width,height)) ni = self.im.convert("RGB") self.im = ni def createBlankTkImage(self,height,width): self.im = tkinter.PhotoImage(height=height,width=width) def copy(self): """Return a copy of this image""" newI = AbstractImage(imobj=self.im) return newI def clone(self): """Return a copy of this image""" newI = AbstractImage(imobj=self.im) return newI def getHeight(self): """Return the height of the image""" return self.height def getWidth(self): """Return the width of the iamge""" return self.width def getTkPixel(self,x,y): """Get a pixel at the given x,y coordinate. The pixel is returned as an rgb color tuple for example foo.getPixel(10,10) --> (10,200,156) """ p = self.im.get(x,y) # p is a string in some tkinter versions; tuple in others. try: p = [int(j) for j in p.split()] except AttributeError: pass return Pixel(p[0],p[1],p[2]) def setTkPixel(self,x,y,pixel): """Set the color of a pixel at position x,y. The color must be specified as an rgb tuple (r,g,b) where the rgb values are between 0 and 255.""" if x and y else: raise ValueError("Pixel index out of range.") def getPILPixel(self,x,y): """docstring for getPILPIxel""" p = self.im.getpixel((x,y)) return Pixel(p[0],p[1],p[2]) def setPILPixel(self,x,y,pixel): """docstring for setPILPixel""" if x and y else: raise ValueError("Pixel index out of range") def setPosition(self,x,y): """Set the position in the window where the top left corner of the window should be.""" self.top = y self.left = x self.centerX = x + (self.width/2)+3 self.centerY = y + (self.height/2)+3 def getImage(self): if pilAvailable: return ImageTk.PhotoImage(self.im) else: return self.im def draw(self,win): """Draw this image in the ImageWin window.""" ig = self.getImage() self.imageCache[self.imageId] = ig # save a reference else Tk loses it... AbstractImage.imageId = AbstractImage.imageId + 1 self.canvas=win self.id = self.canvas.create_image(self.centerX,self.centerY,image=ig) _imroot.update() def saveTk(self,fname=None,ftype='gif'): if fname == None: fname = self.imFileName sufstart = fname.rfind('.') if sufstart 0: suffix = "" else: suffix = fname[sufstart:] if suffix == "": suffix = "."+ftype fname = fname+suffix if suffix not in ['.gif', '.ppm']: raise ValueError("Without PIL, only .gif or .ppm files are allowed") try: self.im.write(fname,format=ftype) except IOError as e: print(e) print("Error saving, Could Not open ", fname, " to write.") except tkinter.TclError as tke: print(tke) print("gif files can only handle 256 distinct colors") def savePIL(self,fname=None,ftype='jpg'): if fname == None: fname = self.imFileName sufstart = fname.rfind('.') if sufstart 0: suffix = "" else: suffix = fname[sufstart:] if suffix == "": suffix = "."+ftype fname = fname+suffix try: self.im.save(fname) except: print("Error saving, Could Not open ", fname, " to write.") def toList(self): """ Convert the image to a List of Lists representation """ res = [] for i in range(self.height): res.append([]) for j in range(self.width): res[i].append(self.getPixel(j,i)) return resclass FileImage(AbstractImage): def __init__(self,thefile): super(FileImage, self).__init__(fname = thefile)class Image(FileImage): passclass EmptyImage(AbstractImage): def __init__(self,cols,rows): super(EmptyImage, self).__init__(height = rows, width = cols)class ListImage(AbstractImage): def __init__(self,thelist): super(ListImage, self).__init__(data=thelist)# Example program Read in an image and calulate the negative.if __name__ == '__main__': win = ImageWin("My Window",480,640) oImage = FileImage('lcastle.gif') print(oImage.getWidth(), oImage.getHeight()) oImage.draw(win) myImage = oImage.copy() for row in range(myImage.getHeight()): for col in range(myImage.getWidth()): v = myImage.getPixel(col,row) v.red = 255 - v.red v.green = 255 - v.green v.blue = 255 - v.blue# x = map(lambda x: 255-x, v) myImage.setPixel(col,row,v) myImage.setPosition(myImage.getWidth()+1,0) myImage.draw(win) print(win.getMouse()) myImage.save('lcastle-inverted.gif') print(myImage.toList()) win.exitOnClick()
Copy and paste the above code into a blank py file and name it "cImage.py"
And lastly, the code that was given to us as a foundation.
#Asn3.py: Image processingimport cImage as imagedef draw_lines(img): '''Write code below to draw a green vertical line from top to bottom, 1/3 of the way across a copy of edinburgh-castle.gif; also draw a horizontal blue line 1/3 of the way down the same image. Return the copy''' copy = img.clone() #Make a copy of img width = copy.getWidth() height = copy.getHeight() third_x = width // 3 third_y = height // 3 green_pixel = image.Pixel(0, 255, 0) blue_pixel = image.Pixel(0, 0, 255) for y in range(0, height): copy.setPixel(third_x, y, green_pixel) for x in range(0, width): copy.setPixel(x, third_y, blue_pixel)#Don't change the above, this is my code that I came up with return copydef border(img): '''Write code below to draw a black border 10 pixels wide around arch.gif; this amounts to drawing 10 black lines across the top and bottom and 10 vertical black lines on the left and right sides.''' copy = img.clone() #Make a copy of img #Draw the border on copy return copydef blend(img1, img2): '''Write code below to blend .6 of img1 with .4 of img2; assume img1 and img2 are the same size''' new_image = image.EmptyImage(img1.getWidth(), img1.getHeight()) #for y in range of the height of new_img # for x in the range of the width of new_image # get a pixel from the x, y position of img1 # get a pixel from the x, y position of img2 # set r to 0.6 * red from img1 pixel + 0.4 * red from img2 pixel # create g & b using the same method as for r # make a new pixel using r, g, and b # set the pixel in the x, y position in new_img to the new pixel#These notes are to help you form your code ^^^ return new_imagedef rotate(img): '''OPTIONAL: Write code below to return a copy of img that is rotated 90 degrees; you'll have to create an empty image - think about what the width and height of that image should be. Then copy the pixels from img to the empty image so the new image is rotated 90 degrees from img. '''#This is optional and not required for full credit pass#Don't change anything below this pointdef main(): img1 = image.Image('images//edinburgh-castle.gif') new_img1 = draw_lines(img1) win1 = image.ImageWin("Win1", new_img1.getWidth(), new_img1.getHeight()) new_img1.draw(win1) img2 = image.Image('images//arch.gif') new_img2 = border(img2) win2 = image.ImageWin("Win2", new_img2.getWidth(), new_img2.getHeight()) new_img2.draw(win2) img3 = image.Image('images//beach.gif') img4 = image.Image('images//blueMotorcycle.gif') img5 = blend(img3, img4) win3 = image.ImageWin("Win3", img5.getWidth(), img5.getHeight()) img5.draw(win3) img6 = image.Image("images//arch.gif") img7 = rotate(img6) if img7: win7 = image.ImageWin("Win7", img7.getWidth(), img7.getHeight()) img7.draw(win7) main()
I apologize for the long pieces of code. In the assignment code, disregard rotate as it is not needed for credit. I have also attached 4 gifs and that are still images, but my instructor has asked for them to be gifs. Please get back to me soon as this assignment is due tomorrow. Thank you very much.


\f\f\f\f
Step by Step Solution
There are 3 Steps involved in it

Get step-by-step solutions from verified subject matter experts


