

Answered step by step
Verified Expert Solution
Question
1 Approved Answer
Milestone # 1 - Welcome screen In this milestone, you will create the welcome screen for the Connections game. The purpose of this game component
Milestone # Welcome screen In this milestone, you will create the welcome screen for the Connections game. The purpose of this game component is to welcome users to the game, explain the rules, save their name to the system, and give them the option to start the game. This part is all inputoutput Read below carefully because your code must be precisely the same as what is described to receive credit this includes whitespace, new lines, capitalization, etc. Here is a sample inputoutput: Connections Group words that share a common thread. Enter your name: Wyna Welcome, Wyna! Press enter to start: Now, some of the above is an output and some is an input. Let's looks line by line. First two lines are strictly outputs, eg: Connections Group words that share a common thread. Next, we have a user prompted input. The prompt is: Enter your name: The user provided the input Wyna. That must be captured and saved to a variable to use later in a few places Next we have customized welcome message which is a variable output: Welcome, wyna! Lastly, we have another input, the prompt is: Lastly, we have another input, the prompt is: Press enter to start: The user provides no input, just pressex enter which means gameplay will start which you will add in the next milestone Your program will hang here until enter is pressed. Develop this in the IDE below. Run often in the IDE and once you think it is correct, submit to autograder. You will only get credit for this milestone if you pass the autograder and receive the points from the autograder. We do not manually review your code to give partial credit for close solutions that do not pass. If you are missing something even something minor like a space you will get zero credit. tableLAB: Welcome ScreenCode Development Develop your code incrementally and run often until it looks right. You should test on all files to make sure your function is written generally and will work for all. When you feel confident your code is right, submit your code and test against the autograder. You have unlimited attempts. See the test case below for the format of the output. main.py # TODO: Write out a file header comment # TODO: Write the code 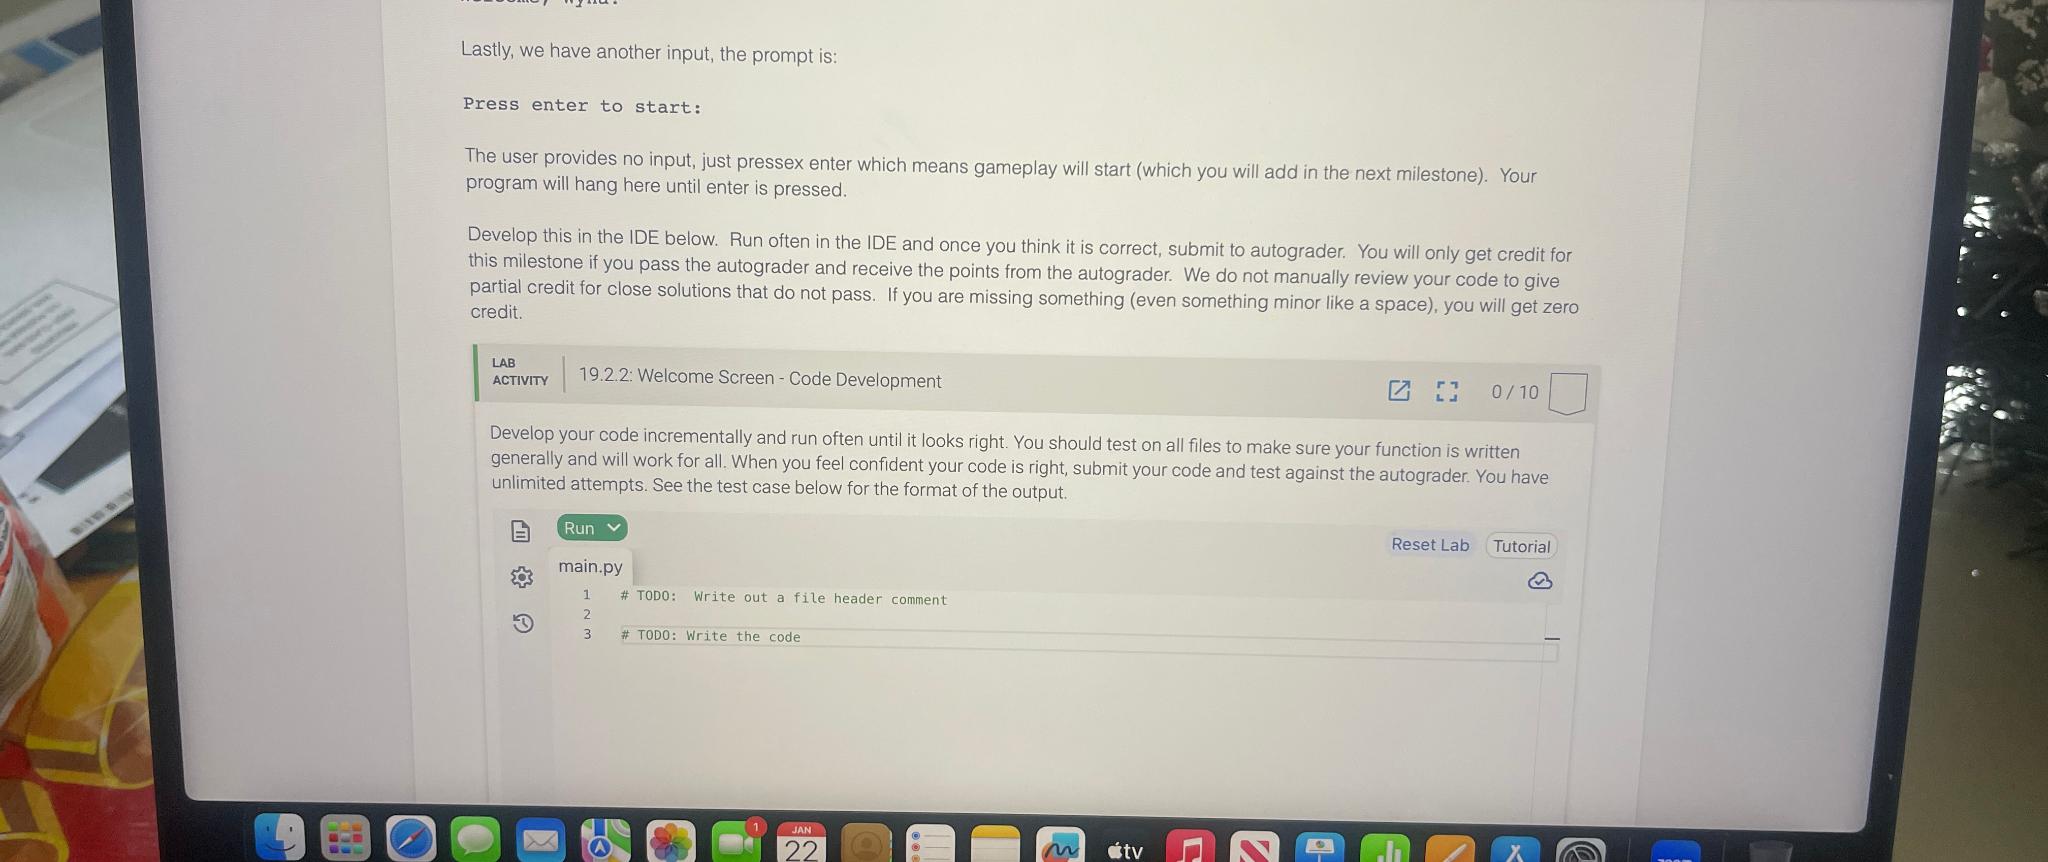
Milestone # Welcome screen
In this milestone, you will create the welcome screen for the Connections game. The purpose of this game component is to welcome users to the game, explain the rules, save their name to the system, and give them the option to start the game. This part is all inputoutput Read below carefully because your code must be precisely the same as what is described to receive credit this includes whitespace, new lines, capitalization, etc.
Here is a sample inputoutput:
Connections
Group words that share a common thread.
Enter your name: Wyna
Welcome, Wyna!
Press enter to start:
Now, some of the above is an output and some is an input. Let's looks line by line. First two lines are strictly outputs, eg:
Connections
Group words that share a common thread.
Next, we have a user prompted input. The prompt is:
Enter your name:
The user provided the input Wyna. That must be captured and saved to a variable to use later in a few places Next we have customized welcome message which is a variable output:
Welcome, wyna!
Lastly, we have another input, the prompt is:
Lastly, we have another input, the prompt is:
Press enter to start:
The user provides no input, just pressex enter which means gameplay will start which you will add in the next milestone Your program will hang here until enter is pressed.
Develop this in the IDE below. Run often in the IDE and once you think it is correct, submit to autograder. You will only get credit for this milestone if you pass the autograder and receive the points from the autograder. We do not manually review your code to give partial credit for close solutions that do not pass. If you are missing something even something minor like a space you will get zero credit.
tableLAB: Welcome ScreenCode Development
Develop your code incrementally and run often until it looks right. You should test on all files to make sure your function is written generally and will work for all. When you feel confident your code is right, submit your code and test against the autograder. You have unlimited attempts. See the test case below for the format of the output.
main.py
# TODO: Write out a file header comment
# TODO: Write the code
Step by Step Solution
There are 3 Steps involved in it
Step: 1

Get Instant Access to Expert-Tailored Solutions
See step-by-step solutions with expert insights and AI powered tools for academic success
Step: 2

Step: 3
Ace Your Homework with AI
Get the answers you need in no time with our AI-driven, step-by-step assistance
Get Started
Hands-On Database
Authors: Steve Conger
2nd Edition
0133024415, 978-0133024418