

Answered step by step
Verified Expert Solution
Question
1 Approved Answer
Modify the following Polygon GUI App in java to have the program change the shape of the polygon depending on the dimensions, for example, it
Modify the following Polygon GUI App in java to have the program change the shape of the polygon depending on the dimensions, for example, it should display a circle when sides and radius are package silvestri;
import java.awt.Color;
import javafx.application.Application;
import javafx.geometry.Pos;
import javafx.scene.Scene;
import javafx.scene.control.Button;
import javafx.scene.control.Label;
import javafx.scene.control.TextField;
import javafx.scene.layout.BorderPane;
import javafx.scene.layout.HBox;
import javafx.scene.layout.StackPane;
import javafx.scene.layout.VBox;
import javafx.stage.Stage;
import shapes.RegularPolygon;
import shapes.Circle;
import shapes.Rectangle;
import shapes.Shape;
import shapes.Triangle;
import silvestri.UpdateablePolygon;
public class PolygonApp extends Application
private TextField sidesField;
private TextField radiusField;
private TextField areaField;
private TextField perimeterField;
private UpdateablePolygon polygon;
@Override
public void startStage primaryStage
Create input fields and labels
Label sidesLabel new LabelSides:;
Label radiusLabel new LabelRadius:;
sidesField createClearableTextField;
radiusField createClearableTextField;
Label areaLabel new LabelArea:;
Label perimeterLabel new LabelPerimeter:;
areaField createReadonlyTextField;
perimeterField createReadonlyTextField;
Create a button
Button calculateButton new ButtonCalculate;
calculateButton.setOnActionevent calculatePolygon;
Create an HBox for input fields and button
HBox inputBox new HBox;
inputBox.getChildrenaddAllsidesLabel sidesField, radiusLabel, radiusField, calculateButton;
Create a BorderPane to hold input fields, output fields, and the polygon
BorderPane root new BorderPane;
root.setTopinputBox;
root.setLeftareaLabel;
root.setLeftareaField;
root.setRightperimeterLabel;
root.setRightperimeterField;
polygon new UpdateablePolygon;
polygon.setSides;
root.setCenterpolygon;
Configure the scene and stage
Scene scene new Sceneroot;
primaryStage.setTitlePolygon Statistics Solver Tony Silvestri";
primaryStage.setScenescene;
primaryStage.show;
Set the initial polygon sides and radius
sidesField.setText;
radiusField.setText;
calculatePolygon;
private TextField createClearableTextField
TextField textField new TextField;
textField.setPrefWidth;
textField.setOnMousePressedevent textField.clear;
return textField;
private TextField createReadonlyTextField
TextField textField new TextField;
textField.setPrefWidth;
textField.setEditablefalse;
textField.setFocusTraversablefalse;
textField.setMouseTransparenttrue;
return textField;
private void calculatePolygon
int sides Integer.parseIntsidesFieldgetText;
double circumRadius Double.parseDoubleradiusFieldgetText;
RegularPolygon regularPolygon new RegularPolygonsides circumRadius, "Black", false;
areaField.setTextStringformatf regularPolygon.getArea;
perimeterField.setTextStringformatf regularPolygon.getPerimeter;
public static void mainString args
launchargs;
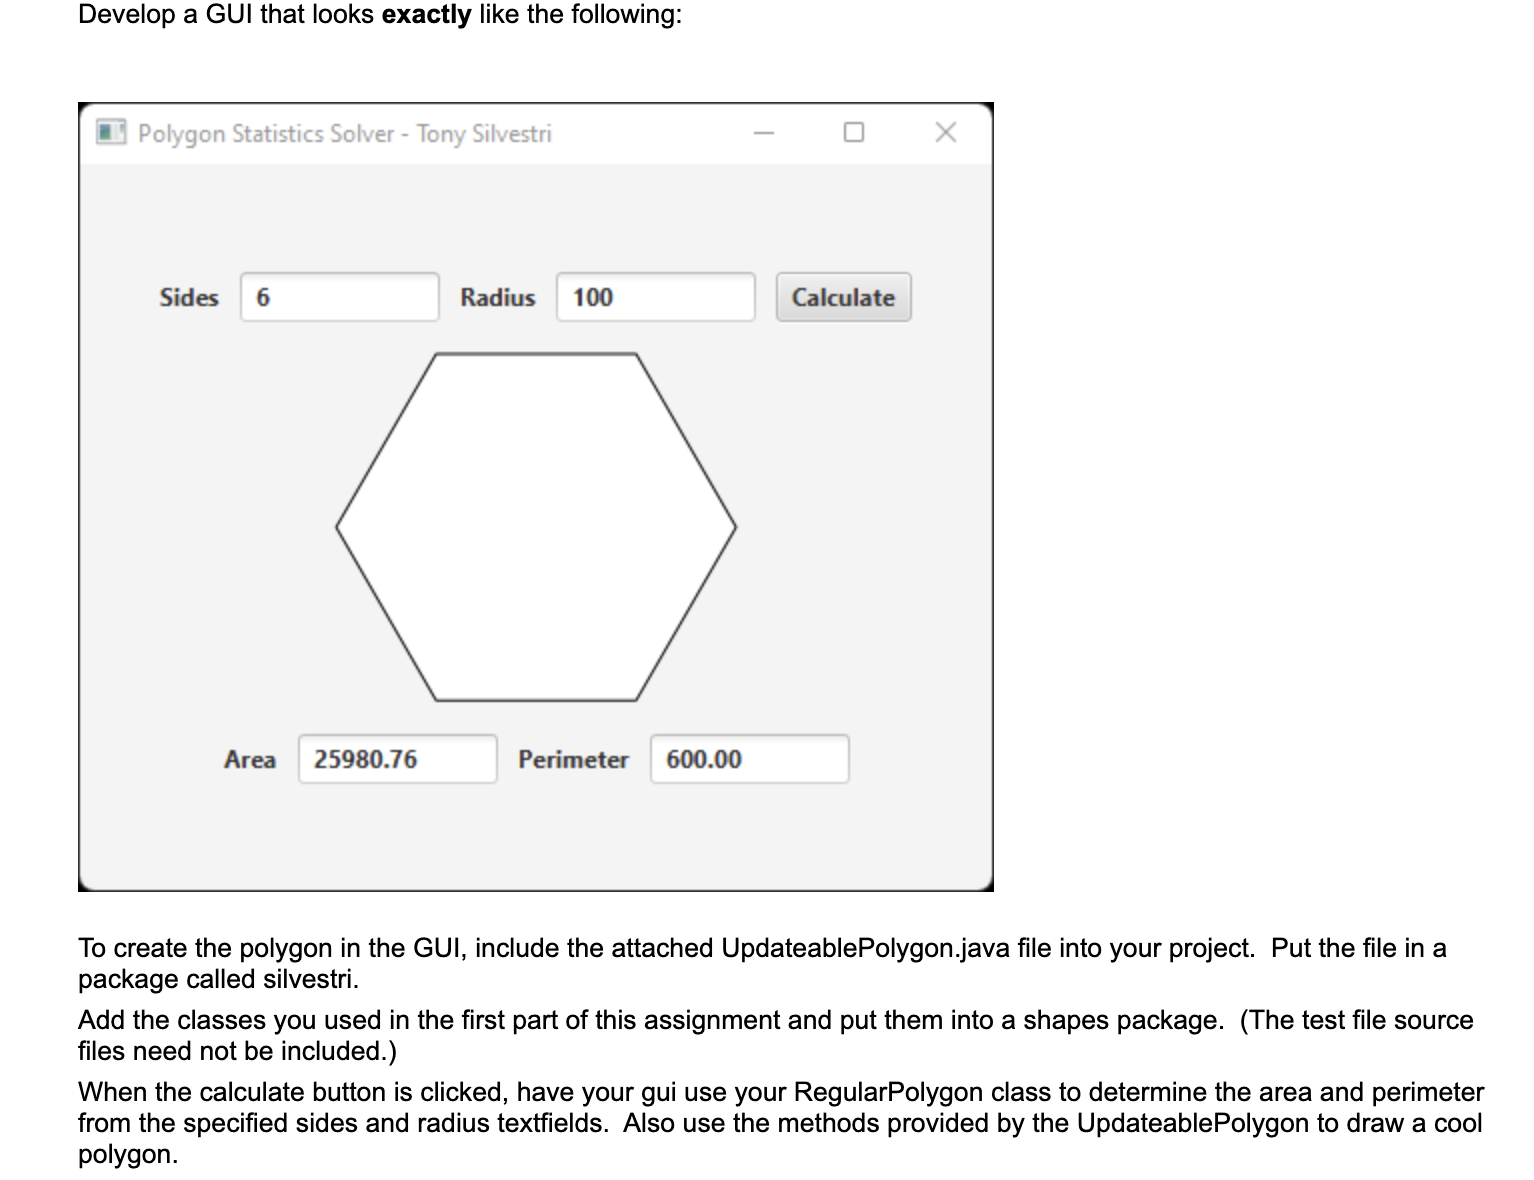
Develop a GUI that looks exactly like the following:
Polygon Statistics Solver Tony Silvestri
Sides
Area
Perimeter
To create the polygon in the GUI, include the attached UpdateablePolygon.java file into your project. Put the file in a
package called silvestri.
Add the classes you used in the first part of this assignment and put them into a shapes package. The test file source
files need not be included.
When the calculate button is clicked, have your gui use your RegularPolygon class to determine the area and perimeter
from the specified sides and radius textfields. Also use the methods provided by the UpdateablePolygon to draw a cool
polygon.
Step by Step Solution
There are 3 Steps involved in it
Step: 1

Get Instant Access to Expert-Tailored Solutions
See step-by-step solutions with expert insights and AI powered tools for academic success
Step: 2

Step: 3
Ace Your Homework with AI
Get the answers you need in no time with our AI-driven, step-by-step assistance
Get Started
Data Visualization A Practical Introduction
Authors: Kieran Healy
1st Edition
0691181624, 978-0691181622