Photoshop assignment

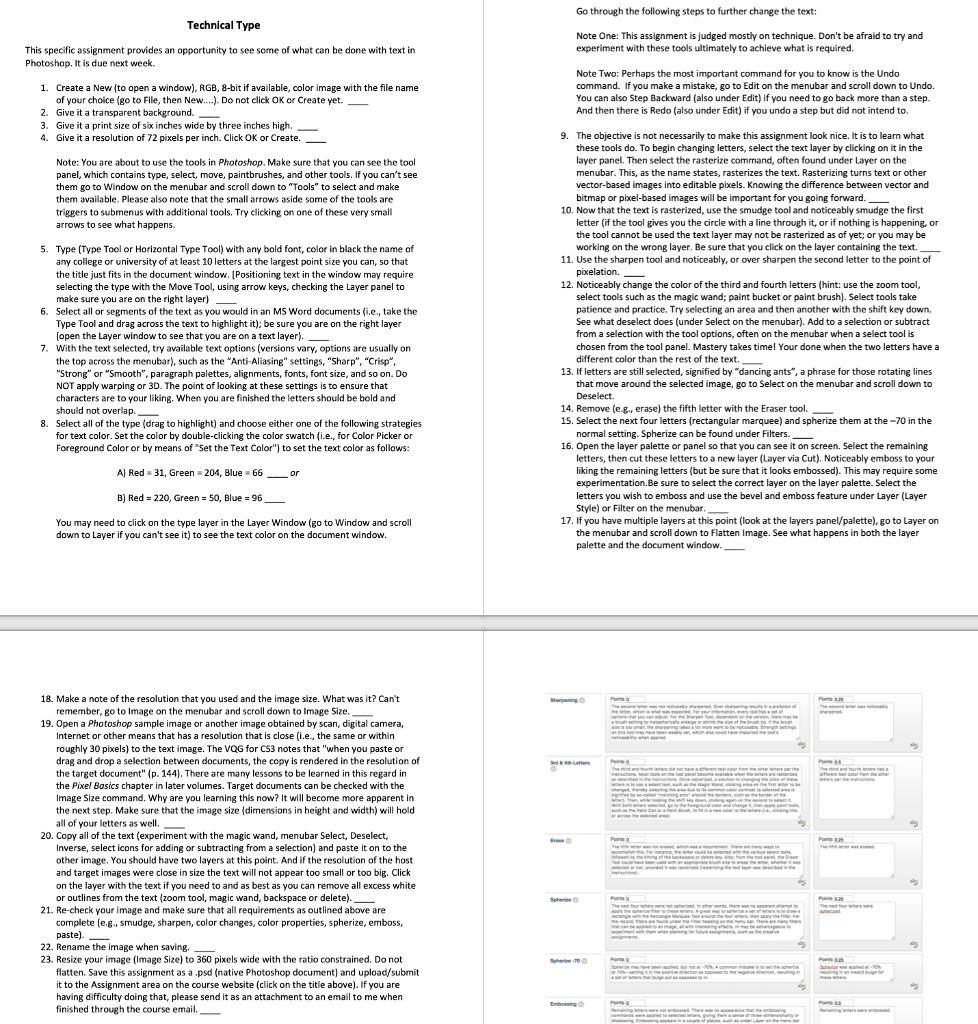
Go through the following steps to further change the text: Technical Type Note One: This assignment is judged mostly on technique. Don't be afraid to try and experiment with these tools ultimately to achieve what is required. This specific assignment provides an opportunity to see some of what can be done with text in Photoshop, It is due next week. Note Two: Perhaps the most important command for you to know is the Undo command. If you make a mistake, go to Edit on the menubar and scroll down to Undo. You can also Step Backward (also under Edit) if you need to go back more than a step. And then there is Redo (also under Edit) if you undo a step but did not intend to. 1. Create a New (to open a window), RGB, 8-bit if available, color image with the file name of your choice (go to File, then New..... Do not click OK or Create yet. 2. Give it a transparent background. 3. Give it a print size of six inches wide by three inches high 4. Give it a resolution of 72 pixels per inch. Click OK or Create,-- 9. Note: You are about to use the tools in Photoshop. Make sure that you can see the tool panel, which contains type, select, move, paintbrushes, and other tools. If you can't see them go to Window on the menubar and scroll down to "Tools" to select and make them available. Please also note that the small arrows aside some of the tools are triggers to submenus with additional tools. Try clicking on one of these very small The objective is not necessarily to make this assignment look nice. It is to learn what these tools do. To begin changing letters, select the text layer by clicking on it in the layer panel. Then select the rasterize command, often found under Layer on the menubar. This, as the name states, rasterizes the text. Rasterizing turns text or other vector-based images into editable pixels. Knowing the difference between vector and bitmap or pixel-based images will be important for you going forward. 10. Now that the text is rasterized, use the smudge tool and noticeably smudge the first letter (if the tool gives you the circle with a line through it, or if nothing is happening, or the tool cannot be used the text layer may not be rasterized as of yet; or you may be working on the wrong layer. Be sure that you click on the layer containing the text. to see 5. Type (Type Tool or Horizontal Type Tool) with any bold font, color in black the name of any college or university of at least 10 letters at the lagest point size you can, so that the title just fits in the document window. [Positioning text in the window may require selecting the type with the Move Tool, using arrow keys, checking the Layer panel to make sure you are on the right layer) Select all or segments of the text as you would in an MS Word documentsi.e., take the Type Tool and drag across the text to highlight it) be sure you are on the right layer open the Layer window to see that you are on a text layer). 11. Use the sharpen tool and noticeably, or over sharpen the second letter to the point of 12. Noticeably change the color of the third and fourth letters (hint: use the zoom tool, select tools such as the magic wand; paint bucket or paint brush). Select tools take patience and practice. Try selecting an area and then another with the shift key down. See what deselect does (under Select on the menubar). Add to a selection or subtract from a selection with the tool options, often on the menubar when a select tool is chosen from the tool panel. Mastery takes time! Your done when the two letters have a different color than the rest of the text, 6. 7. With the text selected, try available text options (versions vary, options are usually orn the top across the menubar), such as the "Anti-Aliasing" settings, "Sharp", "Crisp "Strong" or "Smooth", paragraph palettes, alignments, fonts, font size, and so on. Do NOT apply warping or 3D. The point of looking at these settings is to ensure that characters are to your liking. When you are finished the letters should be bold and should not overlap. -- 13, t letters are still selected, signified by "dancing ants", a phrase for those rotating lines that move around the selected image, go to Select on the menubar and scroll down to Deselect. 14. Remove (e.g., erase) the fifth letter with the Eraser tool. 15. Select the next four letters (rectangular marquee) and spherize them at the-70 in the 8. Select all of the type (drag to highlight) and choose either one of the following strategies normal setting. Spherize can be found under Filters. for text color. Set the color by double-clicking the color swatch (i.e., for Color Picker or Foreground Color or by means of "Set the Text Color") to set the text color as follows 16. Open the layer palette or panel so that you can see it on screen. Select the remaining letters, then cut these letters to a new layer (Layer via Cut). Noticeably emboss to your liking the remaining letters (but be sure that it looks embossed). This may require some experimentation.Be sure to select the correct layer on the layer palette. Select the letters you wish to emboss and use the bevel and emboss feature under Layer (Layer Style) or Filter on the menubar A] Red 31, Green 204, Blue 66 or B) Red 220, Green 50, Blue 96 17. If you have multiple layers at this point (look at the layers panel/palette), go to Layer on You may need to click on the type layer in the Layer Window (go to Window and scroll down to Layer if you can't see it) to see the text color on the document window the menubar and scroll down to Flatten Image. See what happens in both the layer palette and the document window 18. Make a note of the resolution that you used and the image size. What was it? Can't remember, Bo to Image on the menubar and scroll down to Image Size. 19. Open a Photoshop sample image or another image obtained by scan, digital camera, Internet or other means that has a resolution that is close (i.e., the same or within roughly 30 pixels) to the text image. The VQG for CS3 notes that "when you paste or drag and drop a selection between documents, the copy is rendered in the resolution of the target document" (p. 144). There are many lessons to be learned in this regard in the Pixel Bosics chapter in later volumes. Target documents can be checked with the Image Size command. Why are you learning this now? It will become more apparent in the next step. Make sure that the image size (dimensions in height and width) will hold all of your letters as well 20. Copy all of the text (experiment with the magic wand, menubar Select, Deselect, Inverse, select icons for adding or subtracting from a selection) and paste it on to the other image. You should have two layers at this point. And if the resolution of the host and target images were close in size the text will not appear too small or too big. Click on the layer with the text if you need to and as best as you can remove all excess white or outlines from the text (zoom tool, magic wand, backspace or delete). 21. Re-check your image and make sure that all requirements as outlined above are complete (e.g., smudge, sharpen, color changes, color properties, spherize, emboss, paste). 22. Rename the image when saving. 23. Resize your image (Image Size) to 360 pixels wide with the ratio constrained. Do not flatten. Save this assignment as a .psd (native Photoshop document) and upload/submit it to the Assignment area on the course website (click on the title above). If you are having difficulty doing that, please send it as an attachment to an email to me when finished through the course email


