Answered step by step
Verified Expert Solution
Question
1 Approved Answer
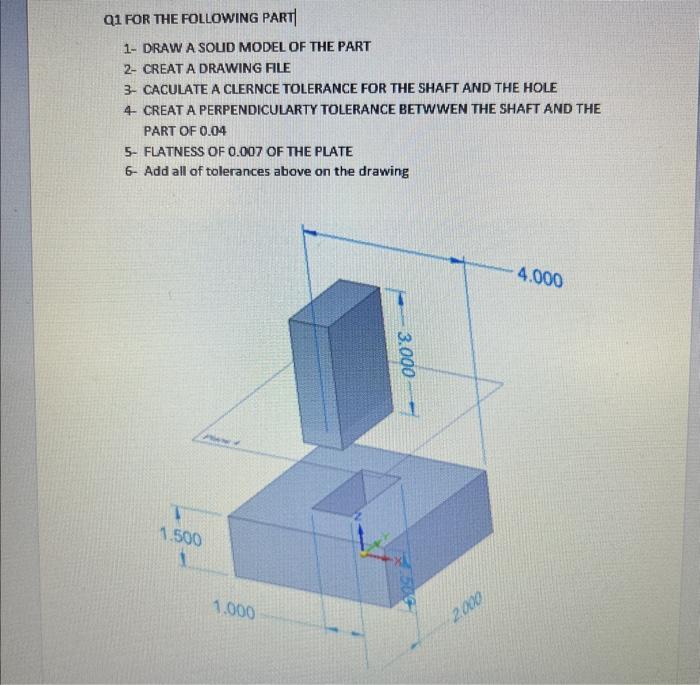
please do Q2 (the second picture) Q1 FOR THE FOLLOWING PART| 1- DRAW A SOUD MODEL OF THE PART 2- CREAT A DRAWING FLE 3-
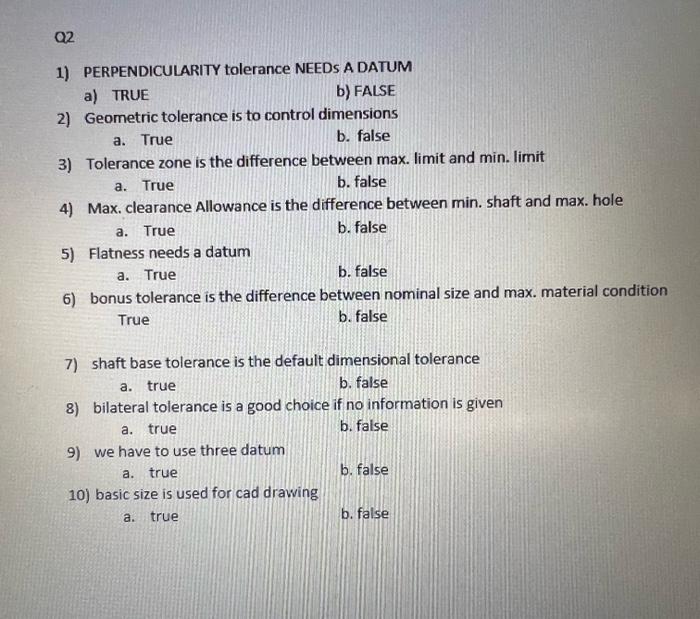
please do Q2 (the second picture) 

Q1 FOR THE FOLLOWING PART| 1- DRAW A SOUD MODEL OF THE PART 2- CREAT A DRAWING FLE 3- CACULATE A CLERNCE TOLERANCE FOR THE SHAFT AND THE HOLE 4. CREAT A PERPENDICULARTY TOLERANCE BETWWEN THE SHAFT AND THE PART OF 0.04 5. FLATNESS OF 0.007 OF THE PLATE 6- Add all of tolerances above on the drawing 1) PERPENDICULARITY tolerance NEEDS A DATUM a) TRUE b) FALSE 2) Geometric tolerance is to control dimensions a. True b. false 3) Tolerance zone is the difference between max. limit and min. limit a. True b. false 4) Max. clearance Allowance is the difference between min. shaft and max. hole a. True b. false 5) Flatness needs a datum a. True b. false 6) bonus tolerance is the difference between nominal size and max. material condition True b. false 7) shaft base tolerance is the default dimensional tolerance a. true b. false 8) bilateral tolerance is a good choice if no information is given a. true b. false 9) we have to use three datum a. true b. false 10) basic size is used for cad drawing a. true b. false 

Step by Step Solution
There are 3 Steps involved in it
Step: 1

Get Instant Access to Expert-Tailored Solutions
See step-by-step solutions with expert insights and AI powered tools for academic success
Step: 2

Step: 3

Ace Your Homework with AI
Get the answers you need in no time with our AI-driven, step-by-step assistance
Get Started


