Answered step by step
Verified Expert Solution
Question
1 Approved Answer
Please help me through this Exercise 2: Create ASP.NET MVC application 1. Start your visual studio 2019 2. Click on Create a new project Get
Please help me through this 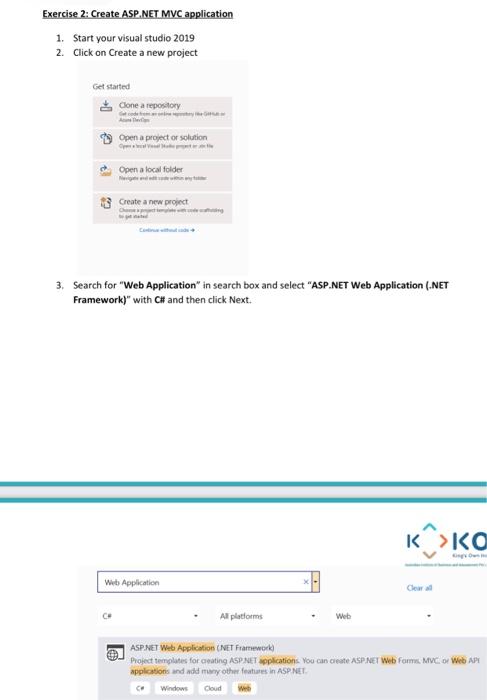
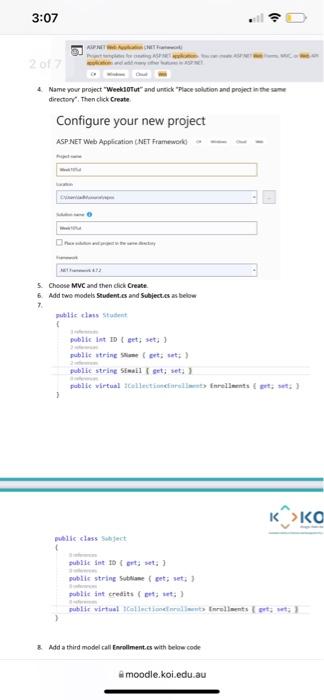
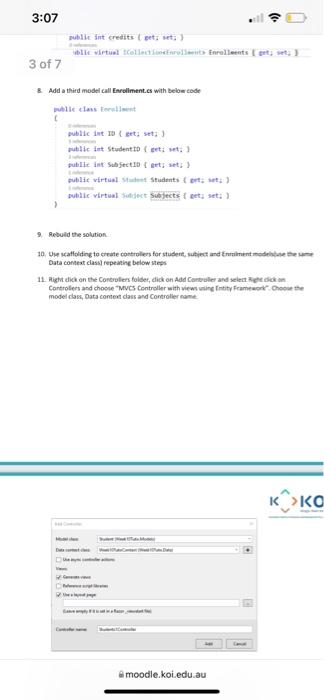
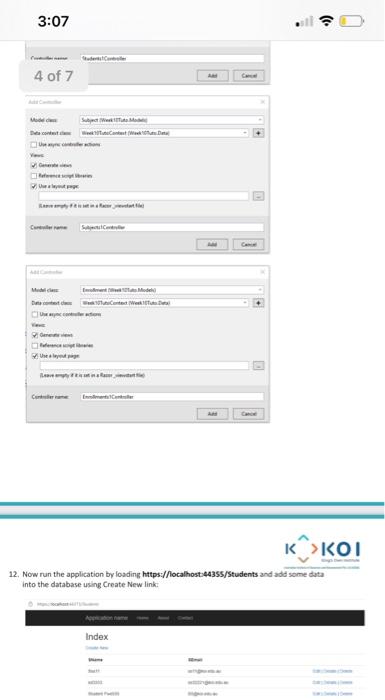
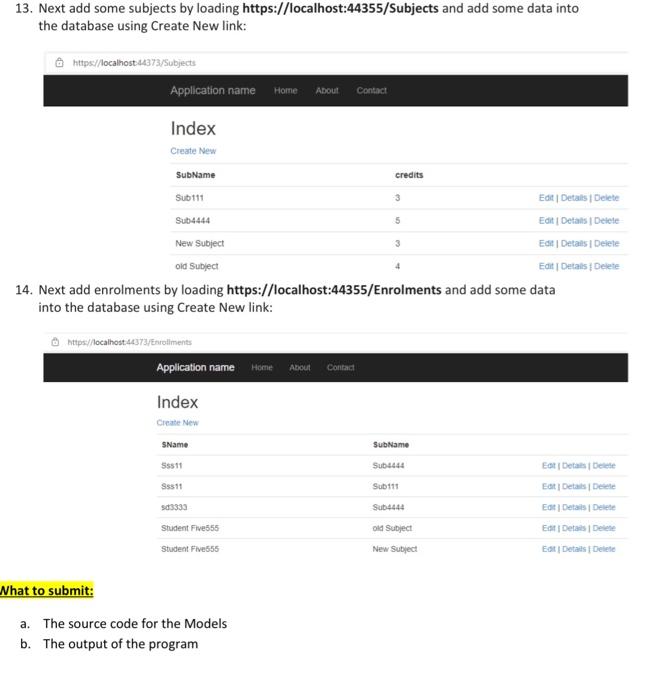
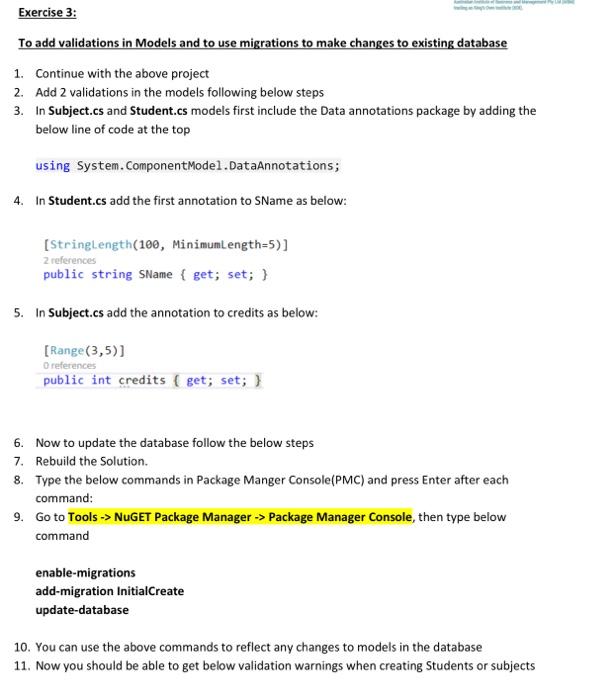
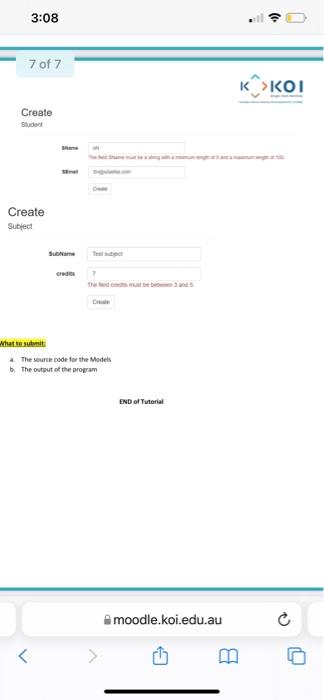
Exercise 2: Create ASP.NET MVC application 1. Start your visual studio 2019 2. Click on Create a new project Get started Cone a repository Open a project or solution . Open a local folder Create a new project 3. Search for "Web Application" in search box and select "ASP.NET Web Application (.NET Framework)" with C# and then click Next. "> Web Application . Cew Al platforms Web ASP.NET Web Application (NET Framework Project templates for creating ASP.NET Applications. You can create ASP.NET Web form. MVC Web API applications and add any other features in ASP.NET ce Windows Cloud 3:07 U KURT 2017 4 Name your project "Weeklout and untik Place solution and project in the same directory' Then click Create Configure your new project ASP.NET Web Application (NET Framework 5. Choose MVC and then click Create 6 Add two models Students and Subjectes as below 7. public class Student public int test public string me out public string Semail set, set: pablie virtual collections forellats K>ka public class Suject publie sottofort: public string Suriame bet; ut: public int credits cont; ut; publie virtual collected to inrellentsort & Add a third model call Enrollment es with below code a moodle koi.edu.au 3:07 public int credits petst:) wille virtual Colindro Enrollments et ses 3 of 7 & Add a third model call Enrollment.es with belowcode le class for public int to get set;) public int student tot in Sub Sec ID rt set: public virtual Students to :) public virtual Safect Subjects teet set: 9. Rebuild the solution 10. Use caffolding to create controllers for student, subject and Errente Data contest class repeating below steps 11. Right click on the Controllers folder, dick on Aal Controller and selected Controles and choose "MVC Controller with viewing intity Framework Choose the model class, Data content class and Controller name K>ka www. moodle.koi.edu.au 3:07 4 of 7 Show De contest Web wer + Ref you + Us 12. Now run the application by loading https://localhost:4435s/Students and add some data into the database using Create New link Index 13. Next add some subjects by loading https://localhost:44355/Subjects and add some data into the database using Create New link: @ https://localhost:44373/Subjects Application name Home About Contact credits 3 Index Create New SubName Sub 111 Edt Details Delete Sub4444 Edit | Details Delete New Subject EGR Details Delete oid Subject Edt | Detals Delete 14. Next add enrolments by loading https://localhost:44355/Enrolments and add some data into the database using Create New link: 5 3 https:/localhost:44373/Enrotiments Application name Home About Contad Index Create New SName SubName Ss11 Sub4444 S8511 Sub 111 503333 Sub4444 Et Details Delete Eat Details Detele Edt Details Delete Et Details Delete Ed Details Delete Student Five555 old Subject New Subject Student Five655 Nhat to submit: a. The source code for the Models b. The output of the program Exercise 3: To add validations in Models and to use migrations to make changes to existing database 1. Continue with the above project 2. Add 2 validations in the models following below steps 3. In Subject.cs and Student.cs models first include the Data annotations package by adding the below line of code at the top using System.ComponentModel.DataAnnotations; 4. In Student.cs add the first annotation to SName as below: [Stringl.ength(100, MinimumLength=5)] 2 references public string SName { get; set; } 5. In Subject.cs add the annotation to credits as below: [Range(3,5)] O references public int credits ( get; set; } 6. Now to update the database follow the below steps 7. Rebuild the Solution. 8. Type the below commands in Package Manger Console(PMC) and press Enter after each command: 9. Go to Tools -> NUGET Package Manager -> Package Manager Console, then type below command enable-migrations add-migration InitialCreate update-database 10. You can use the above commands to reflect any changes to models in the database 11. Now you should be able to get below validation warnings when creating Students or subjects 3:08 7 of 7 K >KOI Create Create Subject SEN 7 what to submit a The source code for the Models The output of the program END of Tutorial moodle.koi.edu.au 0 


Step by Step Solution
There are 3 Steps involved in it
Step: 1

Get Instant Access to Expert-Tailored Solutions
See step-by-step solutions with expert insights and AI powered tools for academic success
Step: 2

Step: 3

Ace Your Homework with AI
Get the answers you need in no time with our AI-driven, step-by-step assistance
Get Started


