Question: Please use any EHR VM to follow step-by-step instructions in reports for Exercise 13-17. Please attach all screenshots for Exercise 13-17. 10/5/17 10/5/17 Guided Exercise
Please use any EHR VM to follow step-by-step instructions in reports for Exercise 13-17. Please attach all screenshots for Exercise 13-17.
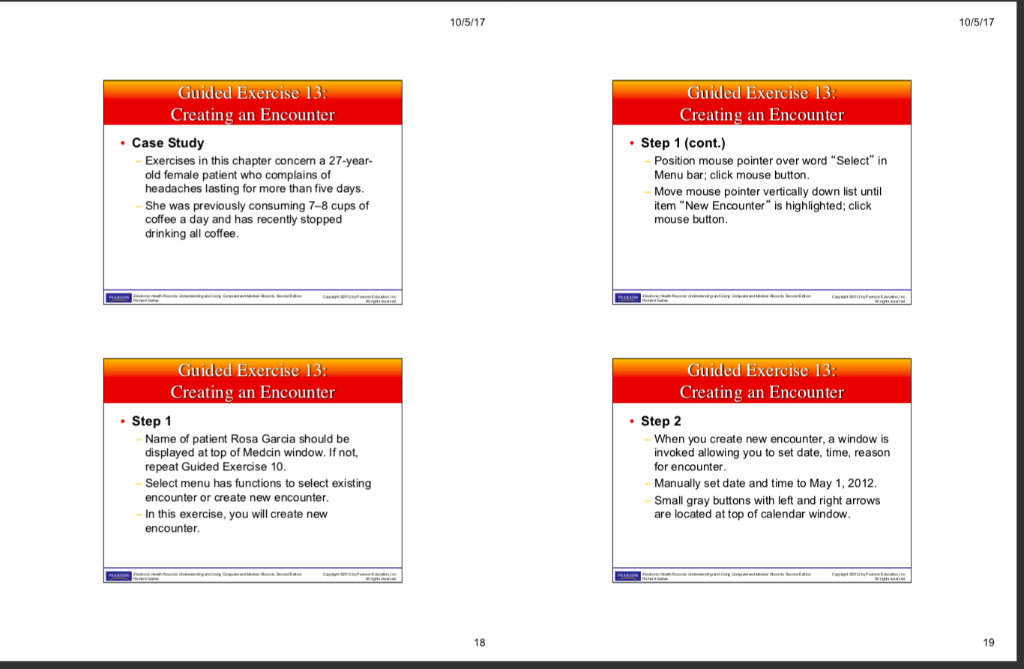
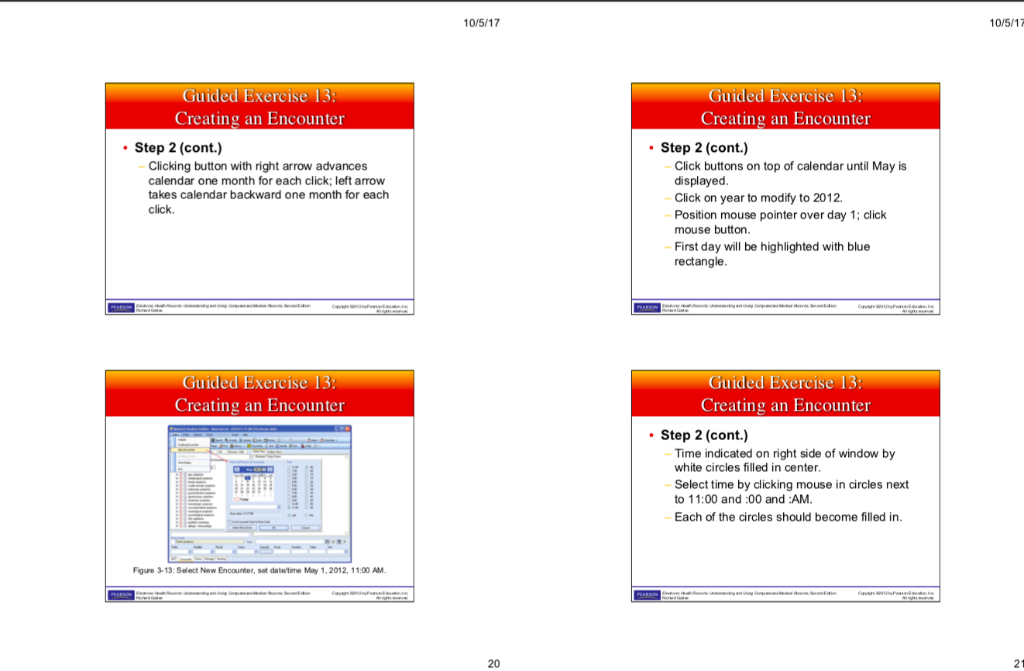
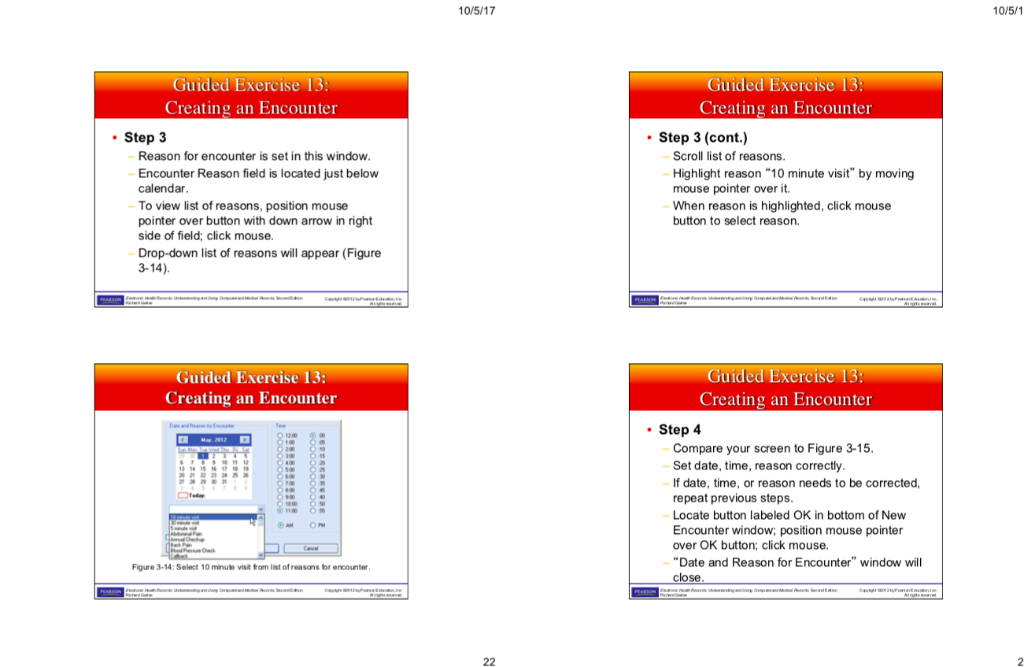
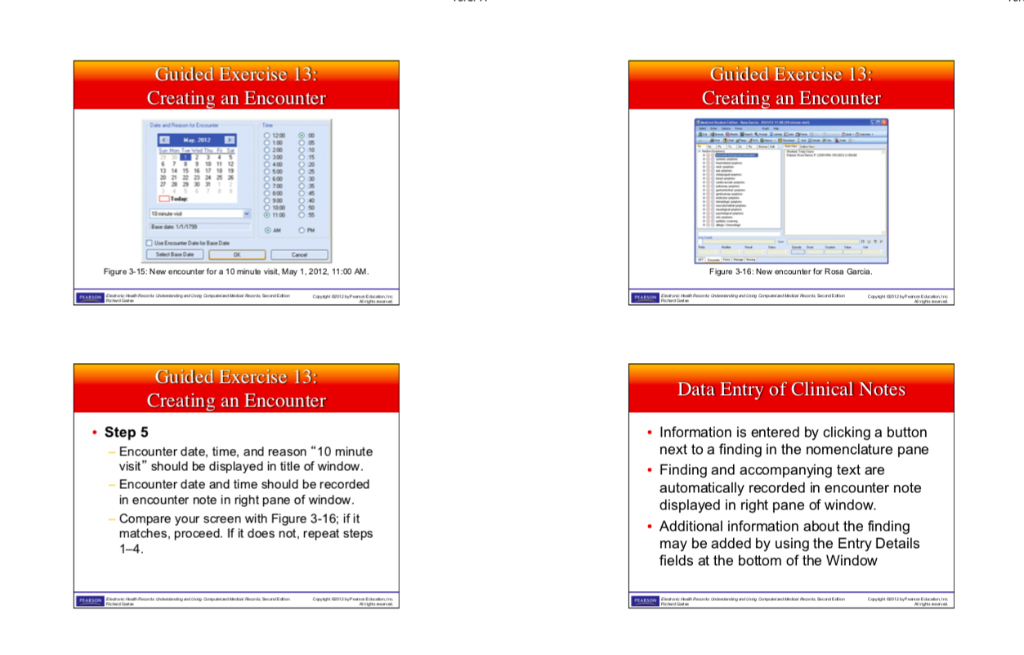
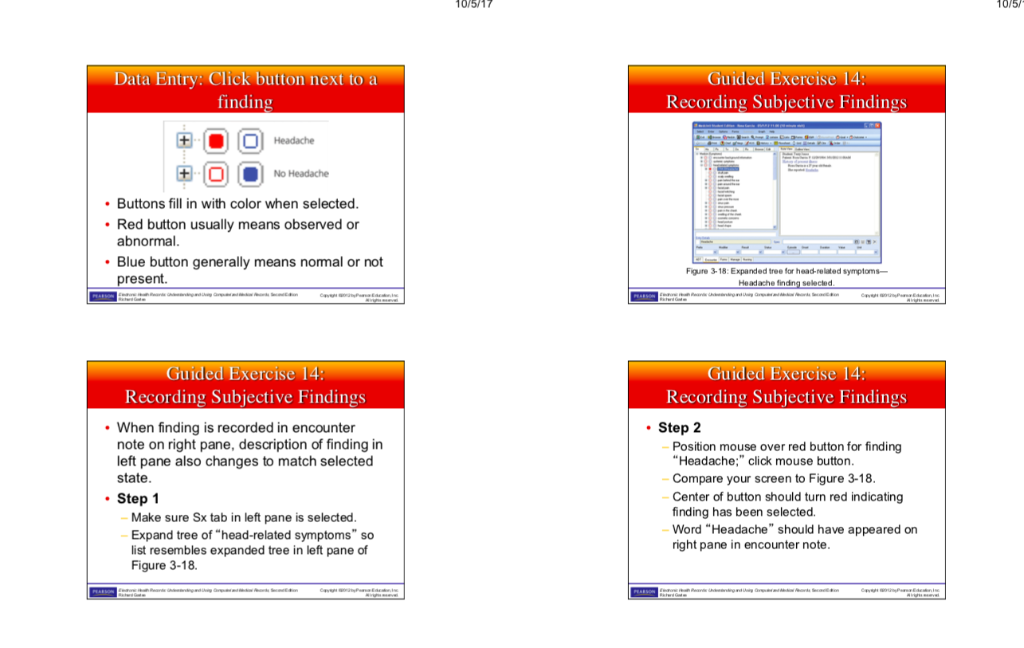
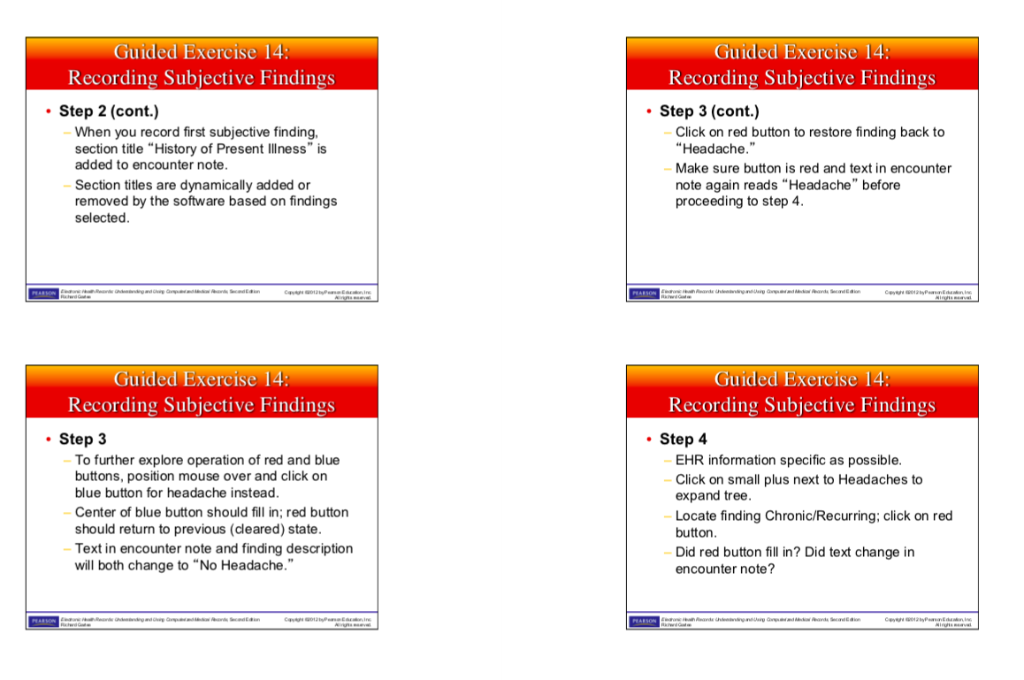
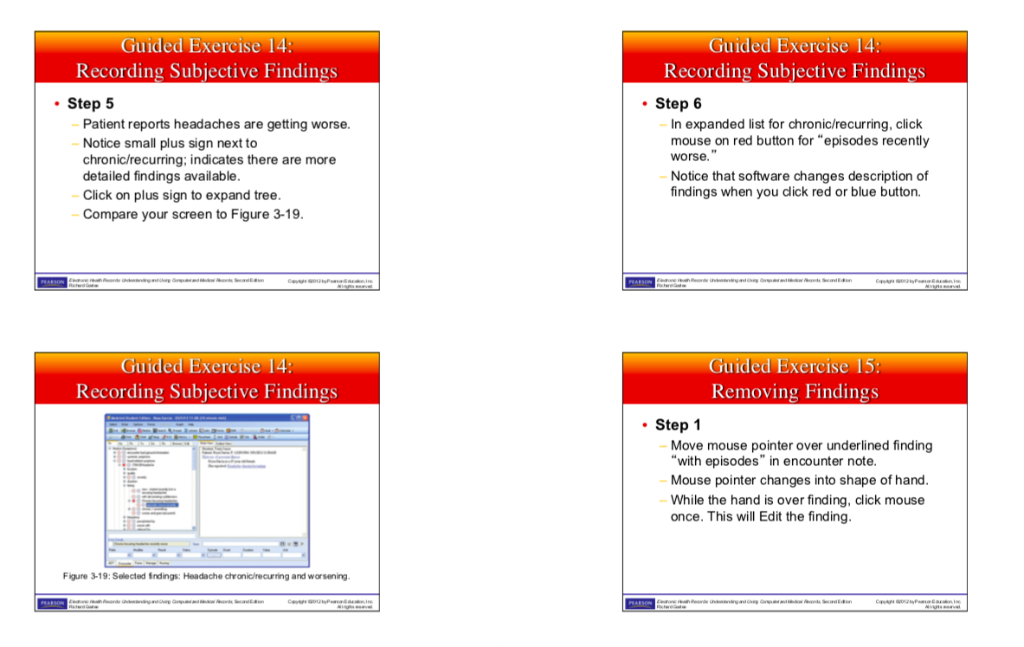
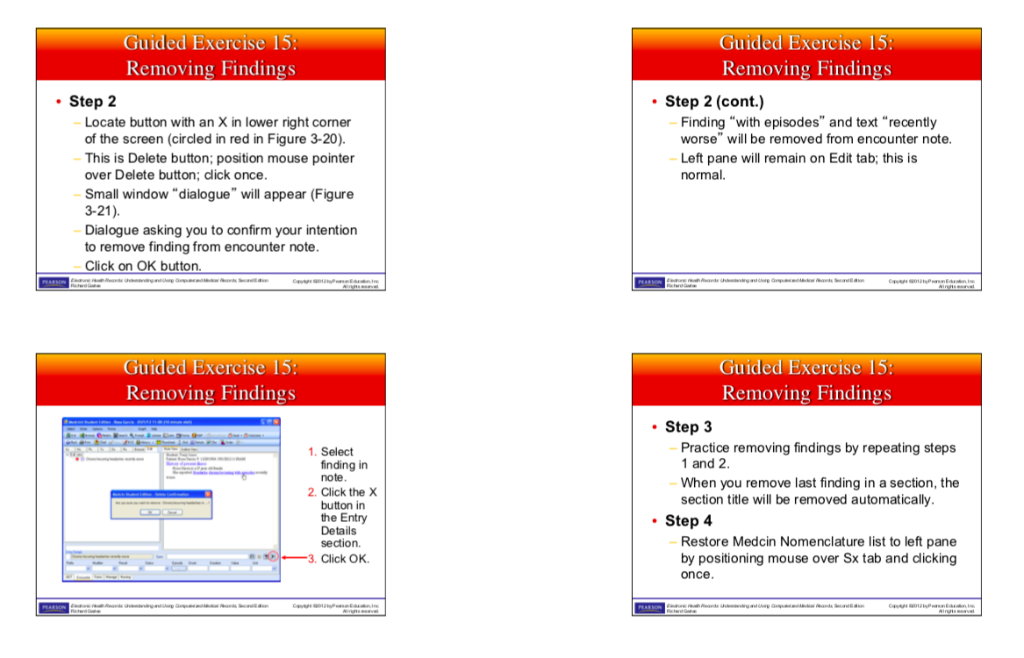
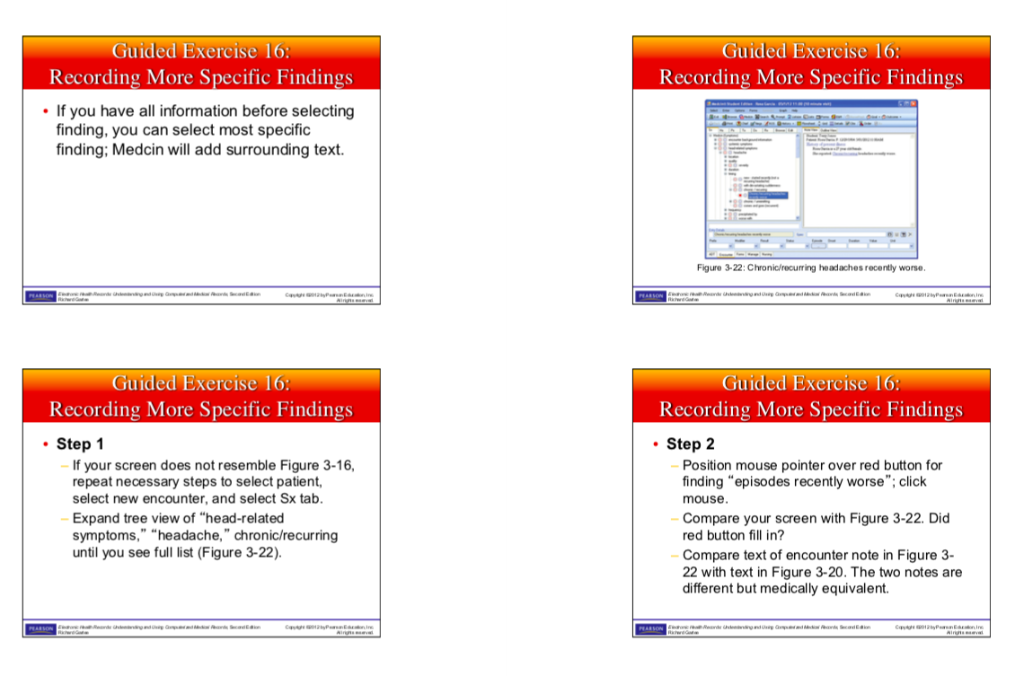
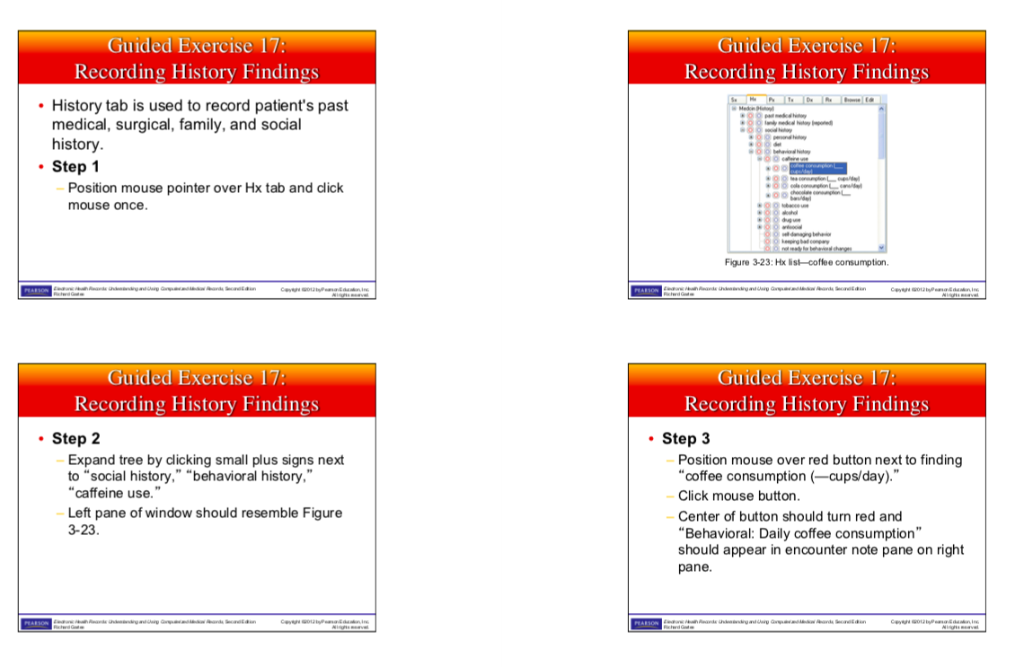
10/5/17 10/5/17 Guided Exercise Guided Exercise Creating an Encounter Creating an Encounter Case Study Step 1(cont.) Exercises in this chapter concern a 27-year- old female patient who complains of headaches lasting for more than five days. She was previously consuming 7-8 cups of coffee a day and has recently stopped drinking all coffee Position mouse pointer over word "Select" in Menu bar; click mouse button Move mouse pointer vertically down list until item "New Encounter" is highlighted; click mouse button Guided Exercise 13 Creating an Encounter Guided Exercise 13 Creating an Encounter Step 1 Step 2 Name of patient Rosa Garcia should be displayed at top of Medcin window. If not, repeat Guided Exercise 10 Select menu has functions to select existing encounter or create new encounter In this exercise, you will create new encounter When you create new encounter, a window is invoked allowing you to set date, time, reason for encounter Manually set date and time to May 1, 2012 Small gray buttons with left and right arrows are located at top of calendar window 18 19 10/5/17 10/5/17 Guided Exercise 13 Creating an Encounter Guided Exercise 13 Creating an Encounter Step 2 (cont.) Step 2 (cont.) Clicking button with right arrow advances calendar one month for each click; left arrow takes calendar backward one month for each click Click buttons on top of calendar until May is displayed Click on year to modify to 2012 Position mouse pointer over day 1; click mouse button First day will be highlighted with blue rectangle Guided Exercise 13 Creating an Encounter Guided Exercise 13: Creating an Encounter Step 2 (cont.) Time indicated on right side of window by white circles filled in center Select time by clicking mouse in circles next to 11:00 and :00 and :AM Each of the circles should become filled in Figure 3-13:Select New Encounter, set datetime May 1,2012, 11:00 AM 20 21 10/5/17 10/5/1 Guided Exercise Creating an Encounter Guided Exercise 13 Creating an Encounter Step 3 Step 3 (cont.) Reason for encounter is set in this window Encounter Reason field is located just below calendar To view list of reasons, position mouse pointer over button with down arrow in right side of field; click mouse. Drop-down list of reasons will appear (Figure 3-14). Scroll list of reasons Highlight reason "10 minute visit" by moving mouse pointer over it. When reason is highlighted, click mouse button to select reason. Guided Exercise 13 Creating an Encounter Guided Exercise 15 Creating an Encounter Step 4 Compare your screen to Figure 3-15 Set date, time, reason correctly If date, time, or reason needs to be corrected repeat previous steps Locate button labeled OK in bottom of Neww Encounter window; position mouse pointer over OK button; click mouse. Date and Reason for Encounter" window will close Figure 3-14: Select 10 minute visit tom list of reasons for encounter Guided Exercise 13 Guided Exercise 13 Creating an Encounter Creating an Encounter 5512 Figure 3-15: New encounter for a 10 minuto visit, May 1,2012 11:00 AM Figure 3-16: New encounter for Rosa Garcia uided Exercise l5 Creating an Encounter Data Entry of Clinical Notes Information is entered by clicking a button next to a finding in the nomenclature pane Finding and accompanying text are automatically recorded in encounter note displayed in right pane of window Additional information about the finding may be added by using the Entry Details fields at the bottom of the Window Step 5 Encounter date, time, and reason "10 minute visit should be displayed in title of window Encounter date and time should be recorded in encounter note in right pane of window Compare your screen with Figure 3-16; if it matches, proceed. If it does not, repeat steps 1-4 075 Data Entry: Click button next to a finding Guided Exercise 14 Recording Subjective Findings ( O) IOI-1 No Headache +0I0Headache Buttons fill in with color when selected Red button usually means observed or abnormal Blue button generally means normal or not Figure 3-18:Expanded tree for head-related symptoms- sent Headache selected Guided Exercise 14 Recording Subjective Findings Guided Exercise 14 Recording Subjective Findings Step 2 When finding is recorded in encounter note on right pane, description of finding in left pane also changes to match selected state Position mouse over "Headache;" click mouse button Compare y Center of button should turn red indicating finding has been selected Word Headache" should have appeared on right pane in encounter note red button for finding our screen to Figure 3-18 Step 1 Make sure Sx tab in left pane is selected Expand tree of "head-related symptoms sc list resembles expanded tree in left pane of Figure 3-18 Guided Exercise 14 Recording Subjective Findings Guided Exercise 14 Recording Subjective Findings Step 2 (cont.) Step 3 (cont.) When you record first subjective finding section title "History of Present Ilness" is added to encounter note Click on red button to restore finding back to "Headache Make sure button is red and text in encounter note again reads "Headache" before proceeding to step 4 Section titles are dynamically added or removed by the software based on findings selected Guided Exercise 14 Recording Subjective Findings Guided Exercise 14 Recording Subjective Findings Step 3 Step 4 To further explore operation of red and blue buttons, position mouse over and click on blue button for headache instead Center of blue button should fill in; red button should return to previous (cleared) state Text in encounter note and finding description will both change to "No Headache." EHR information specific as possible. Click on small plus next to Headaches to expand tree Locate finding Chronic/Recurring; click on red button Did red button fill in? Did text change in encounter note? Guided Exercise 15: Removing Findings Guided Exercise 15 Re moving Findings Step 2 Step 2 (cont.) Finding "with episodes" and text "recently worse" will be removed from encounter note Left pane will remain on Edit tab; this is normal. Locate button with an X in lower right corner of the screen (circled in red in Figure 3-20). This is Delete button; position mouse pointer over Delete button; click once Small window "dialogue" will appear (Figure 3-21). Dialogue asking you to confirm your intention to remove finding from encounter note Click on OK button. Guided Exercise 15 Removing Findings Guided Exercise 15 Removing Findings Step 3 Practice removing findings by repeating steps 1 and 2 1. Select inding in note When you remove last finding in a section, the section title will be removed automatically 2. Click the X button in he Entry Details section. Step 4 Restore Medcin Nomenclature list to left pane by positioning mouse over Sx tab and cicking once 3. Click OK Guided Exercise T6 Recording More Specific Findings If you have all information before selecting finding: Medcin will add surrounding text. Guided Exercise T6 Recording More Specific Findings finding, you can select most specific Figure 3-22: Chronic/recurring headaches recently worse Guided Exercise T6 Guided Exercise T6 Recording More Specific Findings Step 1 Recording More Specific Findings Step 2 If your screen does not resemble Figure 3-16, repeat necessary steps to select patient select new encounter, and select Sx tab Expand tree view of "head-related symptoms," "headache," chronic/recurring until you see full list (Figure 3-22). Position mouse pointer over red button for finding "episodes recently worse"; click mouse Compare your screen with Figure 3-22. Did red button fill in? Compare text of encounter note in Figure 3- 22 with text in Figure 3-20. The two notes are different but medically equivalent. Guided Exercise 17: Guided Exercise lT Recording History Findings Recording History Findings History tab is used to record patient's past medical, surgical, family, and social history Step 1 Position mouse pointer over Hx tab and click mouse once Figure 3-23: Hx ist coffee consumption uided Exercise T Recording History Findings Recording History Findings Step 2 Step 3 Expand tree by clicking small plus signs next to "social history." "behavioral history Position mouse over red button next to finding coffee consumption-cups/day)." Click mouse button Center of button should turn red and "Behavioral: Daily coffee consumption" should appear in encounter note pane on right pane. caffeine use." Left pane of window should resemble Figure 3-23 10/5/17 10/5/17 Guided Exercise Guided Exercise Creating an Encounter Creating an Encounter Case Study Step 1(cont.) Exercises in this chapter concern a 27-year- old female patient who complains of headaches lasting for more than five days. She was previously consuming 7-8 cups of coffee a day and has recently stopped drinking all coffee Position mouse pointer over word "Select" in Menu bar; click mouse button Move mouse pointer vertically down list until item "New Encounter" is highlighted; click mouse button Guided Exercise 13 Creating an Encounter Guided Exercise 13 Creating an Encounter Step 1 Step 2 Name of patient Rosa Garcia should be displayed at top of Medcin window. If not, repeat Guided Exercise 10 Select menu has functions to select existing encounter or create new encounter In this exercise, you will create new encounter When you create new encounter, a window is invoked allowing you to set date, time, reason for encounter Manually set date and time to May 1, 2012 Small gray buttons with left and right arrows are located at top of calendar window 18 19 10/5/17 10/5/17 Guided Exercise 13 Creating an Encounter Guided Exercise 13 Creating an Encounter Step 2 (cont.) Step 2 (cont.) Clicking button with right arrow advances calendar one month for each click; left arrow takes calendar backward one month for each click Click buttons on top of calendar until May is displayed Click on year to modify to 2012 Position mouse pointer over day 1; click mouse button First day will be highlighted with blue rectangle Guided Exercise 13 Creating an Encounter Guided Exercise 13: Creating an Encounter Step 2 (cont.) Time indicated on right side of window by white circles filled in center Select time by clicking mouse in circles next to 11:00 and :00 and :AM Each of the circles should become filled in Figure 3-13:Select New Encounter, set datetime May 1,2012, 11:00 AM 20 21 10/5/17 10/5/1 Guided Exercise Creating an Encounter Guided Exercise 13 Creating an Encounter Step 3 Step 3 (cont.) Reason for encounter is set in this window Encounter Reason field is located just below calendar To view list of reasons, position mouse pointer over button with down arrow in right side of field; click mouse. Drop-down list of reasons will appear (Figure 3-14). Scroll list of reasons Highlight reason "10 minute visit" by moving mouse pointer over it. When reason is highlighted, click mouse button to select reason. Guided Exercise 13 Creating an Encounter Guided Exercise 15 Creating an Encounter Step 4 Compare your screen to Figure 3-15 Set date, time, reason correctly If date, time, or reason needs to be corrected repeat previous steps Locate button labeled OK in bottom of Neww Encounter window; position mouse pointer over OK button; click mouse. Date and Reason for Encounter" window will close Figure 3-14: Select 10 minute visit tom list of reasons for encounter Guided Exercise 13 Guided Exercise 13 Creating an Encounter Creating an Encounter 5512 Figure 3-15: New encounter for a 10 minuto visit, May 1,2012 11:00 AM Figure 3-16: New encounter for Rosa Garcia uided Exercise l5 Creating an Encounter Data Entry of Clinical Notes Information is entered by clicking a button next to a finding in the nomenclature pane Finding and accompanying text are automatically recorded in encounter note displayed in right pane of window Additional information about the finding may be added by using the Entry Details fields at the bottom of the Window Step 5 Encounter date, time, and reason "10 minute visit should be displayed in title of window Encounter date and time should be recorded in encounter note in right pane of window Compare your screen with Figure 3-16; if it matches, proceed. If it does not, repeat steps 1-4 075 Data Entry: Click button next to a finding Guided Exercise 14 Recording Subjective Findings ( O) IOI-1 No Headache +0I0Headache Buttons fill in with color when selected Red button usually means observed or abnormal Blue button generally means normal or not Figure 3-18:Expanded tree for head-related symptoms- sent Headache selected Guided Exercise 14 Recording Subjective Findings Guided Exercise 14 Recording Subjective Findings Step 2 When finding is recorded in encounter note on right pane, description of finding in left pane also changes to match selected state Position mouse over "Headache;" click mouse button Compare y Center of button should turn red indicating finding has been selected Word Headache" should have appeared on right pane in encounter note red button for finding our screen to Figure 3-18 Step 1 Make sure Sx tab in left pane is selected Expand tree of "head-related symptoms sc list resembles expanded tree in left pane of Figure 3-18 Guided Exercise 14 Recording Subjective Findings Guided Exercise 14 Recording Subjective Findings Step 2 (cont.) Step 3 (cont.) When you record first subjective finding section title "History of Present Ilness" is added to encounter note Click on red button to restore finding back to "Headache Make sure button is red and text in encounter note again reads "Headache" before proceeding to step 4 Section titles are dynamically added or removed by the software based on findings selected Guided Exercise 14 Recording Subjective Findings Guided Exercise 14 Recording Subjective Findings Step 3 Step 4 To further explore operation of red and blue buttons, position mouse over and click on blue button for headache instead Center of blue button should fill in; red button should return to previous (cleared) state Text in encounter note and finding description will both change to "No Headache." EHR information specific as possible. Click on small plus next to Headaches to expand tree Locate finding Chronic/Recurring; click on red button Did red button fill in? Did text change in encounter note? Guided Exercise 15: Removing Findings Guided Exercise 15 Re moving Findings Step 2 Step 2 (cont.) Finding "with episodes" and text "recently worse" will be removed from encounter note Left pane will remain on Edit tab; this is normal. Locate button with an X in lower right corner of the screen (circled in red in Figure 3-20). This is Delete button; position mouse pointer over Delete button; click once Small window "dialogue" will appear (Figure 3-21). Dialogue asking you to confirm your intention to remove finding from encounter note Click on OK button. Guided Exercise 15 Removing Findings Guided Exercise 15 Removing Findings Step 3 Practice removing findings by repeating steps 1 and 2 1. Select inding in note When you remove last finding in a section, the section title will be removed automatically 2. Click the X button in he Entry Details section. Step 4 Restore Medcin Nomenclature list to left pane by positioning mouse over Sx tab and cicking once 3. Click OK Guided Exercise T6 Recording More Specific Findings If you have all information before selecting finding: Medcin will add surrounding text. Guided Exercise T6 Recording More Specific Findings finding, you can select most specific Figure 3-22: Chronic/recurring headaches recently worse Guided Exercise T6 Guided Exercise T6 Recording More Specific Findings Step 1 Recording More Specific Findings Step 2 If your screen does not resemble Figure 3-16, repeat necessary steps to select patient select new encounter, and select Sx tab Expand tree view of "head-related symptoms," "headache," chronic/recurring until you see full list (Figure 3-22). Position mouse pointer over red button for finding "episodes recently worse"; click mouse Compare your screen with Figure 3-22. Did red button fill in? Compare text of encounter note in Figure 3- 22 with text in Figure 3-20. The two notes are different but medically equivalent. Guided Exercise 17: Guided Exercise lT Recording History Findings Recording History Findings History tab is used to record patient's past medical, surgical, family, and social history Step 1 Position mouse pointer over Hx tab and click mouse once Figure 3-23: Hx ist coffee consumption uided Exercise T Recording History Findings Recording History Findings Step 2 Step 3 Expand tree by clicking small plus signs next to "social history." "behavioral history Position mouse over red button next to finding coffee consumption-cups/day)." Click mouse button Center of button should turn red and "Behavioral: Daily coffee consumption" should appear in encounter note pane on right pane. caffeine use." Left pane of window should resemble Figure 3-23
Step by Step Solution
There are 3 Steps involved in it

Get step-by-step solutions from verified subject matter experts


