Question: PLS KEEP THE CODES SIMPLE. THANKS IN ADVANCE Objectives The objectives of this lab are: The purpose of this lab exercise is to familiarize you
PLS KEEP THE CODES SIMPLE. THANKS IN ADVANCE
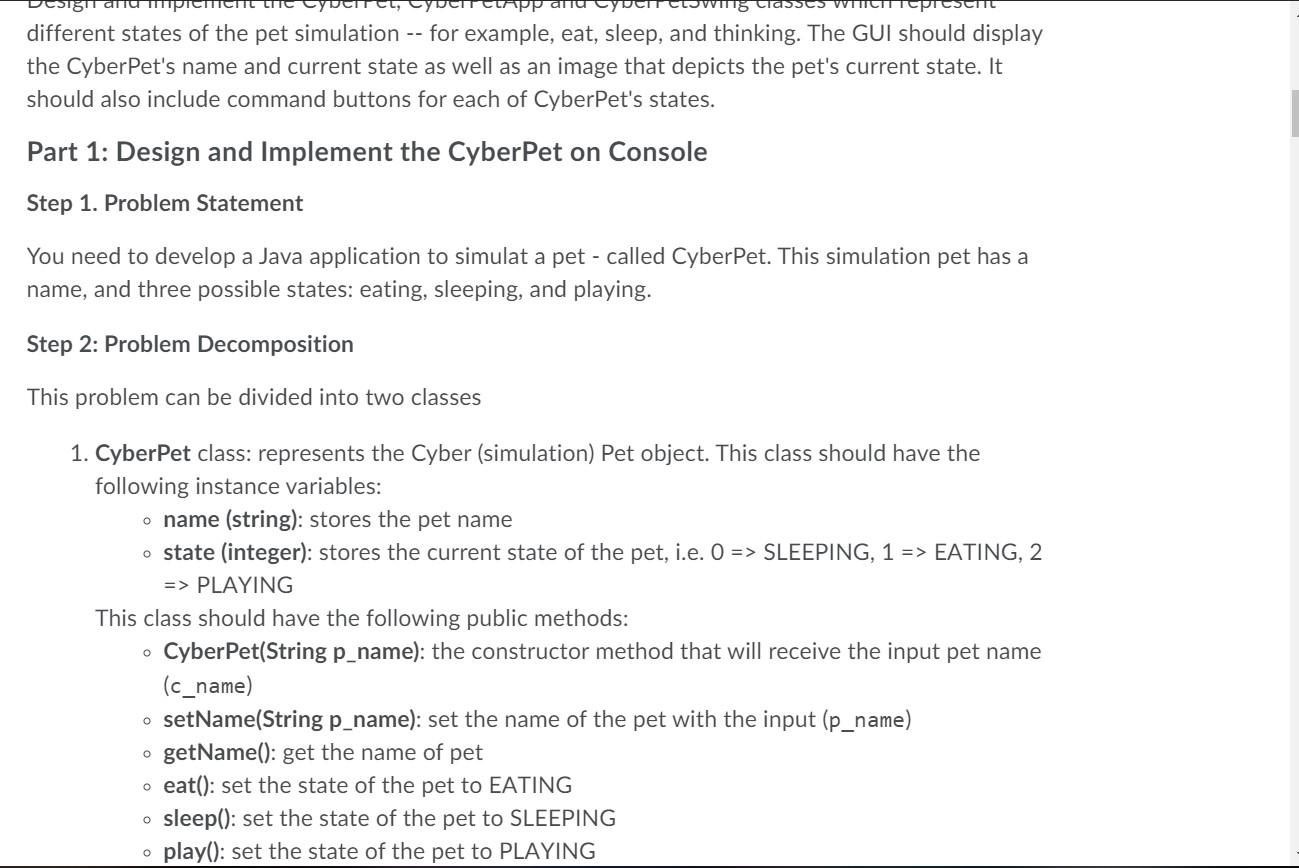
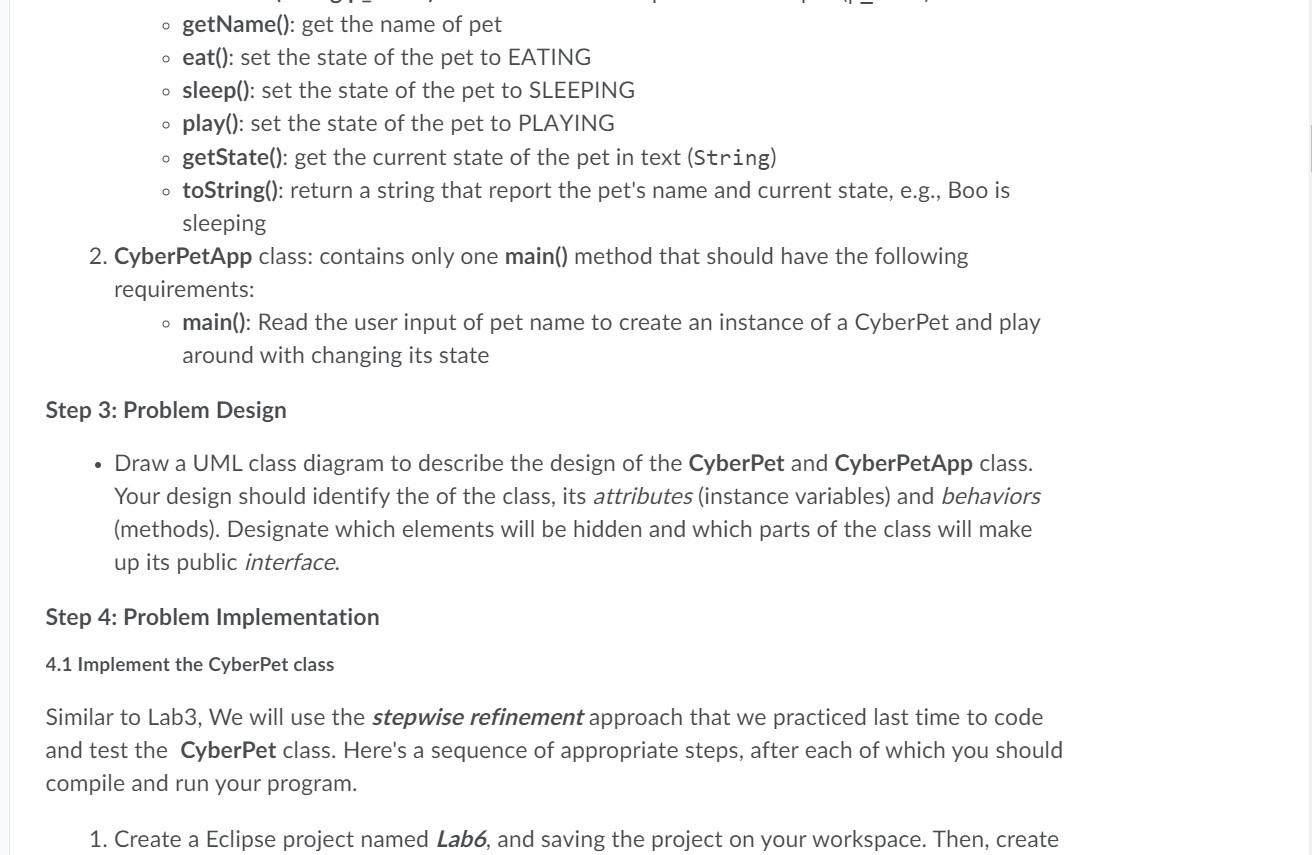
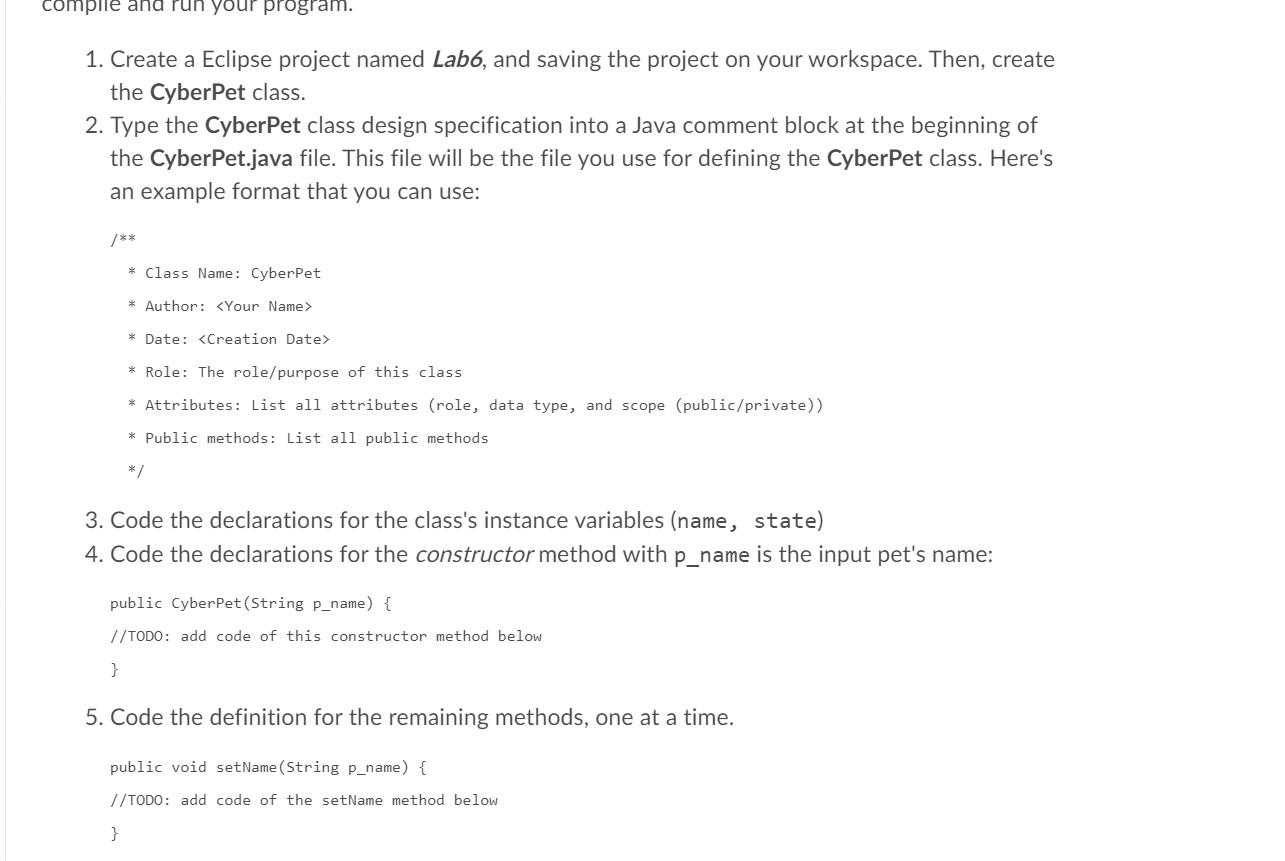
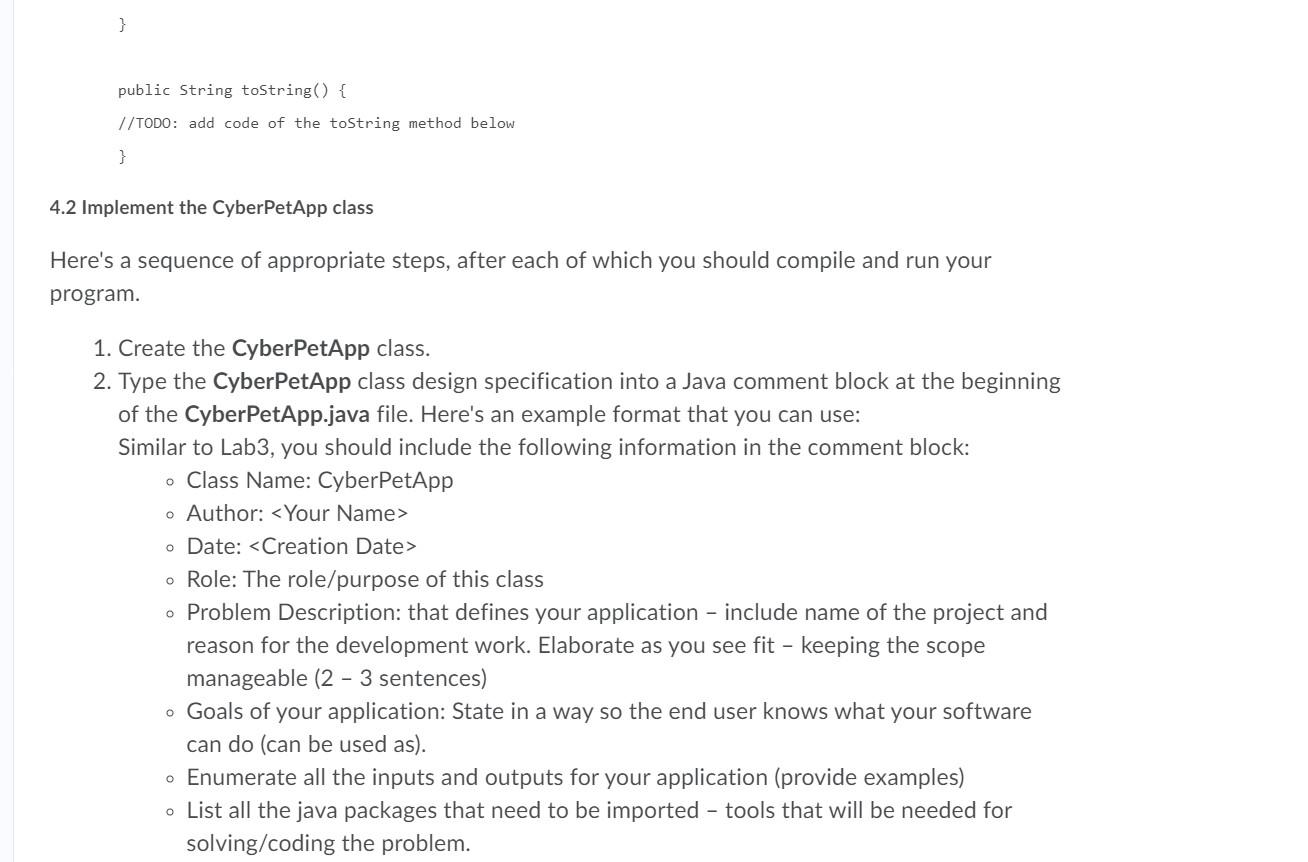
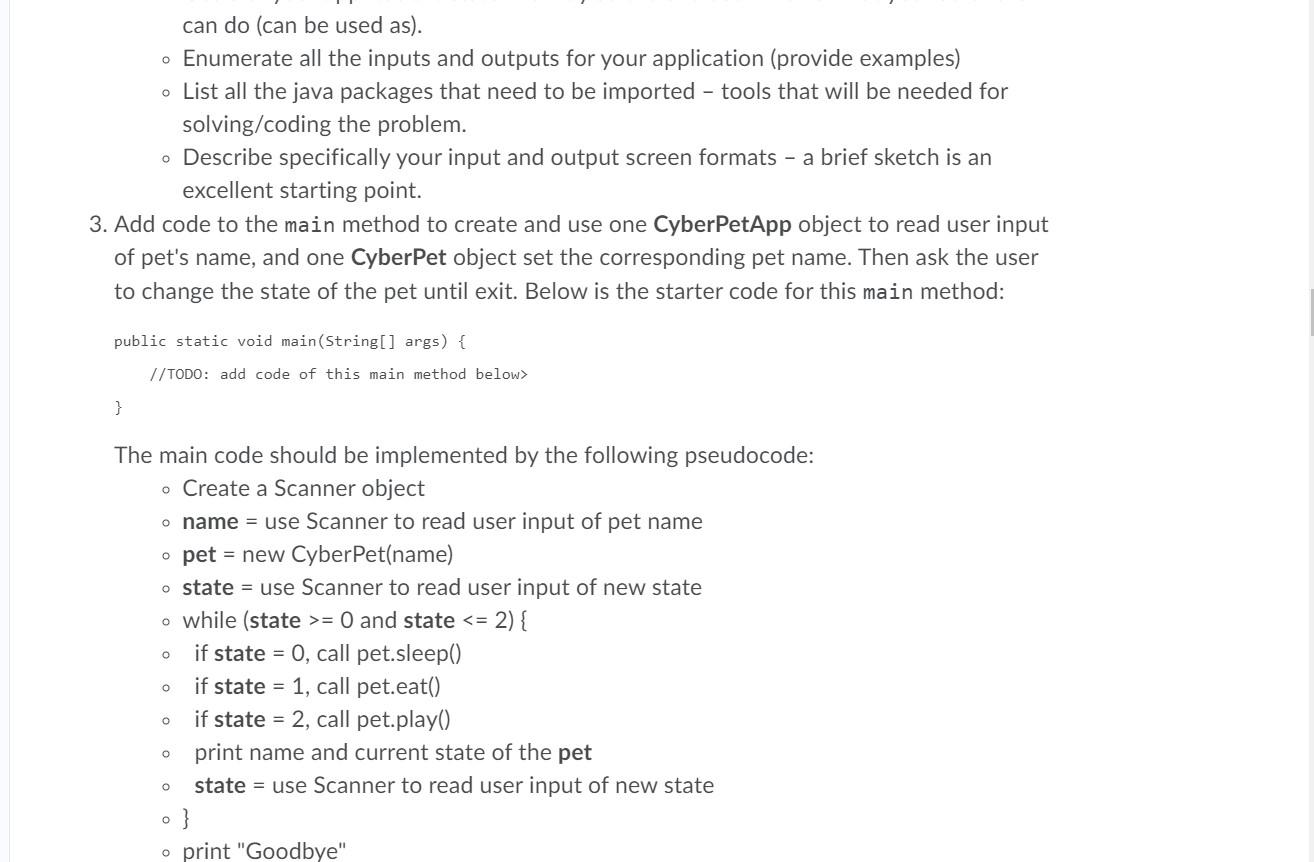
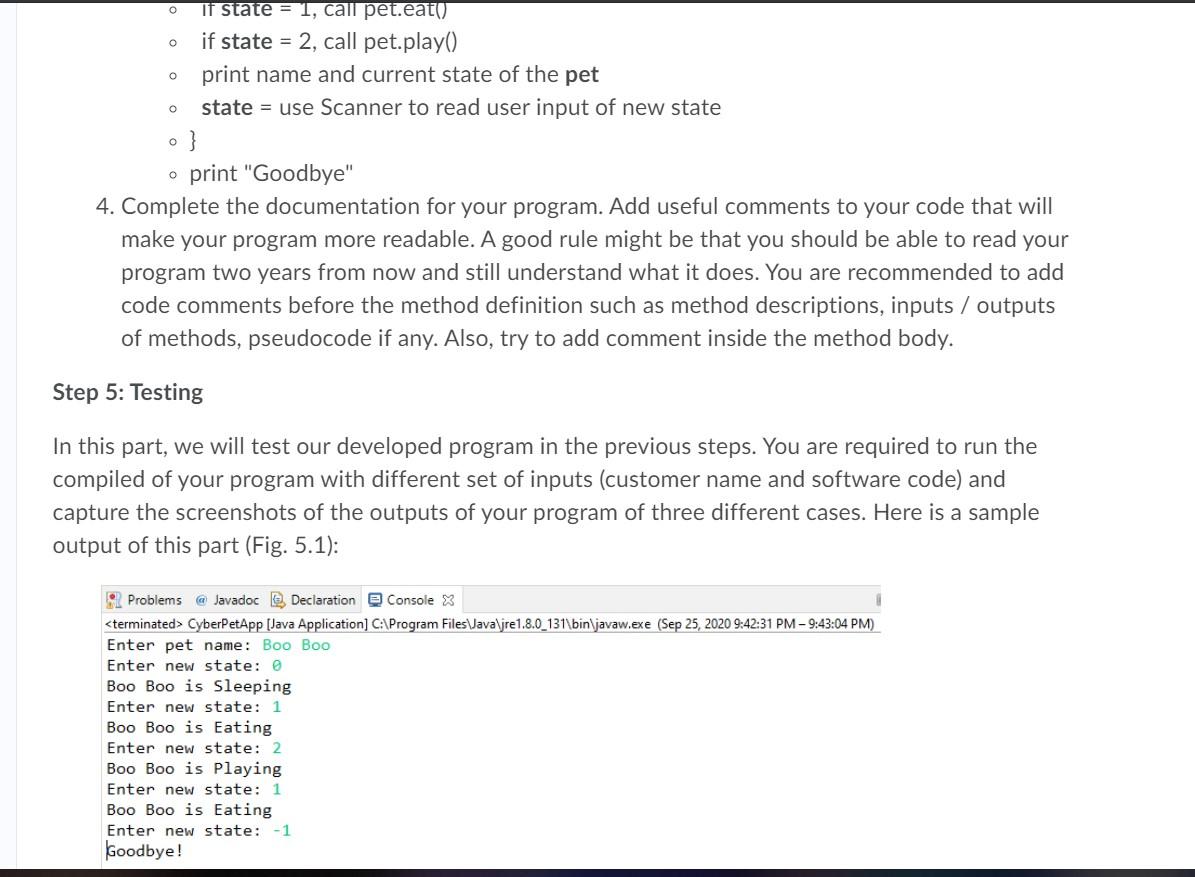
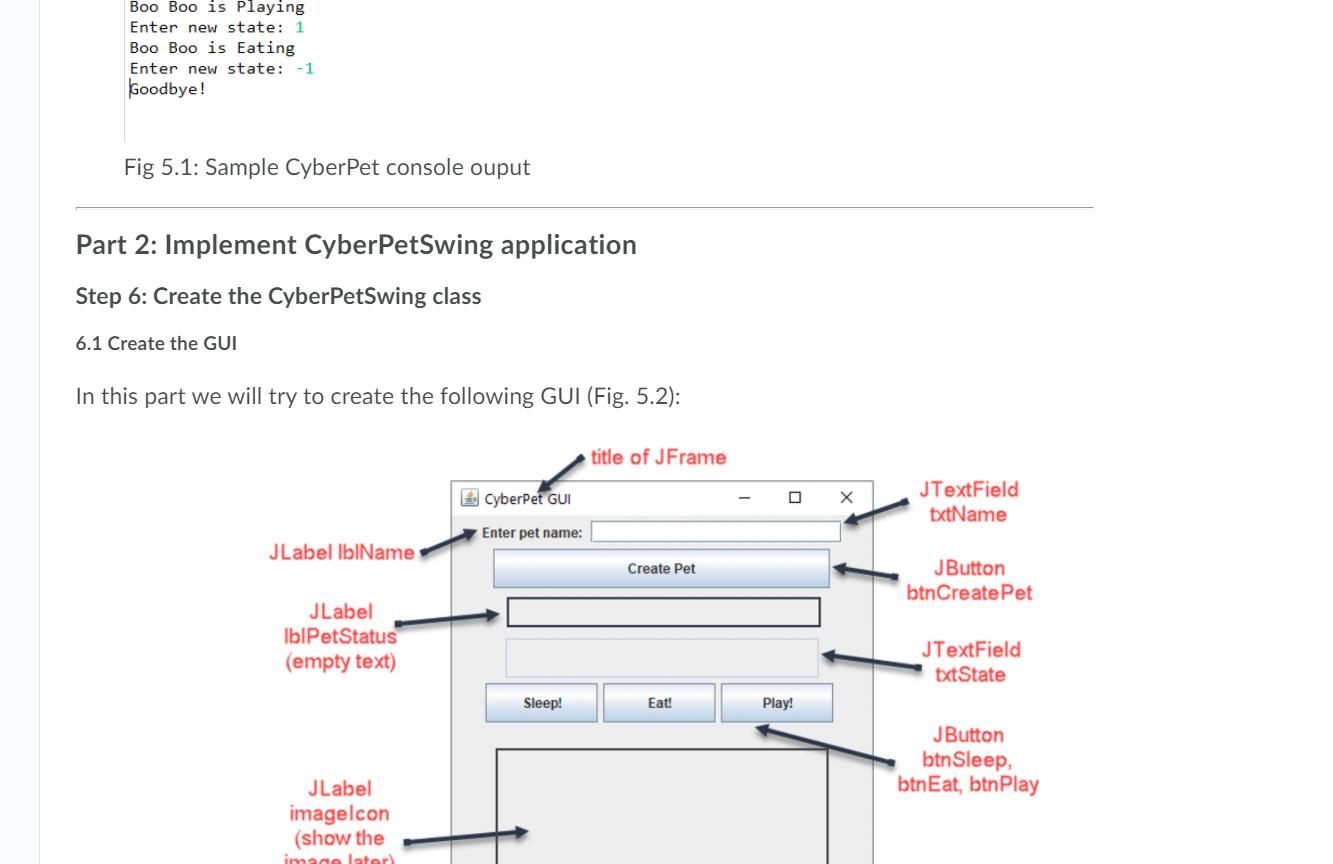
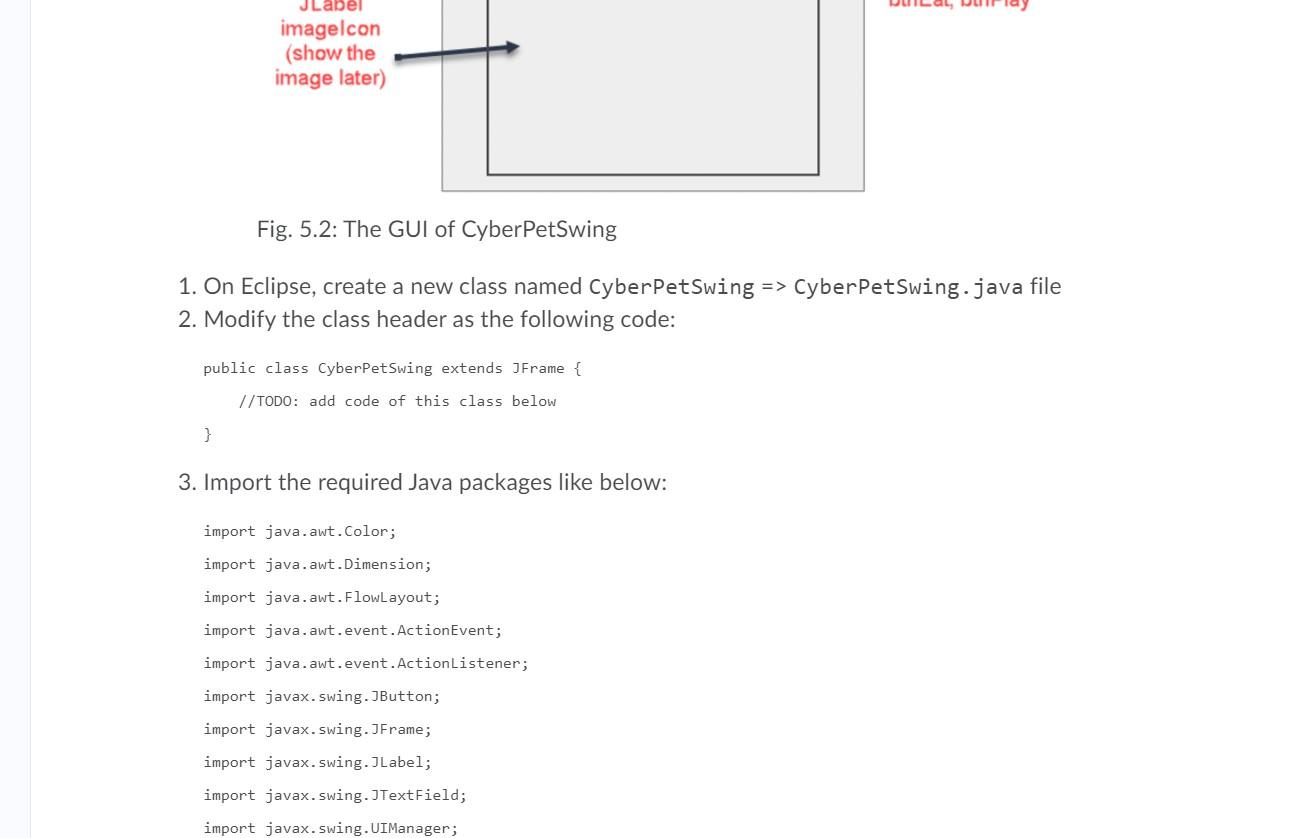
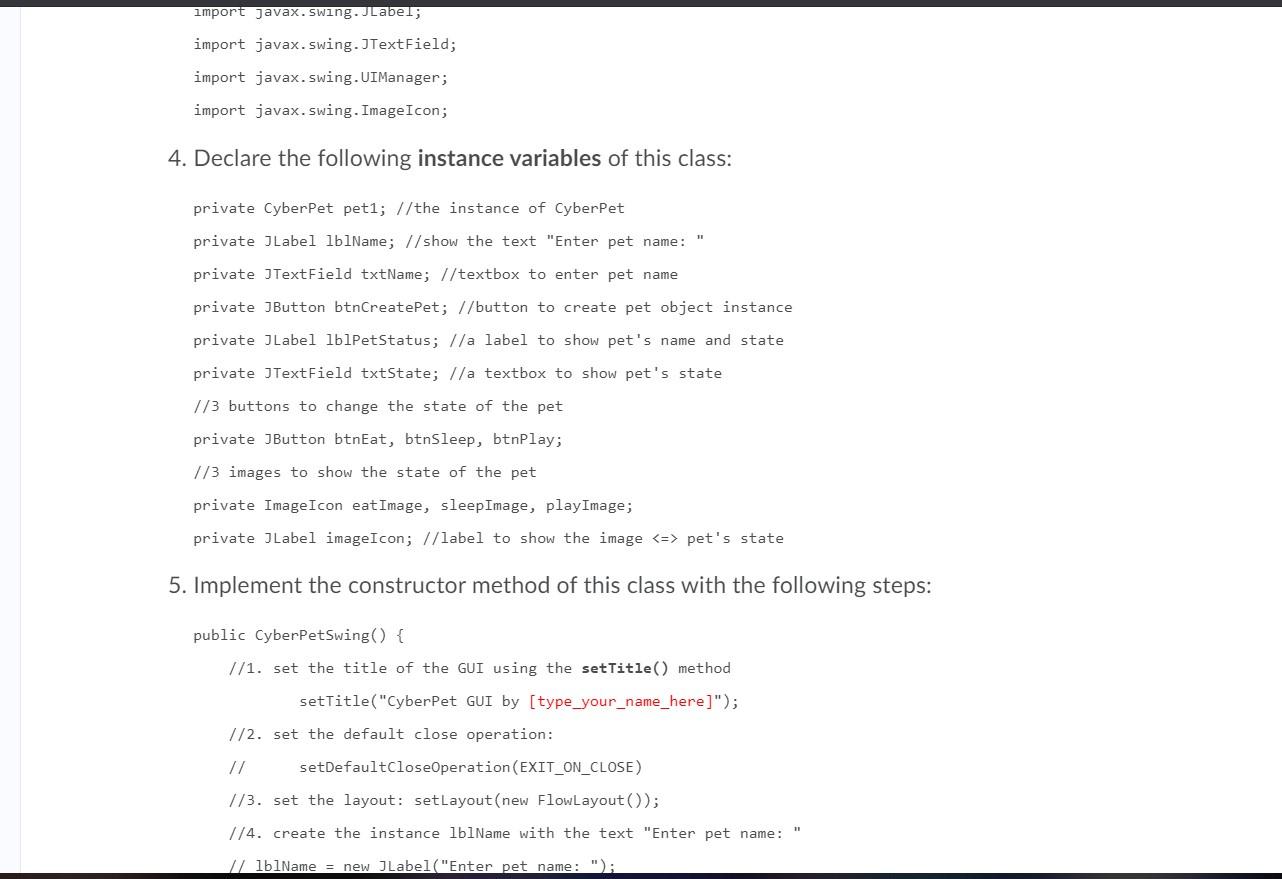
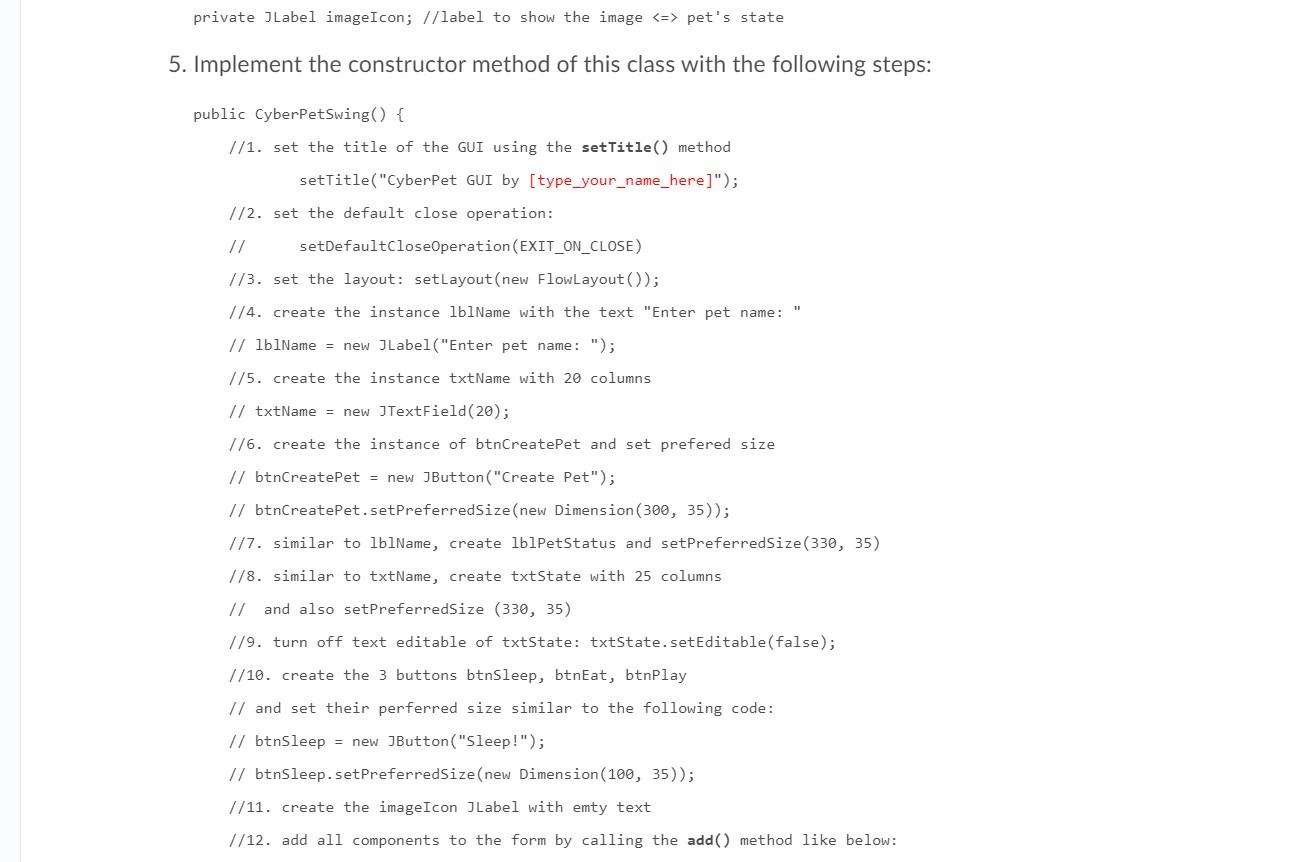
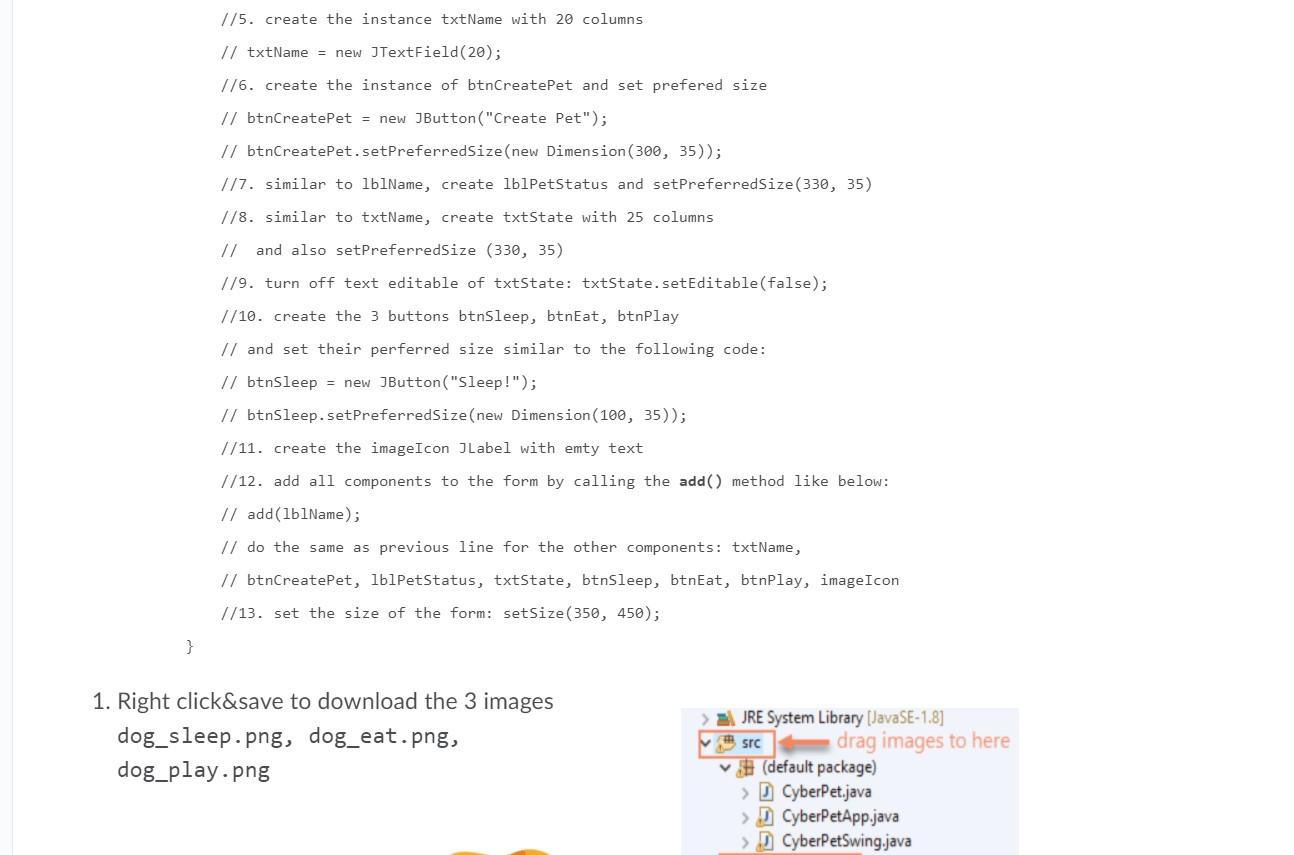
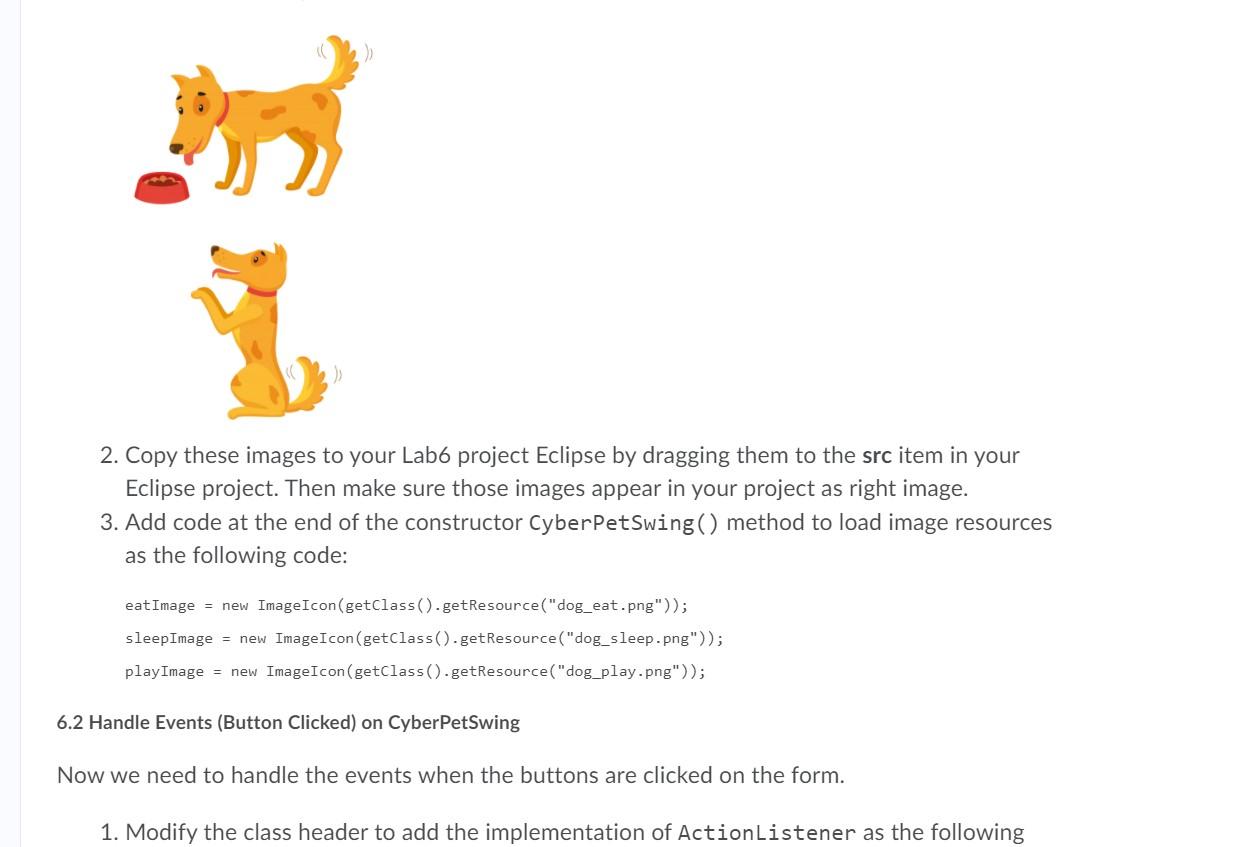
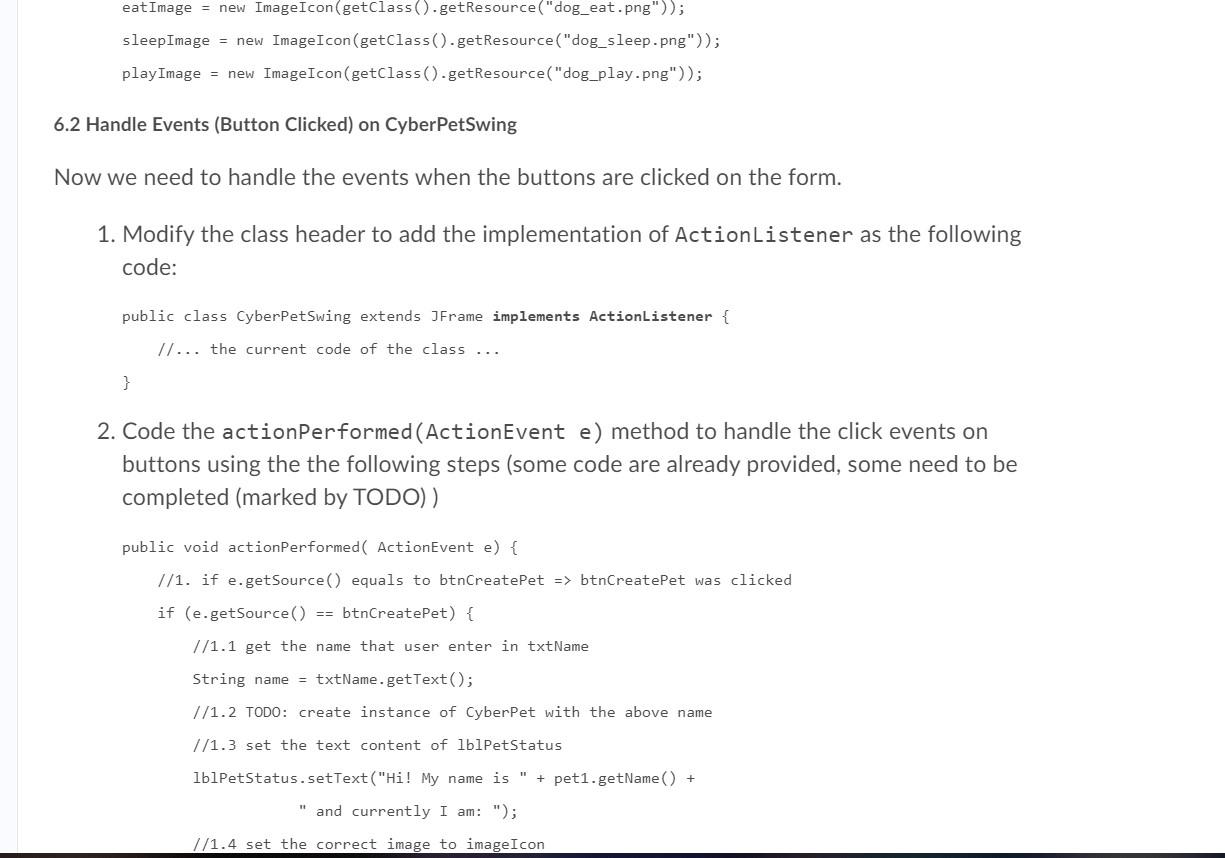
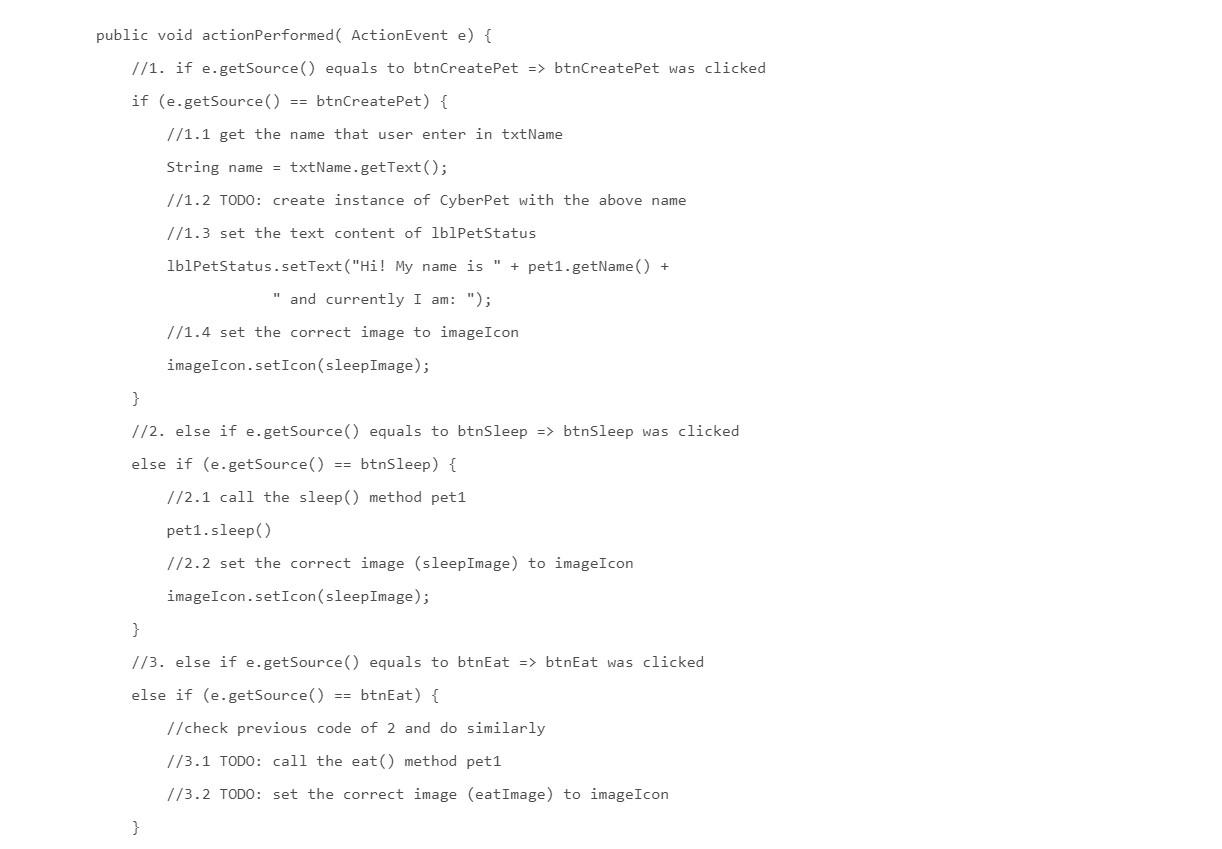
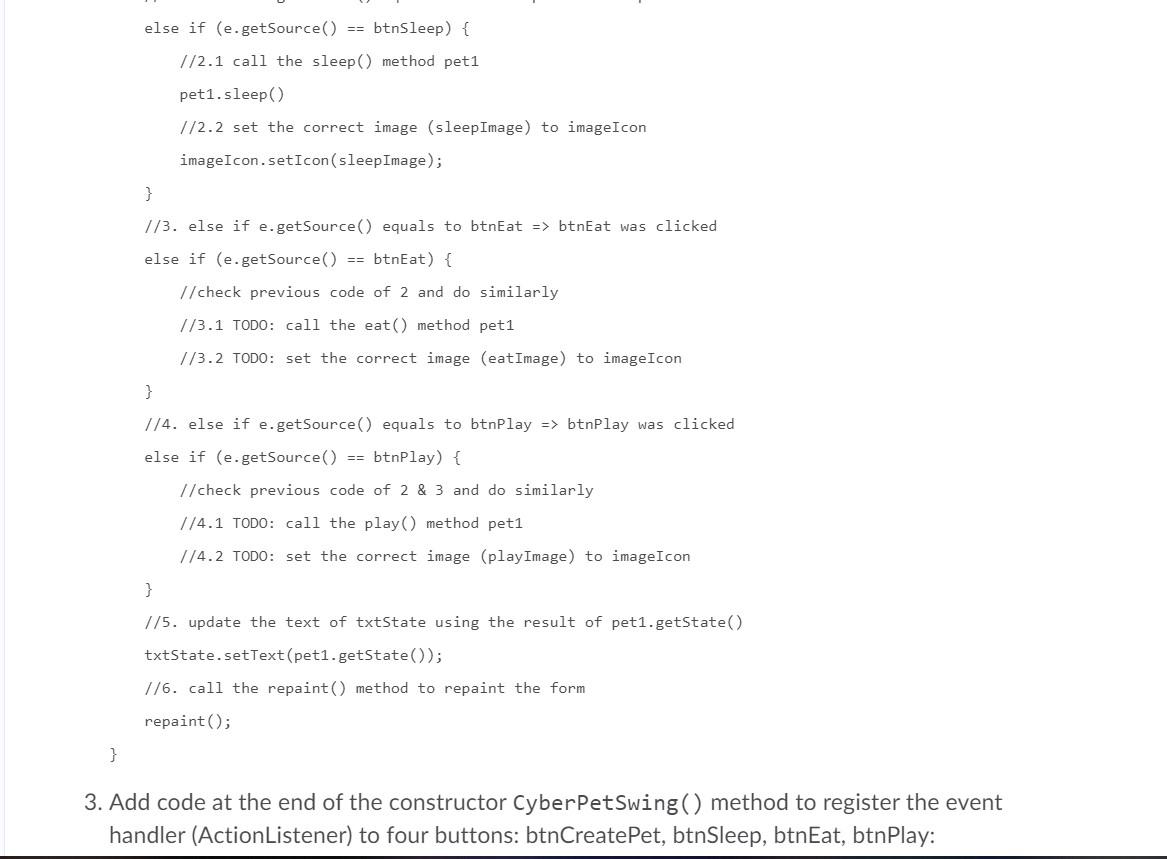
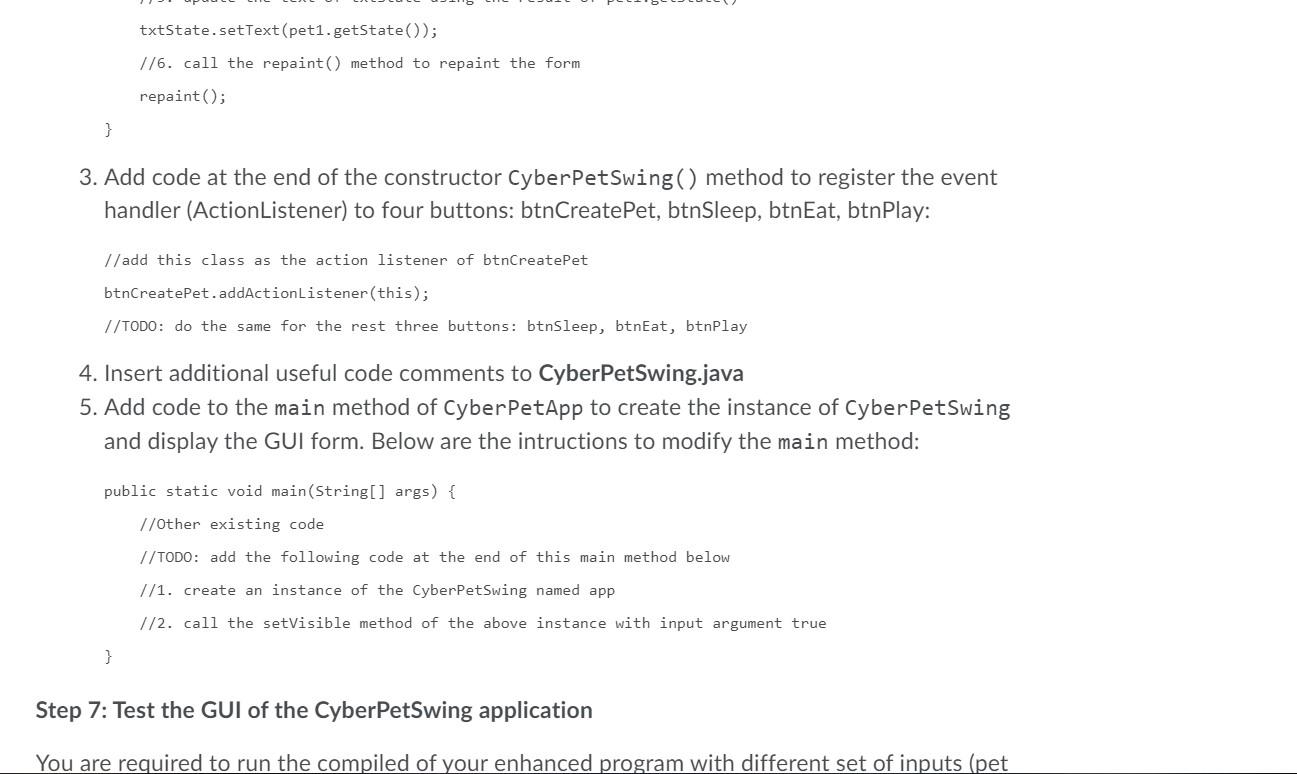
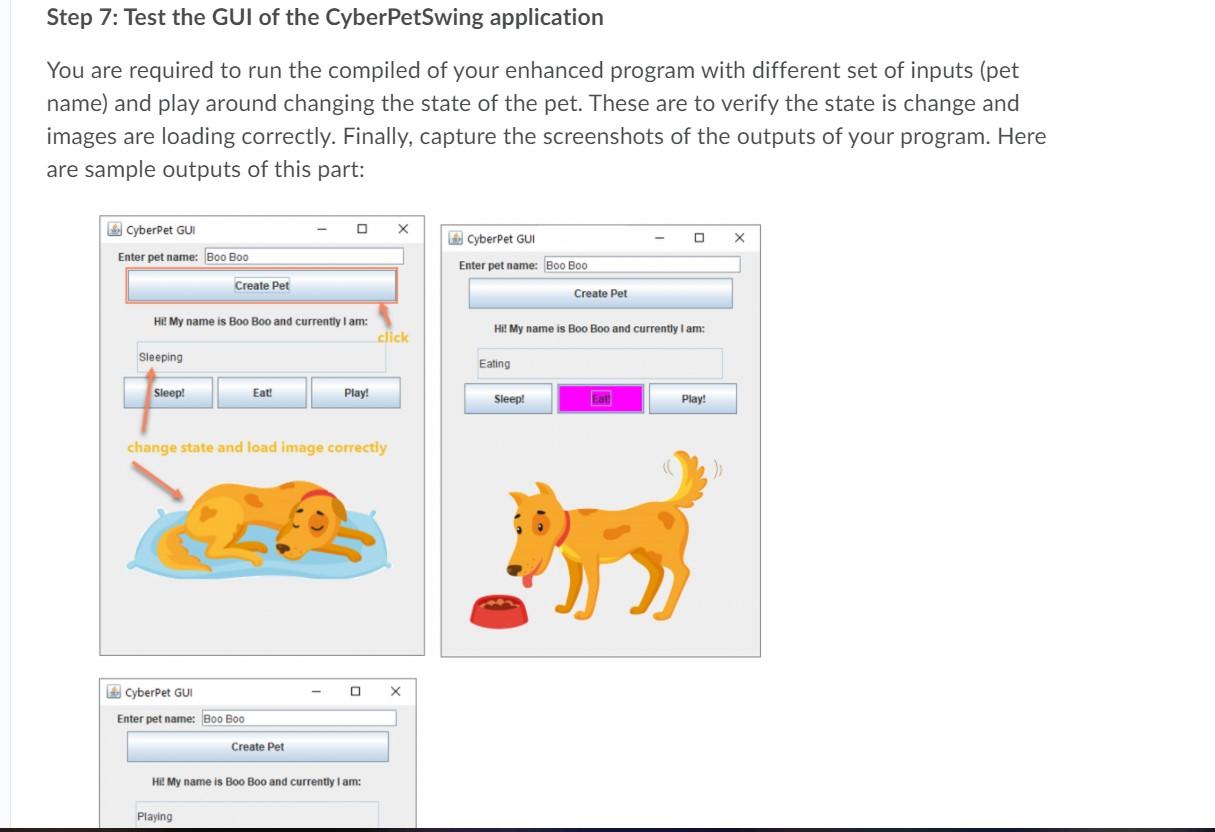
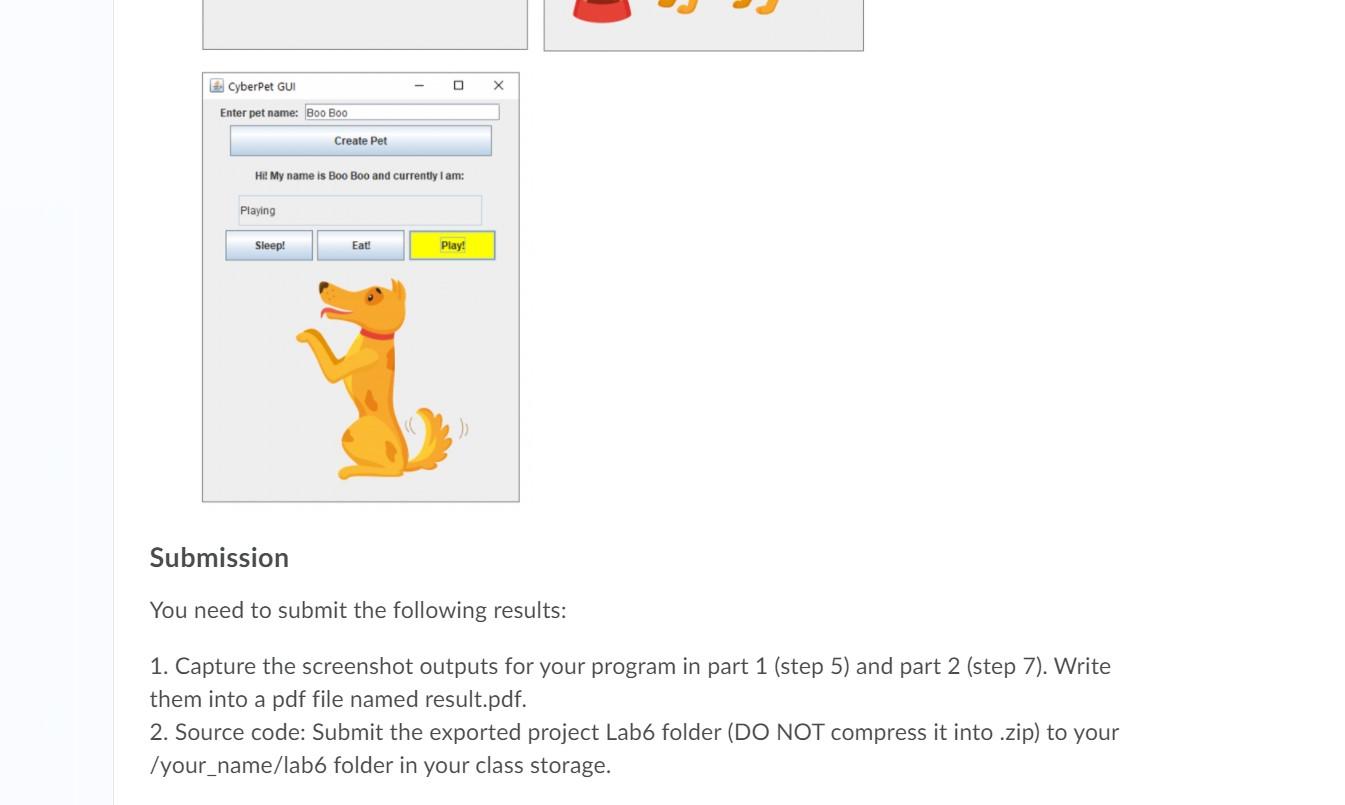
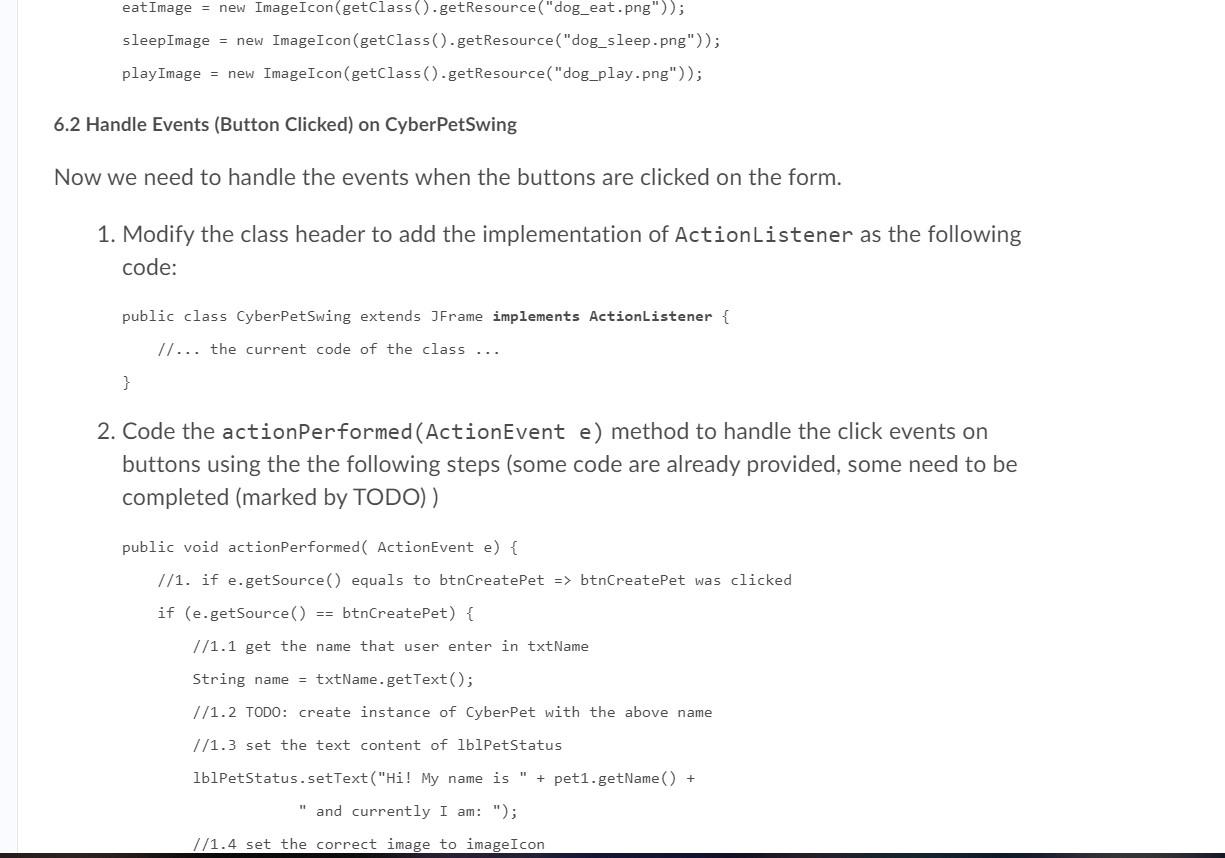
Objectives The objectives of this lab are: The purpose of this lab exercise is to familiarize you with Java Swing application. You will create the CyberPetSwing class to simulate a pet. The objectives of this lab are: To introduce some of the basic GUI Components. To give additional practice using the if and if-else control structures. To introduce a simple graphical object: Image Prerequisites Read Chapter 4 of Java, Java, Java, 3E and read through this document. Submission Method Submit the code/answer/solution under your folder in class storage, e.g., /your_name/lab1, /your_name/lab2, ....... Submission Deadline 5pm, 3/2. Lab Tasks Problems Design and Implement the Cyber Pet, CyberPetApp and CyberPet Swing classes which represent different states of the pet simulation -- for example, eat, sleep, and thinking. The GUI should display the CyberPet's name and current state as well as an image that depicts the pet's current state. It different states of the pet simulation -- for example, eat, sleep, and thinking. The GUI should display the CyberPet's name and current state as well as an image that depicts the pet's current state. It should also include command buttons for each of CyberPet's states. Part 1: Design and implement the CyberPet on Console Step 1. Problem Statement You need to develop a Java application to simulat a pet - called CyberPet. This simulation pet has a name, and three possible states: eating, sleeping, and playing. Step 2: Problem Decomposition This problem can be divided into two classes 1. CyberPet class: represents the Cyber (simulation) Pet object. This class should have the following instance variables: o name (string): stores the pet name o state (integer): stores the current state of the pet, i.e. O => SLEEPING, 1 => EATING, 2 => PLAYING This class should have the following public methods: o Cyber Pet(String p_name): the constructor method that will receive the input pet name (c_name) setName(String p_name): set the name of the pet with the input (p_name) getName(): get the name of pet eat(): set the state of the pet to EATING sleep(): set the state of the pet to SLEEPING o play(): set the state of the pet to PLAYING 0 o o o o o getName(): get the name of pet o eat(): set the state of the pet to EATING o sleep(): set the state of the pet to SLEEPING play(): set the state of the pet to PLAYING getState(): get the current state of the pet in text (String) toString(): return a string that report the pet's name and current state, e.g., Boo is sleeping 2. CyberPetApp class: contains only one main() method that should have the following requirements: main(): Read the user input of pet name to create an instance of a CyberPet and play around with changing its state o O Step 3: Problem Design Draw a UML class diagram to descri the design the CyberPet and CyberPetApp Your design should identify the of the class, its attributes (instance variables) and behaviors (methods). Designate which elements will be hidden and which parts of the class will make up its public interface. Step 4: Problem Implementation 4.1 Implement the CyberPet class Similar to Lab3, We will use the stepwise refinement approach that we practiced last time to code and test the CyberPet class. Here's a sequence of appropriate steps, after each of which you should compile and run your program. 1. Create a Eclipse project named Labo, and saving the project on your workspace. Then, create compile and run your program. 1. Create a Eclipse project named Labb, and saving the project on your workspace. Then, create the CyberPet class. 2. Type the CyberPet class design specification into a Java comment block at the beginning of the CyberPet.java file. This file will be the file you use for defining the CyberPet class. Here's an example format that you can use: /** * Class Name: CyberPet * Author: * Date: * Role: The role/purpose of this class * Attributes: List all attributes (role, data type, and scope (public/private)) * Public methods: List all public methods */ 3. Code the declarations for the class's instance variables (name, state) 4. Code the declarations for the constructor method with p_name is the input pet's name: public CyberPet(String p_name) { //TODO: add code of this constructor method below } 5. Code the definition for the remaining methods, one at a time. public void setName(String p_name) { //TODO: add code of the setName method below } } public String toString() { //TODO: add code of the toString method below } 4.2 Implement the CyberPetApp class Here's a sequence of appropriate steps, after each of which you should compile and run your program. 1. Create the CyberPetApp class. 2. Type the CyberPetApp class design specification into a Java comment block at the beginning of the CyberPetApp.java file. Here's an example format that you can use: Similar to Lab3, you should include the following information in the comment block: Class Name: CyberPetApp o Author: o Date: Role: The role/purpose of this class o Problem Description: that defines your application - include name of the project and reason for the development work. Elaborate as you see fit - keeping the scope manageable (2 - 3 sentences) Goals of your application: State in a way so the end user knows what your software can do (can be used as). Enumerate all the inputs and outputs for your application (provide examples) o List all the java packages that need to be imported - tools that will be needed for solving/coding the problem. can do (can be used as). Enumerate all the inputs and outputs for your application (provide examples) o List all the java packages that need to be imported - tools that will be needed for solving/coding the problem. Describe specifically your input and output screen formats - a brief sketch is an excellent starting point. 3. Add code to the main method to create and use one CyberPetApp object to read user input of pet's name, and one CyberPet object set the corresponding pet name. Then ask the user to change the state of the pet until exit. Below is the starter code for this main method: public static void main(String[] args) { //TODO: add code of this main method below> } The main code should be implemented by the following pseudocode: o Create a Scanner object o name = use Scanner to read user input of pet name o pet = new CyberPet(name) o state = use Scanner to read user input of new state o while (state >= 0 and state CyberPetApp (Java Application] C:\Program FilesJava\jre 1.8.0_131\bin\javaw.exe (Sep 25, 2020 9:42:31 PM - 9:43:04 PM) Enter pet name: Boo Boo Enter new state: 0 Boo Boo is Sleeping Enter new state: 1 Boo Boo is Eating Enter new state: 2 Boo Boo is playing Enter new state: 1 Boo Boo is Eating Enter new state: -1 Goodbye! Boo Boo is playing Enter new state: 1 Boo Boo is Eating Enter new state: -1 Goodbye! Fig 5.1: Sample CyberPet console ouput Part 2: Implement CyberPetSwing application Step 6: Create the CyberPetSwing class 6.1 Create the GUI In this part we will try to create the following GUI (Fig. 5.2): title of JFrame CyberPet GUI JTextField txtName Enter pet name: JLabel lblName Create Pet JButton btnCreate Pet JLabel lblPetStatus (empty text) JTextField txtState Sleep! Eat! Play! JButton btn Sleep, btnEat, btnPlay JLabel imagelcon (show the mas later imagelcon (show the image later) Fig. 5.2: The GUI of CyberPetSwing 1. On Eclipse, create a new class named CyberPetswing => CyberPetSwing.java file 2. Modify the class header as the following code: public class CyberPet Swing extends JFrame { //TODO: add code of this class below } 3. Import the required Java packages like below: import java.awt.Color; import java.awt. Dimension; import java.awt. FlowLayout; import java.awt.event. ActionEvent; import java.awt.event. ActionListener; import javax.swing. JButton; import javax.swing.JFrame; import javax.swing. JLabel; import javax.swing. JTextField; import javax.swing.UIManager; import javax.swing. JLabel; import javax.swing. JTextField; import javax.swing.UIManager; import javax.swing.ImageIcon; 4. Declare the following instance variables of this class: private CyberPet pet1; //the instance of CyberPet private JLabel lblName; // show the text "Enter pet name: private JTextField txtName; //textbox to enter pet name private JButton btnCreatePet; //button to create pet object instance private JLabel lblPetStatus; //a label to show pet's name and state private JTextField txtState; //a textbox to show pet's state 1/3 buttons to change the state of the pet private JButton btnEat, btnSleep, btnPlay; 1/3 images to show the state of the pet private ImageIcon eat Image, sleepImage, playImage; private JLabel imageIcon; //label to show the image pet's state 5. Implement the constructor method of this class with the following steps: public CyberPetSwing() { //1. set the title of the GUI using the setTitle() method setTitle("CyberPet GUI by [type_your_name_here]"); //2. set the default close operation: // setDefaultCloseOperation (EXIT_ON_CLOSE) //3. set the layout: setLayout(new FlowLayout(); //4. create the instance lblName with the text "Enter pet name: // lblName = new JLabel("Enter pet name: ") private JLabel imageIcon; //label to show the image pet's state 5. Implement the constructor method of this class with the following steps: public CyberPetSwing() { //1. set the title of the GUI using the setTitle() method setTitle("CyberPet GUI by [type_your_name_here]"); 1/2. set the default close operation: setDefaultCloseOperation (EXIT_ON_CLOSE) 1/3. set the layout: set Layout(new FlowLayout()); 1/4. create the instance lblName with the text "Enter pet name: // lblName = new JLabel("Enter pet name: "); //5. create the instance txtName with 20 columns // txtName = new JTextField(20); 1/6. create the instance of btnCreatePet and set prefered size // btnCreatePet = new JButton("Create Pet"); // btnCreatePet.setPreferredSize(new Dimension (300, 35)); 1/7. similar to lblName, create lblPetStatus and setPreferredSize(330, 35) //8. similar to txtName, create txtState with 25 columns // and also setPreferredSize (330, 35) //9. turn off text editable of txtState: txtState.setEditable(false); //10. create the 3 buttons btnSleep, btnEat, btnPlay // and set their perferred size similar to the following code: // btnSleep = new JButton("Sleep!"); // btnSleep.setPreferredSize(new Dimension (100, 35)); //11. create the imageIcon JLabel with emty text //12. add all components to the form by calling the add() method like below: //5. create the instance txtName with 20 columns // txtName = new JTextField(20); 1/6. create the instance of btnCreatePet and set prefered size // btnCreatePet = new JButton("Create Pet"); // btnCreatePet.setPreferredSize(new Dimension (300, 35)); 1/7. similar to lblName, create lblPetStatus and setPreferredSize(330, 35) //8. similar to txtName, create txtState with 25 columns // and also setPreferredSize (330, 35) //9. turn off text editable of txtState: txtState.setEditable(false); //10. create the 3 buttons btnSleep, btnEat, btnPlay // and set their perferred size similar to the following code: // btnSleep = new JButton ("Sleep!"); // btnSleep.setPreferredSize(new Dimension (100, 35)); //11. create the imageIcon JLabel with emty text //12. add all components to the form by calling the add() method like below: // add(lblName); // do the same as previous line for the other components: txtName, // btnCreatePet, lblPetStatus, txtState, btnSleep, btnEat, btnPlay, image Icon 1/13. set the size of the form: setSize(350, 450); } 1. Right click&save to download the 3 images dog_sleep.png, dog_eat.png, dog_play.png > JRE System Library (JavaSE-18] src drag images to here (default package) > CyberPet.java > CyberPetApp.java > CyberPetSwing.java 2. Copy these images to your Lab6 project Eclipse by dragging them to the src item in your Eclipse project. Then make sure those images appear in your project as right image. 3. Add code at the end of the constructor CyberPetSwing() method to load image resources as the following code: eat Image = new ImageIcon(getClass().getResource("dog_eat.png")); sleepImage = new ImageIcon(getClass().getResource("dog_sleep.png")); play Image = new ImageIcon(getClass().getResource("dog_play.png")); 6.2 Handle Events (Button Clicked) on CyberPetSwing Now we need to handle the events when the buttons are clicked on the form. 1. Modify the class header to add the implementation of ActionListener as the following eat Image = new ImageIcon(getClass().getResource("dog_eat.png")); sleepImage = new ImageIcon(getClass().getResource("dog_sleep.png")); play Image = new ImageIcon(getClass()-getResource("dog_play.png")); 6.2 Handle Events (Button Clicked) on CyberPetSwing Now we need to handle the events when the buttons are clicked on the form. 1. Modify the class header to add the implementation of ActionListener as the following code: public class CyberPetSwing extends JFrame implements ActionListener { //... the current code of the class ... } 2. Code the actionPerformed(ActionEvent e) method to handle the click events on buttons using the the following steps (some code are already provided, some need to be completed (marked by TODO)) public void actionPerformed ActionEvent e) { 1/1. if e.getSource() equals to btnCreatePet => btnCreatePet was clicked if (e.getSource) == btnCreatePet) { //1.1 get the name that user enter in txtName String name = txtName.getText(); //1.2 TODO: create instance of CyberPet with the above name //1.3 set the text content of lblPetStatus 1 lblPetStatus.setText("Hi! My name is " + pet1.getName() + and currently I am: "); //1.4 set the correct image to imageIcon public void actionPerformed ActionEvent e) { //1. if e.getSource() equals to btnCreatePet => btnCreatePet was clicked if (e.getSource() == btnCreatePet) { //1.1 get the name that user enter in txtName String name = txtName.getText(); //1.2 TODO: create instance of CyberPet with the above name //1.3 set the text content of lblPetStatus lblPetStatus.setText("Hi! My name is " + pet1.getName() + " and currently I am: "); //1.4 set the correct image to imageIcon imageIcon.setIcon(sleepImage); } 1/2. else if e.getSource() equals to btnSleep => btnSleep was clicked else if (e.getSource() == btnSleep) { //2.1 call the sleep() method pet1 pet1.sleep) 1/2.2 set the correct image (sleepImage) to imageIcon imageIcon.setIcon(sleep Image); } 1/3. else if e.getSource() equals to btnEat => btnEat was clicked else if (e.getSource() == btnEat) { //check previous code of 2 and do similarly //3.1 TODO: call the eat() method pet1 //3.2 TODO: set the correct image (eatImage) to imageIcon } else if (e.getSource() == btnSleep) { 1/2.1 call the sleep() method pet1 pet1.sleep 1/2.2 set the correct image (sleepImage) to imageIcon imageIcon.setIcon (sleep Image); } 1/3. else if e.getSource() equals to btnEat => btnEat was clicked else if (e.getSource() == btnEat) { //check previous code of 2 and do similarly //3.1 TODO: call the eat() method pet1 1/3.2 TODO: set the correct image (eat Image) to imageIcon } 1/4. else if e.getSource() equals to btnPlay => btnPlay was clicked else if (e.getSource() == btnPlay) { //check previous code of 2 & 3 and do similarly //4.1 TODO: call the play() method pet1 1/4.2 TODO: set the correct image (play Image) to imageIcon } 1/5. update the text of txtState using the result of pet1.getState) txtState.setText(pet1.getState(); 1/6. call the repaint() method to repaint the form repaint(); } 3. Add code at the end of the constructor CyberPetSwing() method to register the event handler (ActionListener) to four buttons: btnCreatePet, btnSleep, btnEat, btnPlay: txtState.setText (pet1.getState()); 1/6. call the repaint() method to repaint the form repaint(); } 3. Add code at the end of the constructor CyberPetSwing() method to register the event handler (ActionListener) to four buttons: btnCreatePet, btnSleep, btnEat, btnPlay: //add this class as the action listener of btnCreatePet btnCreatePet.addActionListener(this); //TODO: do the same for the rest three buttons: btnSleep, btnEat, btnPlay 4. Insert additional useful code comments to CyberPetSwing.java 5. Add code to the main method of Cyber PetApp to create the instance of CyberPetSwing and display the GUI form. Below are the intructions to modify the main method: public static void main(String[] args) { //other existing code //TODO: add the following code at the end of this main method below //1. create an instance of the CyberPetSwing named app 1/2. call the setVisible method of the above instance with input argument true } Step 7: Test the GUI of the CyberPetSwing application You are required to run the compiled of your enhanced program with different set of inputs (pet Step 7: Test the GUI of the CyberPetSwing application You are required to run the compiled of your enhanced program with different set of inputs (pet name) and play around changing the state of the pet. These are to verify the state is change and images are loading correctly. Finally, capture the screenshots of the outputs of your program. Here are sample outputs of this part: CyberPet GUI Enter pet name: Boo Boo CyberPet GUI Enter pet name: Boo Boo Create Pet Create Pet Hi! My name is Boo Boo and currently I am: Hi! My name is Boo Boo and currently I am: click Sleeping Eating Sleep! Eat! Play! Sleep! Play! change state and load image correctly CyberPet GUI X Enter pet name: Boo Boo Create Pet Hi! My name is Boo Boo and currently I am: Playing D CyberPet GUI Enter pet name: Boo Boo Create Pet Hi! My name is Boo Boo and currently I am: Playing Sleep! Eat! Play! Submission You need to submit the following results: 1. Capture the screenshot outputs for your program in part 1 (step 5) and part 2 (step 7). Write them into a pdf file named result.pdf. 2. Source code: Submit the exported project Labb folder (DO NOT compress it into .zip) to your /your_name/lab6 folder in your class storage. eat Image = new ImageIcon(getClass().getResource("dog_eat.png")); sleepImage = new ImageIcon(getClass().getResource("dog_sleep.png")); play Image = new ImageIcon(getClass()-getResource("dog_play.png")); 6.2 Handle Events (Button Clicked) on CyberPetSwing Now we need to handle the events when the buttons are clicked on the form. 1. Modify the class header to add the implementation of ActionListener as the following code: public class CyberPetSwing extends JFrame implements ActionListener { //... the current code of the class ... } 2. Code the actionPerformed(ActionEvent e) method to handle the click events on buttons using the the following steps (some code are already provided, some need to be completed (marked by TODO)) public void actionPerformed ActionEvent e) { 1/1. if e.getSource() equals to btnCreatePet => btnCreatePet was clicked if (e.getSource) == btnCreatePet) { //1.1 get the name that user enter in txtName String name = txtName.getText(); //1.2 TODO: create instance of CyberPet with the above name //1.3 set the text content of lblPetStatus 1 lblPetStatus.setText("Hi! My name is " + pet1.getName() + and currently I am: "); //1.4 set the correct image to imageIcon


