Question: *PYTHON COURSE* Can someone please help me answer this question for my class. My professor mentioned it using pandas and I honestly dont know what


*PYTHON COURSE* Can someone please help me answer this question for my class. My professor mentioned it using pandas and I honestly dont know what that is. There are a lot of pictures that I believe are just there to just help explain what to do. The problem is at the end. I will 100% like you solving my answering. Thank you so much!!!!
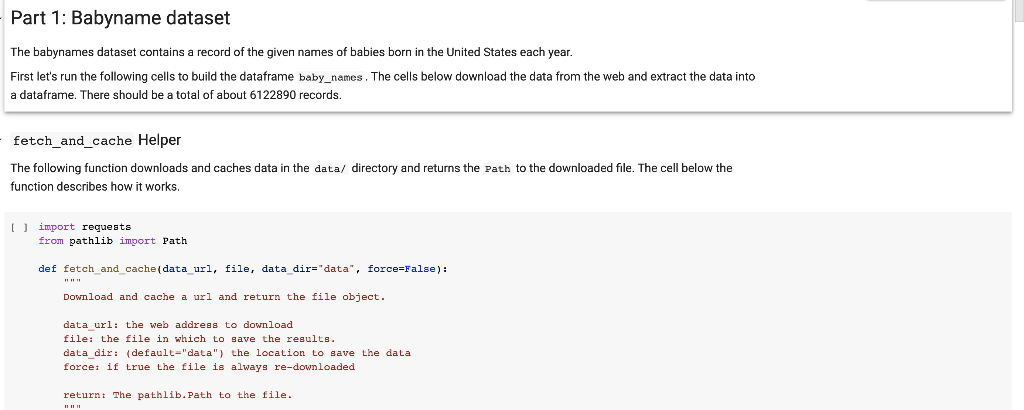
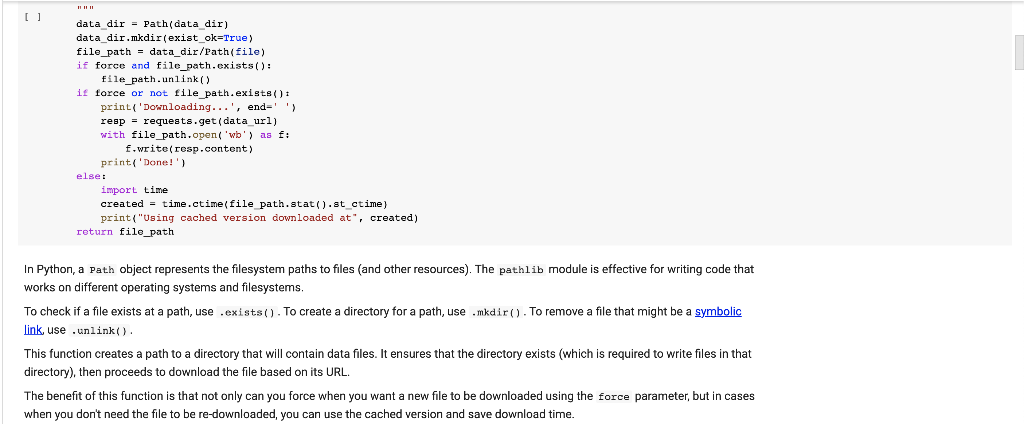
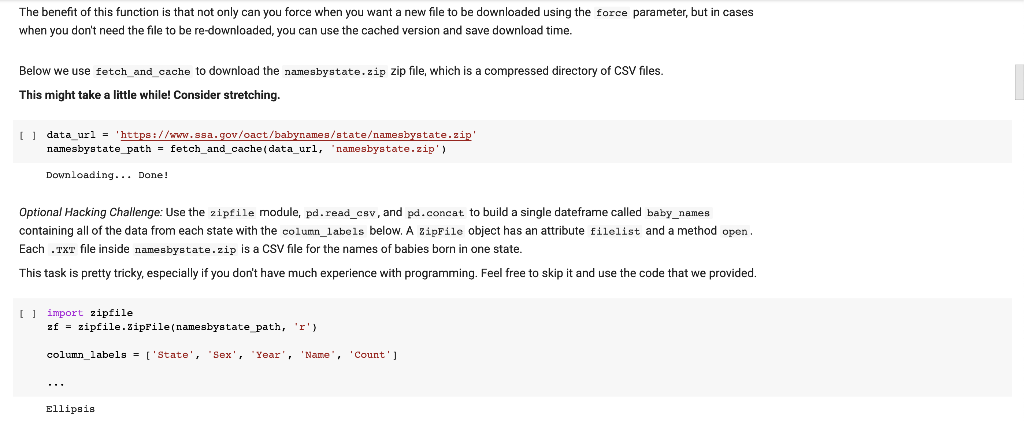
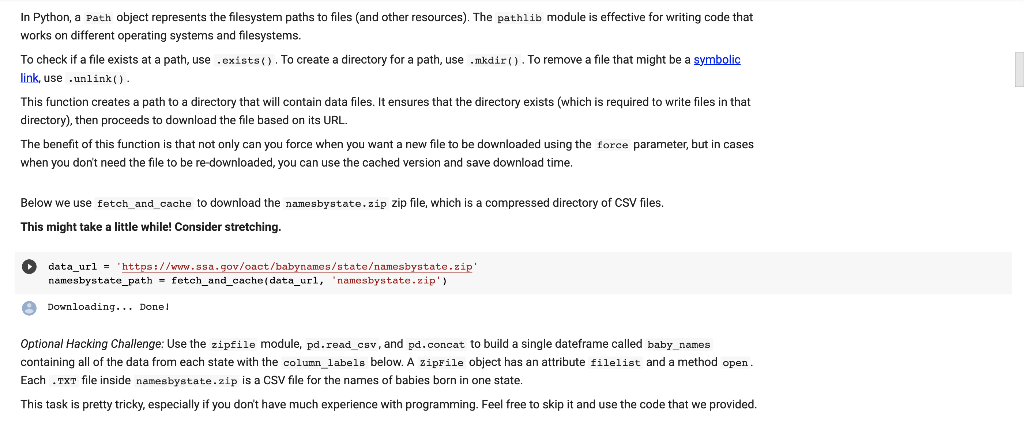
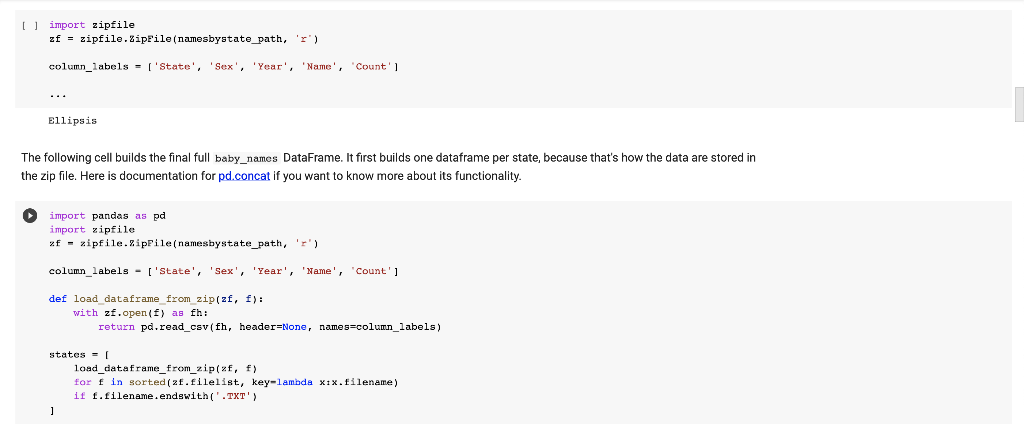
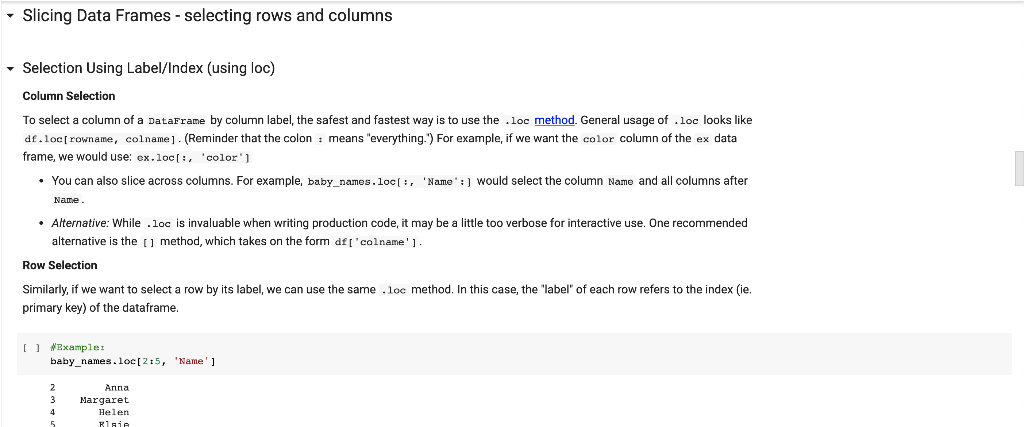
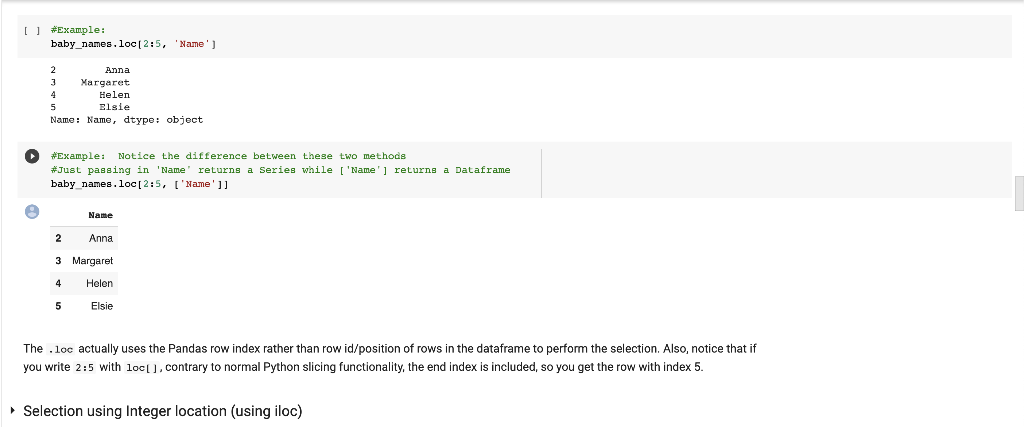
Part 1: Babyname dataset The babynames dataset contains a record of the given names of babies born in the United States each year. First let's run the following cells to build the dataframe baby_names. The cells below download the data from the web and extract the data into a dataframe. There should be a total of about 6122890 records. fetch_and_cache Helper The following function downloads and caches data in the data/ directory and returns the path to the downloaded file. The cell below the function describes how it works. [] import requests from pathlib import Path def fetch_and_cache(data_url, file, data dir="data', force=False): Download and cache a url and return the file object. data url: the web address to download file: the file in which to save the results data_dir: (default="data") the location to save the data force: if true the file is always re-downloaded return the pathlib. Path to the file. [] data dir = Path(data dir) data_dir.mkdir(exist_ok=True) file_path = data_dir/Path(file) if force and file_path.exists(): file_path.unlink() if force or not file_path.exists() print('Downloading...', end='') resp = requests.get(data_url) with file_path.open( 'wb') as f: f.write(resp.content) print('Done!) else: import time created - time.ctime(file path.stat().st_ctime) print("Using cached version downloaded at", created) return file_path In Python, a Path object represents the filesystem paths to files and other resources). The pathlib module is effective for writing code that works on different operating systems and filesystems, To check if a file exists at a path, use .exists(). To create a directory for a path, use .mkdir(). To remove a file that might be a symbolic link, use .unlink(). This function creates a path to a directory that will contain data files. It ensures that the directory exists (which is required to write files in that directory), then proceeds to download the file based on its URL. The benefit of this function is that not only can you force when you want a new file to be downloaded using the force parameter, but in cases when you don't need the file to be re-downloaded, you can use the cached version and save download time. The benefit of this function is that not only can you force when you want a new file to be downloaded using the force parameter, but in cases when you don't need the file to be re-downloaded, you can use the cached version and save download time. Below we use fetch_and_cache to download the namesbystate.zip zip file, which is a compressed directory of CSV files. This might take a little while! Consider stretching. [ ] data_uri = 'https://www.ssa.gov/oact/babynames/stateamesbystate.zip' namesbystate_path = fetch_and_cache(data_url, 'namesbystate.zip') Downloading... Done! Optional Hacking Challenge: Use the zipfile module, pd.read_csv, and pd.concat to build a single dateframe called baby names containing all of the data from each state with the column_labels below. A ZipFile object has an attribute filelist and a method open. Each .txt file inside namesbystate.zip is a CSV file for the names of babies born in one state. This task pretty tricky, especially if you don't have much experience with programming. Feel free to skip it and use the code that we provided. [] import zipfile zf = zipfile.ZipFile(namesbystate path, 'r') column_labels = ['State', Sex' Year', 'Name', 'Count'] Ellipsis In Python, a Path object represents the filesystem paths to files (and other resources). The pathlib module is effective for writing code that works on different operating systems and filesystems. To check if a file exists at a path, use .exists(). To create a directory for a path, use .mkdir(). To remove a file that might be a symbolic link, use .unlink() This function creates a path to a directory that will contain data files. It ensures that the directory exists (which is required to write files in that directory), then proceeds to download the file based on its URL. The benefit of this function is that not only can you force when you want a new file to be downloaded using the force parameter, but in cases when you don't need the file to be re-downloaded, you can use the cached version and save download time. Below we use fetch_and_cache to download the namesbystate.zip zip file, which is a compressed directory of CSV files. This might take a little while! Consider stretching. data_url = "https://www.ssa.gov/oact/babynames/stateamesbystate.zip namesbystate_path = fetch_and_cache(data_url, 'namesbystate.zip') Downloading... Done! Optional Hacking Challenge: Use the zipfile module, pd.read_csv, and pd.concat to build a single dateframe called baby names containing all of the data from each state with the column_labels below. A zipFile object has an attribute filelist and a method open. Each .txt file inside namesbystate.zip is a CSV file for the names of babies born in one state. This task is pretty tricky, especially if you don't have much experience with programming. Feel free to skip it and use the code that we provided. [] import zipfile zf = zipfile.ZipFile(namesbystate_path, 'I') column_labels - l'State', Sex', 'Year', 'Name', Count'] Ellipsis The following cell builds the final full baby_names DataFrame. It first builds one dataframe per state, because that's how the data are stored in the zip file. Here is documentation for pd.concat if you want to know more about its functionality. import pandas as pd import zipfile zf - zipfile.SipFile(namesbystate_path, '') column_labels - ['State', 'sex', 'Year', 'Name', Count'] def load dataframe from zip(zf, f): with zf.open(t) as fh: return pd.read_csv'fh, header=None, names=column_labels) states = 1 load_dataframe_from_zipizf, f) for f in sorted (zf.filelist, key-lambda xix.filename) if f.filename.endswith('.TXT') ] [] = baby_names states [0] for state df in states [1:]: baby_names = pd.concat([baby_names, state_df]) baby_names = baby_names.reset_index().iloc[:, 1:] [] len (baby_names) 6122890 baby_names.head() State Sex Year Name Count 0 AK F 1910 Mary 14 AK F 1910 Annie 12 2 AK F 1910 Anna 10 3 AK F 1910 Margaret 8 4 AK F 1910 Helen 7 Slicing Data Frames - selecting rows and columns Selection Using Label/Index (using loc) Column Selection To select a column of a DataFrame by column label, the safest and fastest way is to use the loc method. General usage of loc looks like df.loc [rowname, colname] - (Reminder that the colon : means "everything.") For example, if we want the color column of the ex data frame, we would use: ex.loc[:, 'color') You can also slice across columns. For example, baby_names.loc[:, 'Name': ] would select the column Name and all columns after Name. Alternative: While .loc is invaluable when writing production code, it may be a little too verbose for interactive use. One recommended alternative is the [] method, which takes on the form df['colname']. Row Selection Similarly, if we want to select a row by its label, we can use the same .loc method. In this case, the "label" of each row refers to the index (ie. primary key) of the dataframe. [] Example: baby_names.loc[2:5, 'Name'] Z Anna Margaret Helen Elsie 4. [] #Example: baby_names.loc[2:5, 'Name'] 2 Anna Margaret. 4 Helen 5 Elsie Name : Name, dtype: object #Example: Notice the difference between these two methods #Just passing in 'Name returns a Series while ['Name'] returns a Dataframe baby names.loc[2:5, ['Name']] e Name 2 Anna 3 Margaret 4 Helen 5 Elsie The .loc actually uses the Pandas row index rather than row id/position of rows in the dataframe to perform the selection. Also, notice that if you write 2:5 with loc(), contrary to normal Python slicing functionality, the end index is included, so you get the row with index 5. Selection using Integer location (using iloc) (11 pts) Problem 1 Selecting multiple columns is easy. You just need to supply a list of column names. Select the name and Year in that order from the baby_names table. [] = name_and_year name_and_year[:5] Note that .loc[] can be used to re-order the columns within a dataframe. Part 1: Babyname dataset The babynames dataset contains a record of the given names of babies born in the United States each year. First let's run the following cells to build the dataframe baby_names. The cells below download the data from the web and extract the data into a dataframe. There should be a total of about 6122890 records. fetch_and_cache Helper The following function downloads and caches data in the data/ directory and returns the path to the downloaded file. The cell below the function describes how it works. [] import requests from pathlib import Path def fetch_and_cache(data_url, file, data dir="data', force=False): Download and cache a url and return the file object. data url: the web address to download file: the file in which to save the results data_dir: (default="data") the location to save the data force: if true the file is always re-downloaded return the pathlib. Path to the file. [] data dir = Path(data dir) data_dir.mkdir(exist_ok=True) file_path = data_dir/Path(file) if force and file_path.exists(): file_path.unlink() if force or not file_path.exists() print('Downloading...', end='') resp = requests.get(data_url) with file_path.open( 'wb') as f: f.write(resp.content) print('Done!) else: import time created - time.ctime(file path.stat().st_ctime) print("Using cached version downloaded at", created) return file_path In Python, a Path object represents the filesystem paths to files and other resources). The pathlib module is effective for writing code that works on different operating systems and filesystems, To check if a file exists at a path, use .exists(). To create a directory for a path, use .mkdir(). To remove a file that might be a symbolic link, use .unlink(). This function creates a path to a directory that will contain data files. It ensures that the directory exists (which is required to write files in that directory), then proceeds to download the file based on its URL. The benefit of this function is that not only can you force when you want a new file to be downloaded using the force parameter, but in cases when you don't need the file to be re-downloaded, you can use the cached version and save download time. The benefit of this function is that not only can you force when you want a new file to be downloaded using the force parameter, but in cases when you don't need the file to be re-downloaded, you can use the cached version and save download time. Below we use fetch_and_cache to download the namesbystate.zip zip file, which is a compressed directory of CSV files. This might take a little while! Consider stretching. [ ] data_uri = 'https://www.ssa.gov/oact/babynames/stateamesbystate.zip' namesbystate_path = fetch_and_cache(data_url, 'namesbystate.zip') Downloading... Done! Optional Hacking Challenge: Use the zipfile module, pd.read_csv, and pd.concat to build a single dateframe called baby names containing all of the data from each state with the column_labels below. A ZipFile object has an attribute filelist and a method open. Each .txt file inside namesbystate.zip is a CSV file for the names of babies born in one state. This task pretty tricky, especially if you don't have much experience with programming. Feel free to skip it and use the code that we provided. [] import zipfile zf = zipfile.ZipFile(namesbystate path, 'r') column_labels = ['State', Sex' Year', 'Name', 'Count'] Ellipsis In Python, a Path object represents the filesystem paths to files (and other resources). The pathlib module is effective for writing code that works on different operating systems and filesystems. To check if a file exists at a path, use .exists(). To create a directory for a path, use .mkdir(). To remove a file that might be a symbolic link, use .unlink() This function creates a path to a directory that will contain data files. It ensures that the directory exists (which is required to write files in that directory), then proceeds to download the file based on its URL. The benefit of this function is that not only can you force when you want a new file to be downloaded using the force parameter, but in cases when you don't need the file to be re-downloaded, you can use the cached version and save download time. Below we use fetch_and_cache to download the namesbystate.zip zip file, which is a compressed directory of CSV files. This might take a little while! Consider stretching. data_url = "https://www.ssa.gov/oact/babynames/stateamesbystate.zip namesbystate_path = fetch_and_cache(data_url, 'namesbystate.zip') Downloading... Done! Optional Hacking Challenge: Use the zipfile module, pd.read_csv, and pd.concat to build a single dateframe called baby names containing all of the data from each state with the column_labels below. A zipFile object has an attribute filelist and a method open. Each .txt file inside namesbystate.zip is a CSV file for the names of babies born in one state. This task is pretty tricky, especially if you don't have much experience with programming. Feel free to skip it and use the code that we provided. [] import zipfile zf = zipfile.ZipFile(namesbystate_path, 'I') column_labels - l'State', Sex', 'Year', 'Name', Count'] Ellipsis The following cell builds the final full baby_names DataFrame. It first builds one dataframe per state, because that's how the data are stored in the zip file. Here is documentation for pd.concat if you want to know more about its functionality. import pandas as pd import zipfile zf - zipfile.SipFile(namesbystate_path, '') column_labels - ['State', 'sex', 'Year', 'Name', Count'] def load dataframe from zip(zf, f): with zf.open(t) as fh: return pd.read_csv'fh, header=None, names=column_labels) states = 1 load_dataframe_from_zipizf, f) for f in sorted (zf.filelist, key-lambda xix.filename) if f.filename.endswith('.TXT') ] [] = baby_names states [0] for state df in states [1:]: baby_names = pd.concat([baby_names, state_df]) baby_names = baby_names.reset_index().iloc[:, 1:] [] len (baby_names) 6122890 baby_names.head() State Sex Year Name Count 0 AK F 1910 Mary 14 AK F 1910 Annie 12 2 AK F 1910 Anna 10 3 AK F 1910 Margaret 8 4 AK F 1910 Helen 7 Slicing Data Frames - selecting rows and columns Selection Using Label/Index (using loc) Column Selection To select a column of a DataFrame by column label, the safest and fastest way is to use the loc method. General usage of loc looks like df.loc [rowname, colname] - (Reminder that the colon : means "everything.") For example, if we want the color column of the ex data frame, we would use: ex.loc[:, 'color') You can also slice across columns. For example, baby_names.loc[:, 'Name': ] would select the column Name and all columns after Name. Alternative: While .loc is invaluable when writing production code, it may be a little too verbose for interactive use. One recommended alternative is the [] method, which takes on the form df['colname']. Row Selection Similarly, if we want to select a row by its label, we can use the same .loc method. In this case, the "label" of each row refers to the index (ie. primary key) of the dataframe. [] Example: baby_names.loc[2:5, 'Name'] Z Anna Margaret Helen Elsie 4. [] #Example: baby_names.loc[2:5, 'Name'] 2 Anna Margaret. 4 Helen 5 Elsie Name : Name, dtype: object #Example: Notice the difference between these two methods #Just passing in 'Name returns a Series while ['Name'] returns a Dataframe baby names.loc[2:5, ['Name']] e Name 2 Anna 3 Margaret 4 Helen 5 Elsie The .loc actually uses the Pandas row index rather than row id/position of rows in the dataframe to perform the selection. Also, notice that if you write 2:5 with loc(), contrary to normal Python slicing functionality, the end index is included, so you get the row with index 5. Selection using Integer location (using iloc) (11 pts) Problem 1 Selecting multiple columns is easy. You just need to supply a list of column names. Select the name and Year in that order from the baby_names table. [] = name_and_year name_and_year[:5] Note that .loc[] can be used to re-order the columns within a dataframe
Step by Step Solution
There are 3 Steps involved in it

Get step-by-step solutions from verified subject matter experts


