Question
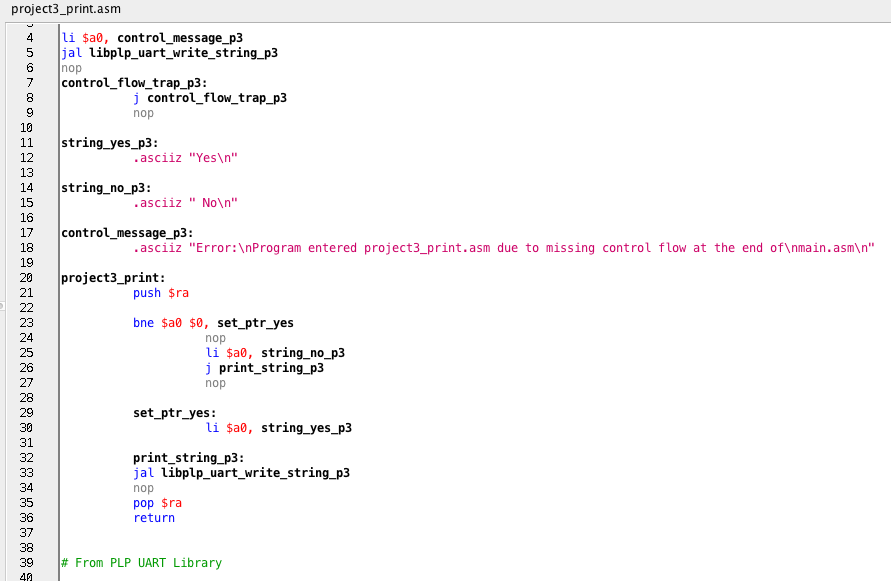
Skeleton file: project3_print.asm: project3_print.asm text: li $a0, control_message_p3 jal libplp_uart_write_string_p3 nop control_flow_trap_p3: j control_flow_trap_p3 nop string_yes_p3: .asciiz Yes string_no_p3: .asciiz No control_message_p3:
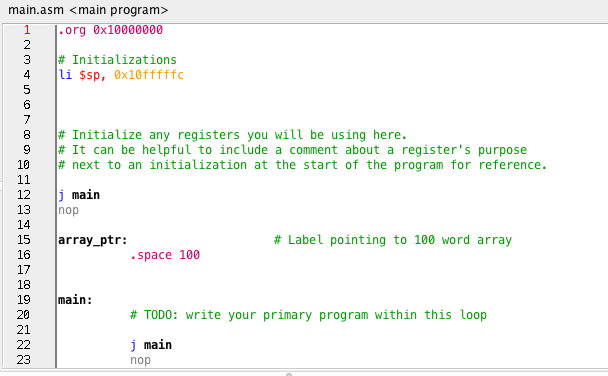
Skeleton file:
project3_print.asm:
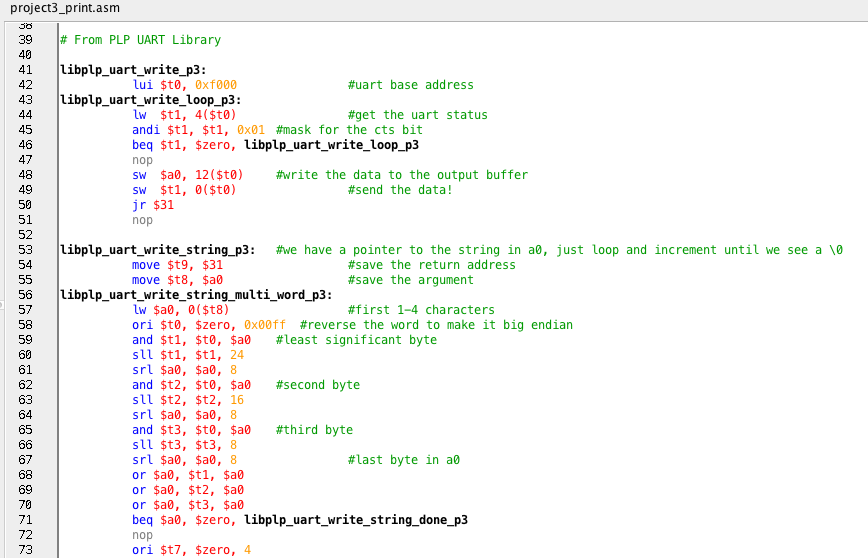

project3_print.asm text:
li $a0, control_message_p3
jal libplp_uart_write_string_p3
nop
control_flow_trap_p3:
j control_flow_trap_p3
nop
string_yes_p3:
.asciiz "Yes "
string_no_p3:
.asciiz " No "
control_message_p3:
.asciiz "Error: Program entered project3_print.asm due to missing control flow at the end of main.asm "
project3_print:
push $ra
bne $a0 $0, set_ptr_yes
nop
li $a0, string_no_p3
j print_string_p3
nop
set_ptr_yes:
li $a0, string_yes_p3
print_string_p3:
jal libplp_uart_write_string_p3
nop
pop $ra
return
# From PLP UART Library
libplp_uart_write_p3:
lui $t0, 0xf000 #uart base address
libplp_uart_write_loop_p3:
lw $t1, 4($t0) #get the uart status
andi $t1, $t1, 0x01 #mask for the cts bit
beq $t1, $zero, libplp_uart_write_loop_p3
nop
sw $a0, 12($t0) #write the data to the output buffer
sw $t1, 0($t0) #send the data!
jr $31
nop
libplp_uart_write_string_p3: #we have a pointer to the string in a0, just loop and increment until we see a \0
move $t9, $31 #save the return address
move $t8, $a0 #save the argument
libplp_uart_write_string_multi_word_p3:
lw $a0, 0($t8) #first 1-4 characters
ori $t0, $zero, 0x00ff #reverse the word to make it big endian
and $t1, $t0, $a0 #least significant byte
sll $t1, $t1, 24
srl $a0, $a0, 8
and $t2, $t0, $a0 #second byte
sll $t2, $t2, 16
srl $a0, $a0, 8
and $t3, $t0, $a0 #third byte
sll $t3, $t3, 8
srl $a0, $a0, 8 #last byte in a0
or $a0, $t1, $a0
or $a0, $t2, $a0
or $a0, $t3, $a0
beq $a0, $zero, libplp_uart_write_string_done_p3
nop
ori $t7, $zero, 4
libplp_uart_write_string_loop_p3:
jal libplp_uart_write_p3 #write this byte
addiu $t7, $t7, -1
srl $a0, $a0, 8
bne $a0, $zero, libplp_uart_write_string_loop_p3
nop
beq $t7, $zero, libplp_uart_write_string_multi_word_p3
addiu $t8, $t8, 4 #increment for the next word
libplp_uart_write_string_done_p3:
jr $t9 #go home
nop
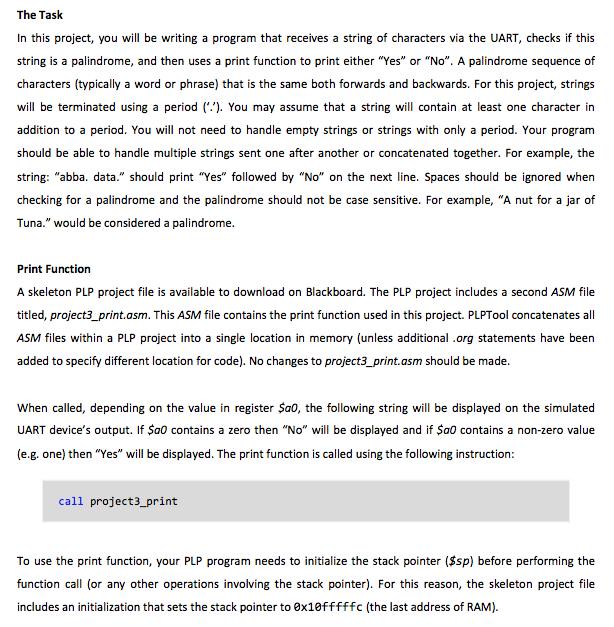
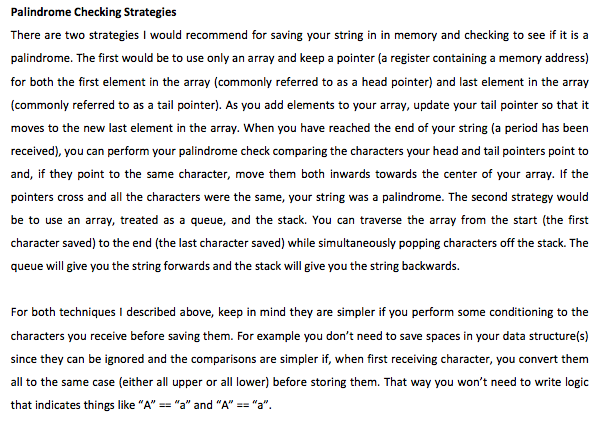
The Task In this project, you will be writing a program that receives a string of characters via the UART, checks if this string is a palindrome, and then uses a print function to print either "Yes" or "No". A palindrome sequence of characters (typically a word or phrase) that is the same both forwards and backwards. For this project, strings will be terminated using a period. You may assume that a string will contain at least one character in addition to a period. You will not need to handle empty strings or strings with only a period. Your program should be able to handle multiple strings sent one after another or concatenated together. For example, the string: "abba. data." should print "Yes" followed by "No" on the next line. Spaces should be ignored when checking for a palindrome and the palindrome should not be case sensitive. For example, "A nut for a jar of Tuna." would be considered a palindrome. Print Function A skeleton PLP project file is available to download on Blackboard. The PLP project includes a second ASM file titled, project3_print.asm. This ASM file contains the print function used in this project. PLPTool concatenates all ASM files within a PLP project into a single location in memory (unless additional.org statements have been added to specify different location for code). No changes to project3_print.asm should be made. When called, depending on the value in register Sa0, the following string will be displayed on the simulated UART device's output. If Sa0 contains a zero then "No" will be displayed and if Sa0 contains a non-zero value (e.g. one) then "Yes" will be displayed. The print function is called using the following instruction: call project3_print To use the print function, your PLP program needs to initialize the stack pointer ($sp) before performing the function call (or any other operations involving the stack pointer). For this reason, the skeleton project file includes an initialization that sets the stack pointer to 0x10fffffc (the last address of RAM) The Task In this project, you will be writing a program that receives a string of characters via the UART, checks if this string is a palindrome, and then uses a print function to print either "Yes" or "No". A palindrome sequence of characters (typically a word or phrase) that is the same both forwards and backwards. For this project, strings will be terminated using a period. You may assume that a string will contain at least one character in addition to a period. You will not need to handle empty strings or strings with only a period. Your program should be able to handle multiple strings sent one after another or concatenated together. For example, the string: "abba. data." should print "Yes" followed by "No" on the next line. Spaces should be ignored when checking for a palindrome and the palindrome should not be case sensitive. For example, "A nut for a jar of Tuna." would be considered a palindrome. Print Function A skeleton PLP project file is available to download on Blackboard. The PLP project includes a second ASM file titled, project3_print.asm. This ASM file contains the print function used in this project. PLPTool concatenates all ASM files within a PLP project into a single location in memory (unless additional.org statements have been added to specify different location for code). No changes to project3_print.asm should be made. When called, depending on the value in register Sa0, the following string will be displayed on the simulated UART device's output. If Sa0 contains a zero then "No" will be displayed and if Sa0 contains a non-zero value (e.g. one) then "Yes" will be displayed. The print function is called using the following instruction: call project3_print To use the print function, your PLP program needs to initialize the stack pointer ($sp) before performing the function call (or any other operations involving the stack pointer). For this reason, the skeleton project file includes an initialization that sets the stack pointer to 0x10fffffc (the last address of RAM)Step by Step Solution
There are 3 Steps involved in it
Step: 1

Get Instant Access to Expert-Tailored Solutions
See step-by-step solutions with expert insights and AI powered tools for academic success
Step: 2

Step: 3

Ace Your Homework with AI
Get the answers you need in no time with our AI-driven, step-by-step assistance
Get Started


