Answered step by step
Verified Expert Solution
Question
1 Approved Answer
Visual Basic Any help with this project will be greatly appericated thank you in advanced! Solar Panel Installation Programming Challenge 3 in Chapter 6 asked

Visual Basic Any help with this project will be greatly appericated thank you in advanced!
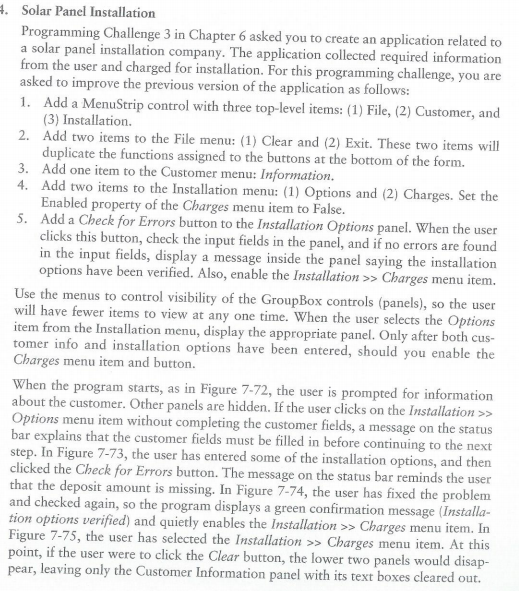
Solar Panel Installation Programming Challenge 3 in Chapter 6 asked you to create an application related to a solar panel installation company. The application collected required information from the user and charged for installation. For this programming challenge, you are asked to improve the previous version of the application as follows: Add a MenuStrip control with three top-level items: (1) File, (2) Customer, and (3) Installation. Add two items to the File menu: (1) Clear and (2) Exit. These two items will duplicate the functions assigned to the buttons at the bottom of the form. Add one item to the Customer menu: Information. Add two items to the Installation menu: (1) Options and (2) Charges. Set the Enabled property of the Charges menu item to False. Add a Check for Errors button to the Installation Options panel. When the user clicks this button, check the input fields in the panel, and if no errors are found in the input fields, display a message inside the panel saying the installation options have been verified. Also, enable the Installation >> Charges menu item. Use the menus to control visibility of the GroupBox controls (panels), so the user will have fewer items to view at any one time. When the user selects the Options item from the Installation menu, display the appropriate panel. Only after both customer info and installation options have been entered, should you enable the Charges menu item and button. When the program starts, as in Figure 7-72, the user is prompted for information about the customer. Other panels are hidden. If the user clicks on the Installation >> Options menu item without completing the customer fields, a message on the status bar explains that the customer fields must be filled in before continuing to the next step. In Figure 7-73, the user has entered some of the installation options, and then clicked the Check for Errors button. The message on the status bar reminds the user that the deposit amount is missing. In Figure 7-74, the user has fixed the problem and checked again, so the program displays a green confirmation message (Installation options verified) and quietly enables the Installation >> Charges menu item. In Figure 7-75, the user has selected the Installation >> Charges menu item. At this point, if the user were to click the Clear button, the lower two panels would disappear, leaving only the Customer Information panel with its text boxes cleared out. Solar Panel Installation Programming Challenge 3 in Chapter 6 asked you to create an application related to a solar panel installation company. The application collected required information from the user and charged for installation. For this programming challenge, you are asked to improve the previous version of the application as follows: Add a MenuStrip control with three top-level items: (1) File, (2) Customer, and (3) Installation. Add two items to the File menu: (1) Clear and (2) Exit. These two items will duplicate the functions assigned to the buttons at the bottom of the form. Add one item to the Customer menu: Information. Add two items to the Installation menu: (1) Options and (2) Charges. Set the Enabled property of the Charges menu item to False. Add a Check for Errors button to the Installation Options panel. When the user clicks this button, check the input fields in the panel, and if no errors are found in the input fields, display a message inside the panel saying the installation options have been verified. Also, enable the Installation >> Charges menu item. Use the menus to control visibility of the GroupBox controls (panels), so the user will have fewer items to view at any one time. When the user selects the Options item from the Installation menu, display the appropriate panel. Only after both customer info and installation options have been entered, should you enable the Charges menu item and button. When the program starts, as in Figure 7-72, the user is prompted for information about the customer. Other panels are hidden. If the user clicks on the Installation >> Options menu item without completing the customer fields, a message on the status bar explains that the customer fields must be filled in before continuing to the next step. In Figure 7-73, the user has entered some of the installation options, and then clicked the Check for Errors button. The message on the status bar reminds the user that the deposit amount is missing. In Figure 7-74, the user has fixed the problem and checked again, so the program displays a green confirmation message (Installation options verified) and quietly enables the Installation >> Charges menu item. In Figure 7-75, the user has selected the Installation >> Charges menu item. At this point, if the user were to click the Clear button, the lower two panels would disappear, leaving only the Customer Information panel with its text boxes cleared outStep by Step Solution
There are 3 Steps involved in it
Step: 1

Get Instant Access to Expert-Tailored Solutions
See step-by-step solutions with expert insights and AI powered tools for academic success
Step: 2

Step: 3

Ace Your Homework with AI
Get the answers you need in no time with our AI-driven, step-by-step assistance
Get Started


