Question
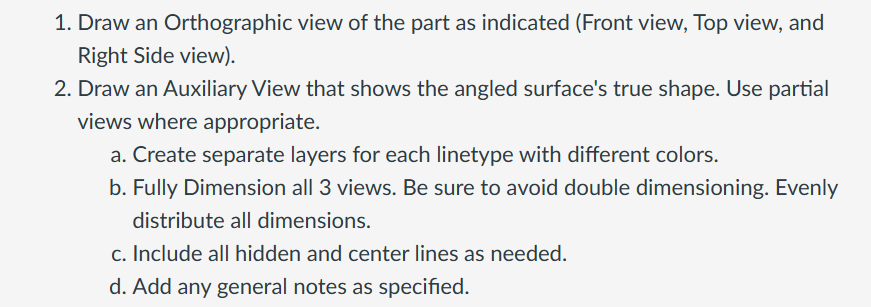
1. Draw an Orthographic view of the part as indicated (Front view, Top view, and Right Side view). 2. Draw an Auxiliary View that


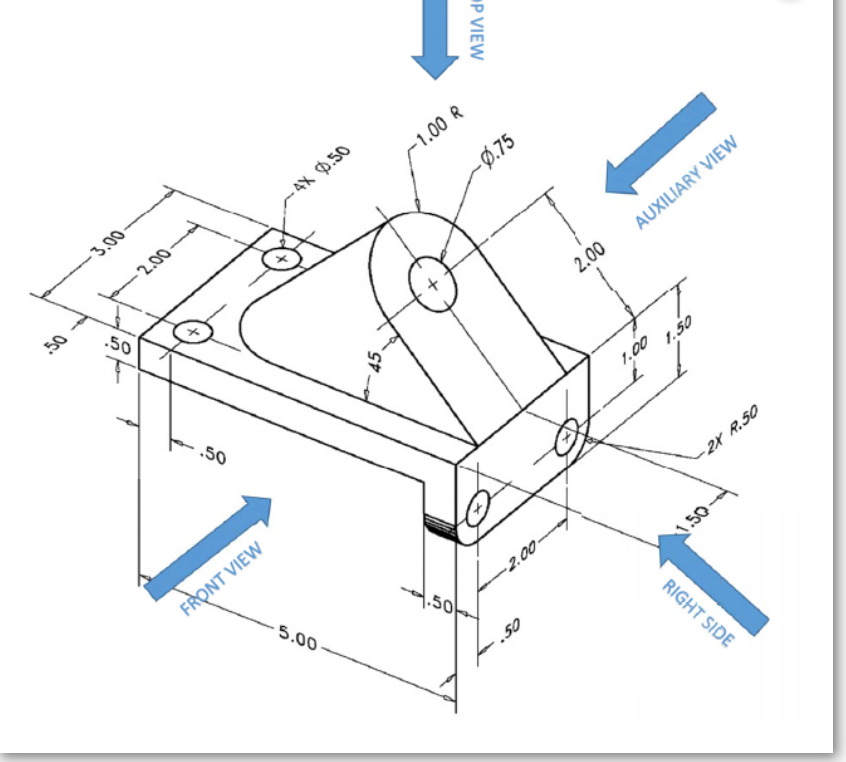
1. Draw an Orthographic view of the part as indicated (Front view, Top view, and Right Side view). 2. Draw an Auxiliary View that shows the angled surface's true shape. Use partial views where appropriate. a. Create separate layers for each linetype with different colors. b. Fully Dimension all 3 views. Be sure to avoid double dimensioning. Evenly distribute all dimensions. c. Include all hidden and center lines as needed. d. Add any general notes as specified. 50 -3.00 -2.00 .50 .50 FRONT VIEW 5.00- -4X 0.50 1.50 P VIEW -1.00 R -0.75 -2.00 .50 2.00 1.00 AUXILIARY VIEW 1.50 1.50 2X R.50 RIGHT SIDE
Step by Step Solution
There are 3 Steps involved in it
Step: 1

Get Instant Access to Expert-Tailored Solutions
See step-by-step solutions with expert insights and AI powered tools for academic success
Step: 2

Step: 3

Ace Your Homework with AI
Get the answers you need in no time with our AI-driven, step-by-step assistance
Get StartedRecommended Textbook for
Automation Production Systems and Computer Integrated Manufacturing
Authors: Mikell P.Groover
3rd edition
132393212, 978-0132393218
Students also viewed these Mechanical Engineering questions
Question
Answered: 1 week ago
Question
Answered: 1 week ago
Question
Answered: 1 week ago
Question
Answered: 1 week ago
Question
Answered: 1 week ago
Question
Answered: 1 week ago
Question
Answered: 1 week ago
Question
Answered: 1 week ago
Question
Answered: 1 week ago
Question
Answered: 1 week ago
Question
Answered: 1 week ago
Question
Answered: 1 week ago
Question
Answered: 1 week ago
Question
Answered: 1 week ago
Question
Answered: 1 week ago
Question
Answered: 1 week ago
Question
Answered: 1 week ago
Question
Answered: 1 week ago
Question
Answered: 1 week ago
Question
Answered: 1 week ago
Question
Answered: 1 week ago
Question
Answered: 1 week ago
View Answer in SolutionInn App


