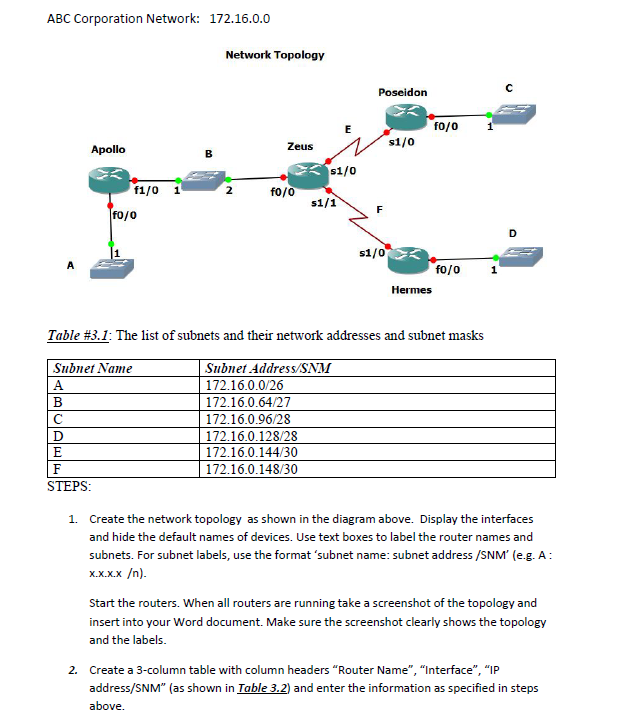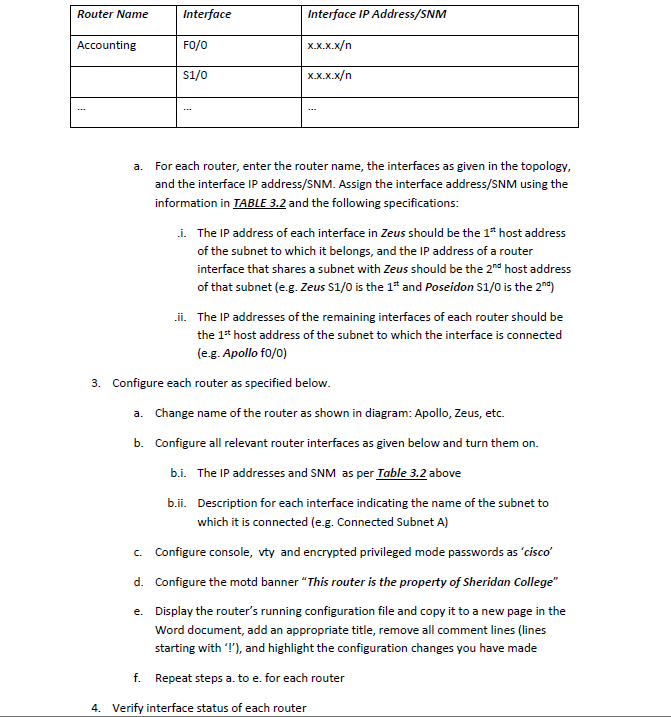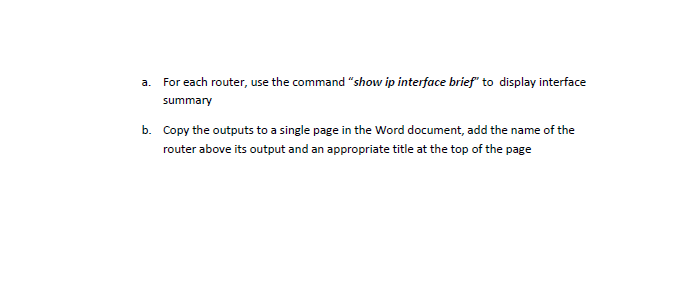


ABC Corporation Network: 172.16.0.0 Network Topology Poseidon f0/0 Apollo Zeus s1/0 s1/0 2 f0/0 f1/ 01 f0/0 s1/1 F s1/0 fo/o Hermes Table #3.1: The list of subnets and their network addresses and subnet masks Subnet Name A B D E F STEPS: Subnet Address SNM 172.16.0.0/26 172.16.0.64/27 172.16.0.96/28 172.16.0.128/28 172.16.0.144/30 172.16.0.148/30 1. Create the network topology as shown in the diagram above. Display the interfaces and hide the default names of devices. Use text boxes to label the router names and subnets. For subnet labels, use the format 'subnet name: subnet address /SNM' (e.g. A: X.X.X.X ). Start the routers. When all routers are running take a screenshot of the topology and insert into your Word document. Make sure the screenshot clearly shows the topology and the labels. 2. Create a 3-column table with column headers "Router Name", "Interface", "IP address/SNM" (as shown in Table 3.2) and enter the information as specified in steps above. Router Name Interface Interface IP Address/SNM Accounting FO/O x.x.x.x S1/0 X.x.x.x a. For each router, enter the router name, the interfaces as given in the topology, and the interface IP address/SNM. Assign the interface address/SNM using the information in TABLE 3.2 and the following specifications: i. The IP address of each interface in Zeus should be the 1* host address of the subnet to which it belongs, and the IP address of a router interface that shares a subnet with Zeus should be the 2nd host address of that subnet (e.g. Zeus 51/0 is the 1* and Poseidon 51/0 is the 2nd) ii. The IP addresses of the remaining interfaces of each router should be the 1* host address of the subnet to which the interface is connected (e.g. Apollo fo/0) 3. Configure each router as specified below. a. Change name of the router as shown in diagram: Apollo, Zeus, etc. b. Configure all relevant router interfaces as given below and turn them on. b.i. The IP addresses and SNM as per Table 3.2 above b.ii. Description for each interface indicating the name of the subnet to which it is connected (eg. Connected Subnet A) c Configure console, vty and encrypted privileged mode passwords as 'cisco' d. Configure the motd banner "This router is the property of Sheridan College" e. Display the router's running configuration file and copy it to a new page in the Word document, add an appropriate title, remove all comment lines (lines starting with '), and highlight the configuration changes you have made f. Repeat steps a. to e. for each router 4. Verify interface status of each router a. For each router, use the command "show ip interface brief" to display interface summary b. Copy the outputs to a single page in the Word document, add the name of the router above its output and an appropriate title at the top of the page ABC Corporation Network: 172.16.0.0 Network Topology Poseidon f0/0 Apollo Zeus s1/0 s1/0 2 f0/0 f1/ 01 f0/0 s1/1 F s1/0 fo/o Hermes Table #3.1: The list of subnets and their network addresses and subnet masks Subnet Name A B D E F STEPS: Subnet Address SNM 172.16.0.0/26 172.16.0.64/27 172.16.0.96/28 172.16.0.128/28 172.16.0.144/30 172.16.0.148/30 1. Create the network topology as shown in the diagram above. Display the interfaces and hide the default names of devices. Use text boxes to label the router names and subnets. For subnet labels, use the format 'subnet name: subnet address /SNM' (e.g. A: X.X.X.X ). Start the routers. When all routers are running take a screenshot of the topology and insert into your Word document. Make sure the screenshot clearly shows the topology and the labels. 2. Create a 3-column table with column headers "Router Name", "Interface", "IP address/SNM" (as shown in Table 3.2) and enter the information as specified in steps above. Router Name Interface Interface IP Address/SNM Accounting FO/O x.x.x.x S1/0 X.x.x.x a. For each router, enter the router name, the interfaces as given in the topology, and the interface IP address/SNM. Assign the interface address/SNM using the information in TABLE 3.2 and the following specifications: i. The IP address of each interface in Zeus should be the 1* host address of the subnet to which it belongs, and the IP address of a router interface that shares a subnet with Zeus should be the 2nd host address of that subnet (e.g. Zeus 51/0 is the 1* and Poseidon 51/0 is the 2nd) ii. The IP addresses of the remaining interfaces of each router should be the 1* host address of the subnet to which the interface is connected (e.g. Apollo fo/0) 3. Configure each router as specified below. a. Change name of the router as shown in diagram: Apollo, Zeus, etc. b. Configure all relevant router interfaces as given below and turn them on. b.i. The IP addresses and SNM as per Table 3.2 above b.ii. Description for each interface indicating the name of the subnet to which it is connected (eg. Connected Subnet A) c Configure console, vty and encrypted privileged mode passwords as 'cisco' d. Configure the motd banner "This router is the property of Sheridan College" e. Display the router's running configuration file and copy it to a new page in the Word document, add an appropriate title, remove all comment lines (lines starting with '), and highlight the configuration changes you have made f. Repeat steps a. to e. for each router 4. Verify interface status of each router a. For each router, use the command "show ip interface brief" to display interface summary b. Copy the outputs to a single page in the Word document, add the name of the router above its output and an appropriate title at the top of the page


