Complete exercises in the following assignment. To get the credit for this lab, submit a file that contains a screenshot of any of the following exercises (with Workbench query and result windows shown in the screenshot) through Canvas.
You need to download the following files from Canvas before starting the homework:
1. create_db_ap.sql from the Course Info and Databases module
2. lab1script.sql from Chapters One and Two module


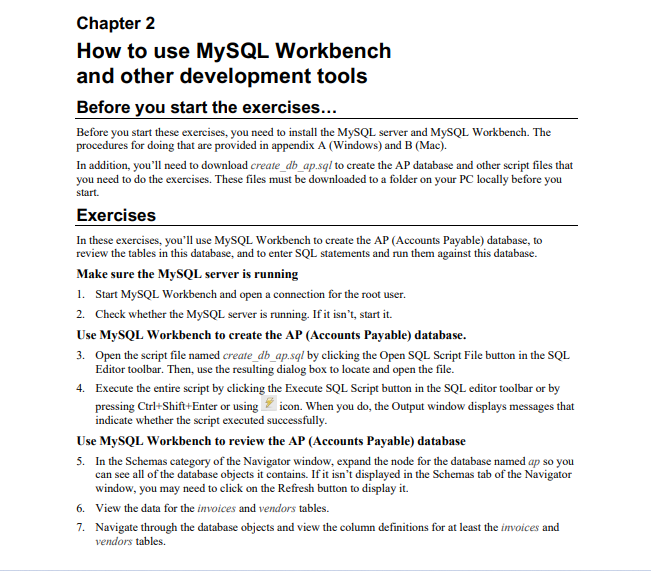
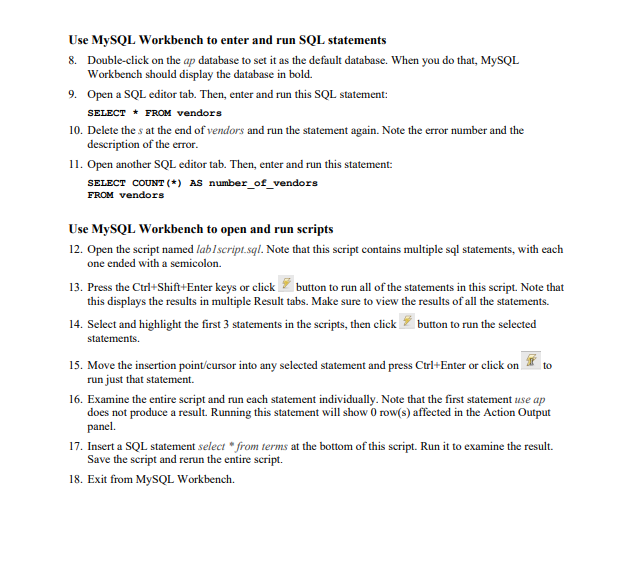
Chapter 2 How to use MySQL Workbench and other development tools Before you start the exercises... Before you start these exercises, you need to install the MySQL server and MySQL Workbench. The procedures for doing that are provided in appendix A (Windows) and B (Mac). In addition, you'll need to download create_db_ap.sql to create the AP database and other script files that you need to do the exercises. These files must be downloaded to a folder on your PC locally before you start. Exercises In these exercises, you'll use MySQL Workbench to create the AP (Accounts Payable) database, to review the tables in this database, and to enter SQL statements and run them against this database. Make sure the MySQL server is running 1. Start MySQL Workbench and open a connection for the root user. 2. Check whether the MySQL server is running. If it isn't, start it. Use MySQL Workbench to create the AP (Accounts Payable) database. 3. Open the script file named create_db_ap.sql by clicking the Open SQL Script File button in the SQL Editor toolbar. Then, use the resulting dialog box to locate and open the file. 4. Execute the entire script by clicking the Execute SQL Script button in the SQL editor toolbar or by pressing Ctrl+Shift+Enter or using icon. When you do, the Output window displays messages that indicate whether the script executed successfully. Use MySQL Workbench to review the AP (Accounts Payable) database 5. In the Schemas category of the Navigator window, expand the node for the database named ap so you can see all of the database objects it contains. If it isn't displayed in the Schemas tab of the Navigator window, you may need to click on the Refresh button to display it. 6. View the data for the invoices and vendors tables. 7. Navigate through the database objects and view the column definitions for at least the invoices and vendors tables. Use MySQL Workbench to enter and run SQL statements 8. Double-click on the ap database to set it as the default database. When you do that, MySQL Workbench should display the database in bold. 9. Open a SQL editor tab. Then, enter and run this SQL statement: SELECT * FROM vendors 10. Delete the s at the end of vendors and run the statement again. Note the error number and the description of the error. 11. Open another SQL editor tab. Then, enter and run this statement: SELECT COUNT () AS number_of_vendors FROM vendors Use MySQL Workbench to open and run scripts 12. Open the script named lablscript.sql. Note that this script contains multiple sql statements, with each one ended with a semicolon. 13. Press the Ctrl+Shift+Enter keys or click button to run all of the statements in this script. Note that this displays the results in multiple Result tabs. Make sure to view the results of all the statements. 14. Select and highlight the first 3 statements in the scripts, then click button to run the selected statements. 15. Move the insertion point/cursor into any selected statement and press Ctrl+Enter or click on to run just that statement. 16. Examine the entire script and run each statement individually. Note that the first statement use ap does not produce a result. Running this statement will show 0 row(s) affected in the Action Output panel. 17. Insert a SQL statement select " from terms at the bottom of this script. Run it to examine the result. Save the script and rerun the entire script. 18. Exit from MySQL Workbench


