Question
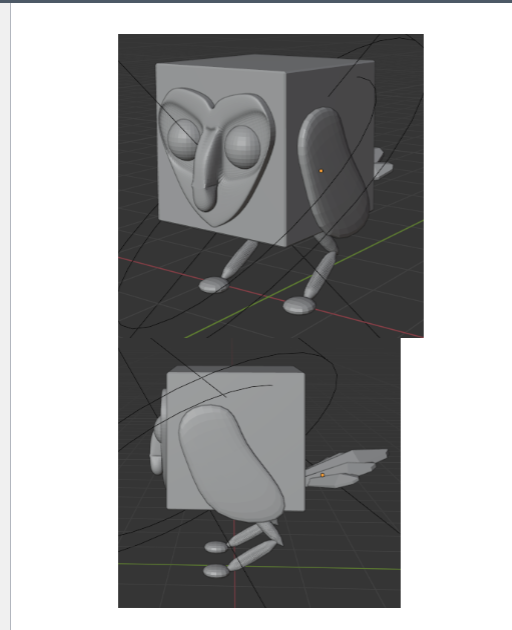
digital media creating this in blender(just need a pdf of something that looks like this) Complete 3D, low polygon character model of a owl cube.1.
digital media creating this in blender(just need a pdf of something that looks like this)
Complete 3D, low polygon character model of a owl cube.1. Reuse the cube bird model from the previous class. Complete any missing body parts as needed.2. Color the model by applying colors to the base color in the shaders. Give appropriate colors, matching the wings to the body. 3. The previous step allows you fill in colors, but does not accommodate detail you could get with texture or texture painting. Apply an image texture to each body part. Image texture should be blank, but you can use the UV Grid or Color Stripe grid to see the effects of the texture wrap.4. Once you have textures, even if blank, applied to model, switch to texture painting workspace. 5. Use paint brush and fill tools to create a more complex painted owl cube. You will need to save your texture images, this can be done when quitting, you will be prompted to save all image textures, answer yes when prompted.6. Add any additional shaders necessary to modify your texture.7. The next step will be lighting the scene, before lighting it, create a plane with 2 smooth rear walls to have something light can create shadow on.8. Use the camera view Numpad-0 to get an idea of the render view. Move your model or camera to get a more interesting composition in regards to the owl cube filling the camera frame. The camera is an object and responds to movement and rotation like any other object.9. Add an area light for your key light on the side of model closest to camera view. This is the main light source. Warm the light up by removing some blue in the RGB property.10. Add a larger area light on the other side of model, 45 degrees off center. Use a cooler light color (more blue in RGB), use less light intensity. This is called fill light.11. Place a spot light behind the model facing down at an angle. This is a rim light and will light back, top, and some sides.12. Add more rim lights as needed to enhance details you want to bring out.13. Add area lights to illuminate wall and floor14. Render output of model in a pose so that part of the front and side are visible of the model.15. Save render as png and upload to canvas.16. Time permitting, professor will also go over how to use the B04 class media for modeling a 2D image with 3D tools.

Step by Step Solution
There are 3 Steps involved in it
Step: 1

Get Instant Access to Expert-Tailored Solutions
See step-by-step solutions with expert insights and AI powered tools for academic success
Step: 2

Step: 3

Ace Your Homework with AI
Get the answers you need in no time with our AI-driven, step-by-step assistance
Get Started


