

Question
need this in #c . You will now add server side validation code to the frmPersonnel page. Currently, when the Submit button is pressed, the
need this in #c
. You will now add server side validation code to the frmPersonnel page. Currently, when the Submit button is pressed, the frmPersonnelVerified page is displayed. This is because the frmPersonnelVerified page is set as the Submit button's PostBackUrl property. Instead of having the page go directly to the frmPersonnelVerified page when the Submit button is pressed, we want to do some server side validation. If any of the validation rules fail, we will redisplay the frmPersonnel page with the fields in question highlighted in yellow with an error message displayed.
First, it is important to understand what is currently happening when the submit button is pressed. This is causing a postback of the form to the frmPersonnelVerified form. When this postback happens, all of the data in the fields on the frmPersonnel form are sent to the frmPersonnelVerified form as name value pairs. In the Page_Load code of frmPersonnelVerified these values are picked up from the Request object and displayed. Each name value pair will be in the Request object as the ID of the control containing the value and the value itself. We can pass data between pages by using Session state instead. In order to do validation on the values but still have the values visible on the frmPersonnelVerified page, we will need to change not only the PostBack URL of the frmPersonnel page but also how the frmPersonnelVerified form is getting the datait will need to get it from Session state rather than from the Request object.
In order to do this, we will make the following changes.
Clear the Submit button PostBackURL Property on the frmPersonnel form. Remove the value in the PostBackUrl that is highlighted.
In the btnSubmit_Click event handler get each value from the data entry fields and set Session state items for each. (instructions below)
Change the frmPersonnelVerified code behind to get the values from the Session state items you created in the previous step. (instructions below)
When you are done with these steps, you should be able to enter data on the frmPersonnel data entry form and then click the Submit button. The frmPersonnelVerified page should then be displayed with the values that were in the data entry fields on frmPersonnel.
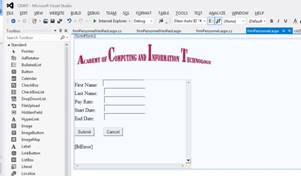
23. Add a label to the frmPersonnel form with an ID of lblError. Do not place the label to the right or left of any of the controls on the form. Add it below the controls or above the controls. The text property of this label should be set to an empty string.
24. Add code to perform server side validation in response to the submit button being clicked. Here are the business rules we want to enforce (remember this will be server C# code in the frmPersonnel code behind): Fields may not be empty or filled with spaces. If any field is empty, turn that field background color to yellow and add to/create an error message to be shown in the error label. The end date must be greater than the start date. If the end date is less than the start date, turn both date fields yellow and add to/create an error message to be shown in the error label. If all fields validate properly then the session state items should be set properly and the user should see the frmPersonnelVerified form with all the values displayed.
frmPersonnel.aspx Lab Hints
1. The server side validation should be in the Submit button's event handler. There is a Trim method on the string object that will automatically remove spaces from the beginning and end of a string. To test if txtFirstName is empty or filled with spaces, use the following code.
if (Request["txtFirstName"].ToString().Trim() == "")
2. To set the background color of the txtFirstName field, use the following code.
txtFirstName.BackColor = System.Drawing.Color.Yellow;
3. To set a value in session state and redirect the response to the frmPersonnelVerified.aspx do the following. txtFirstName is the key and txtFirstName.Text is the value.
Session["txtFirstName"] = txtFirstName.Text; //Need to set session variables for all text boxes Response.Redirect("frmPersonnelVerified.aspx"); 4. You may want to create variables to work with for validation rather than using the Request item objects directly.
To turn a string into a DateTime object you can use the DateTime method Parse. If you had a date value stored in a string called strDate, you could turn it into a DateTime object like this.
DateTime myDateTimeObject = DateTime.Parse(strDate);
You can compare two DateTime objects by using the DateTime.Compare method. If you had two DateTime objects called dt1 and dt2 you can check to see if dt1 is greater than dt2 by doing this.
if (DateTime.Compare(dt1,dt2) > 0)
DateTime.Compare will return a 0 if the two dates are equal, a 1 if dt1 is greater than dt2, and a -1 if dt1 is less than dt2.
If you put in an invalid date for either of the date fields, you will get an exception/server error when trying to parse the values. We will address this in a later labfor now make sure you enter valid dates (valid meaning a date in the form of mm/dd/yyyy).
5. An example of the code you might want to use to test if the end date is after the start date follows.
DateTime startDate = DateTime.Parse(Request["txtStartDate"]); DateTime endDate = DateTime.Parse(Request["txtEndDate"]); if (DateTime.Compare(startDate, endDate) > 0) { txtStartDate.BackColor = System.Drawing.Color.Yellow; txtEndDate.BackColor = System.Drawing.Color.Yellow; Msg = Msg + "The end date must be a later date than the start date."; //The Msg text will be displayed in lblError.Text after all the error messages are concatenated validatedState= false; //Boolean value - test each textbox to see if the data entered is valid, if not set validState=false. //If after testing each validation rule, the validatedState value is true, then submit to frmPersonnelVerified.aspx, if not, then display error message } else { txtStartDate.BackColor = System.Drawing.Color.White; txtEndDate.BackColor = System.Drawing.Color.White; } Remember to clear the PostBackURL property of the Submit button!
frmPersonnelVerified.aspx Lab Hints
When using the Session state in frmPersonnel.aspx for txtFirstName, you used the following code: Session["txtFirstName"] = txtFirstName.Text;
To get this same value back from the session we use the key and the Session object in the Page_Load of frmPersonnellVerified.aspx (instead of using Request, use Session) as follows.
Session["txtLastName"].ToString()
Step by Step Solution
There are 3 Steps involved in it
Step: 1

Get Instant Access to Expert-Tailored Solutions
See step-by-step solutions with expert insights and AI powered tools for academic success
Step: 2

Step: 3
Ace Your Homework with AI
Get the answers you need in no time with our AI-driven, step-by-step assistance
Get Started
Genetic Databases
Authors: Martin J. Bishop
1st Edition
0121016250, 978-0121016258