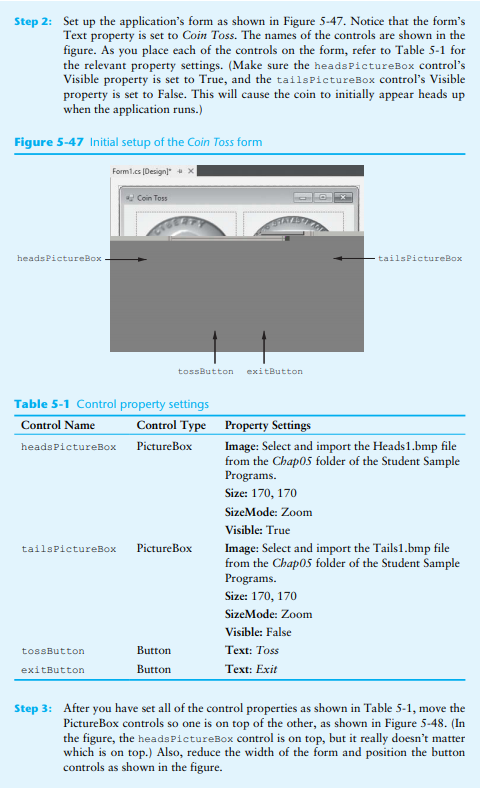
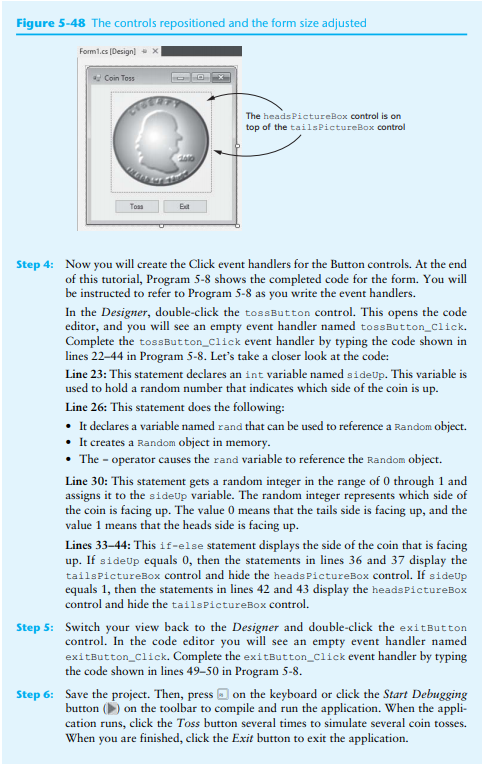
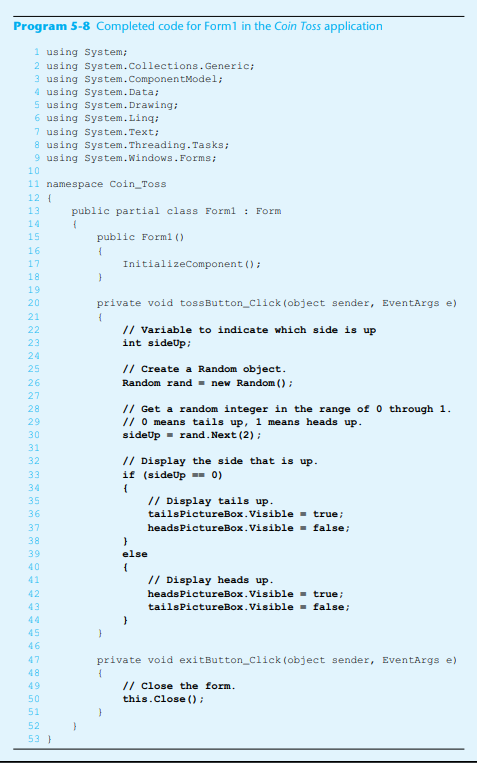
Tutorial 5-8: Simulating Coin Tosses In this tutorial, you create an application that simulates the tossing of a coin. Each time the user tosses the coin, the application uses a Random object to get a random integer in the range of 0 through 1. If the random number is 0, it means the tails side of the coin is up, and if the random number is 1, it means the heads side is up. The application displays an image of a coin showing either heads or tails, depending on the value of the random number. Start Visual Studio and begin a new Windows Forms Application project named Coin Toss. Step 1: Set up the application's form as shown in Figure 5-47. Notice that the form's Text property is set to Coin Toss. The names of the controls are shown in the figure. As you place each of the controls on the form, refer to Table 5-1 for the relevant property settings. (Make sure the headsPictureBox control's Visible property is set to True, and the tailsPictureBox control's Visible property is set to False. This will cause the coin to initially appear heads up when the application runs.) Step 2: Figure 5-47 Initial setup of the Coin Toss form Forml.cs[Designl. Coin Toss headsPictureBox tailsPictureBox tossButton exitButton Table 5-1 Control property settings Control Type Control Name Property Settings Image: Select and import the Heads1.bmp file from the Chap0S folder of the Student Sample Programs Size: 170, 170 SizeMode: Zoom Visible: True Image: Select and import the Tails1.bmp file from the Chap0S folder of the Student Sample Programs. Size: 170, 170 SizeMode: Zoom Visible: False Text: Toss Text: Exit headsPictureBox PictureBox tailsPictureBox PictureBox tossButton Button exitButton Button After you have set all of the control properties as shown in Table 5-1, move the PictureBox controls so one is on top of the other, as shown in Figure 5-48. (In the figure, the headsPictureBox control is on top, but it really doesn't matter which is on top.) Also, reduce the width of the form and position the button controls as shown in the figure. Step 3: Figure 5-48 The controls repositioned and the form size adjusted Coin Toss The headsPictureBox control is on top of the tailsPictureBox control Toss Now you will create the Click event handlers for the Button controls. At the end of this tutorial, Program 5-8 shows the completed code for the form. You will be instructed to refer to Program 5-8 as you write the event handlers. In the Designer, double-click the tossButton control. This opens the code editor, and you will see an empty event handler named tossButton_click. Complete the tossButton_Click event handler by typing the code shown in lines 22-44 in Program 5-8. Let's take a closer look at the code: Line 23: This statement declares an int variable named sideUp. This variable is used to hold a random number that indicates which side of the coin is up. Line 26: This statement does the following: . It declares a variable named rand that can be used to reference a Random object. It creates a Random object in memory. Step 4: The - operator causes the rand variable to reference the Random object. Line 30: This statement gets a random integer in the range of 0 through 1 and assigns it to the sideUp variable. The random integer represents which side of the coin is facing up. The value 0 means that the tails side is facing up, and the value 1 means that the heads side is facing up. Lines 33-44: This if-else statement displays the side of the coin that is facing up. If sideUp equals 0, then the statements in lines 36 and 37 display the tailsPictureBox control and hide the headsPictureBox control. If sideUp equals 1, then the statements in lines 42 and 43 display the headsPictureBox control and hide the tailsPictureBox control. Step S: Switch your view back to the Designer and double-click the exitButton control. In the code editor you will see an empty event handler named exitButton_Click. Complete the exitButton_Click event handler by typing the code shown in lines 49-50 in Program 5-8 Step 6: Save the project. Then, press on the keyboard or click the Start Debugging button on the toolbar to compile and run the application. When the appli- cation runs, click the Toss button several times to simulate several coin tosses. When you are finished, click the Exit button to exit the application