You might not have access to everything but can you help me code this. Im using MSP430F5529 to code this using Energia. Thanks

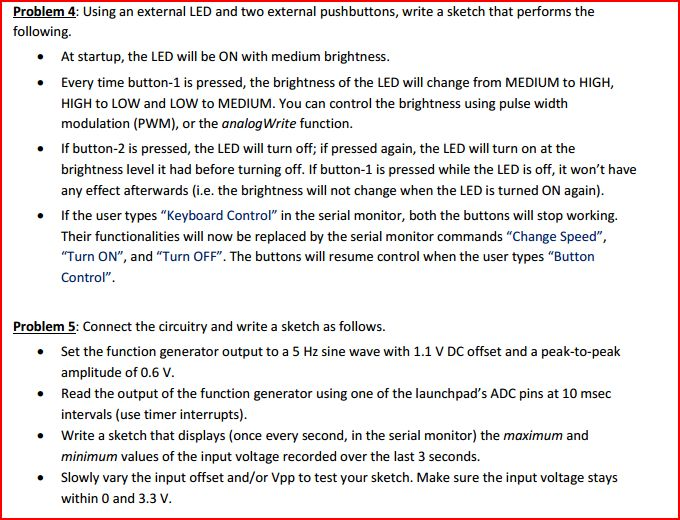
Problem 4: Using an external LED and two external pushbuttons, write a sketch that performs the following. At startup, the LED will be ON with medium brightness Every time button-1 is pressed, the brightness of the LED will change from MEDIUM to HIGH HIGH to LOW and LOW to MEDIUM. You can control the brightness using pulse width modulation (PWM), or the analogWrite function. If button-2 is pressed, the LED will turn off; if pressed again, the LED will turn on at the brightness level it had before turning off. If button-1 is pressed while the LED is off, it won't have any effect afterwards(i.e. the brightness will not change when the LED is turned ON again) .If the user types "Keyboard Control" in the serial monitor, both the buttons will stop working. Their functionalities will now be replaced by the serial monitor commands "Change Speed", Turn ON", and "Turn OFF". The buttons will resume control when the user types "Button Control". Problem 5: Connect the circuitry and write a sketch as follows. .Set the function generator output to a 5 Hz sine wave with 1.1 V DC offset and a peak-to-peak amplitude of 0.6 V. Read the output of the function generator using one of the launchpad's ADC pins at 10 msec intervals (use timer interrupts). Write a sketch that displays (once every second, in the serial monitor) the maximum and minimum values of the input voltage recorded over the last 3 seconds. . .Slowly vary the input offset and/or Vpp to test your sketch. Make sure the input voltage stays within 0 and 3.3 V. Problem 4: Using an external LED and two external pushbuttons, write a sketch that performs the following. At startup, the LED will be ON with medium brightness Every time button-1 is pressed, the brightness of the LED will change from MEDIUM to HIGH HIGH to LOW and LOW to MEDIUM. You can control the brightness using pulse width modulation (PWM), or the analogWrite function. If button-2 is pressed, the LED will turn off; if pressed again, the LED will turn on at the brightness level it had before turning off. If button-1 is pressed while the LED is off, it won't have any effect afterwards(i.e. the brightness will not change when the LED is turned ON again) .If the user types "Keyboard Control" in the serial monitor, both the buttons will stop working. Their functionalities will now be replaced by the serial monitor commands "Change Speed", Turn ON", and "Turn OFF". The buttons will resume control when the user types "Button Control". Problem 5: Connect the circuitry and write a sketch as follows. .Set the function generator output to a 5 Hz sine wave with 1.1 V DC offset and a peak-to-peak amplitude of 0.6 V. Read the output of the function generator using one of the launchpad's ADC pins at 10 msec intervals (use timer interrupts). Write a sketch that displays (once every second, in the serial monitor) the maximum and minimum values of the input voltage recorded over the last 3 seconds. . .Slowly vary the input offset and/or Vpp to test your sketch. Make sure the input voltage stays within 0 and 3.3 V


